If you look for instant benefits, it becomes pretty clear that having a plugin opens up far more opportunities for your menus. A clear & well-designed menu appeals to new visitors to explore your website and even holds the attention of the audience..
And the good news is, SocialNetworking.Solutions is offering Ultimate Menu Plugin at best market price, so you can instantly create a navigable website. This plugin can be the right solution for those who want a great mobile/desktop friendly menu plugin without the hassle of having to spend too much designing.
The standout specification from this plugin is undeniably its Adjustable Multi-Level Navigation Menu. Make your menus more exciting and appealing by adding images, Easy Single Widget Placement, 3rd Party Plugin Integration and much more.
You will be happy to know that there is no need for any prior technical knowledge to do so,simply install this plugin and you are ready to go. You can easily craft your menu you want in a matter of minutes.
Here, we are providing an interactive and easy to follow Ultimate Menu Plugin setup & installation guide which will help you to use & configure it properly on your website & maximize the efficiency of your website by showcasing the exciting features. With this help-guide, you will get a better sense of usage when you actually install this plugin on your website.
Installation of this plugin is very easy, but if you still need our expert to install this plugin for you, then you can purchase the service by Clicking Here.
Watch Video
Step-by-Step Installation & Tutorial Guide:
** This tutorial assumes that you are already logged in to the Admin Panel.**
If not, then you have to log in first to the admin panel after filling the admin account credentials on your website.
1. Installation of Ultimate Menu Plugin:
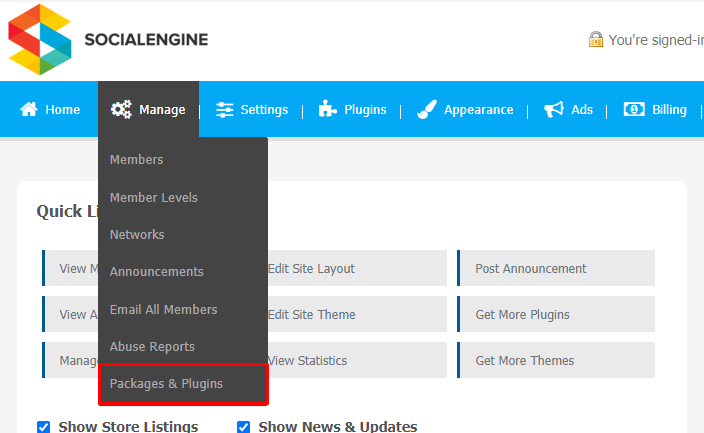
1. In the Main Menu section, click on the tab Manage and select “Packages & Plugins” to install this plugin.
2. Our Plugin is based on SE standards, so this will get installed on your website as any standard theme can. Please read the tutorial on installing themes and plugins in SE: Click Here
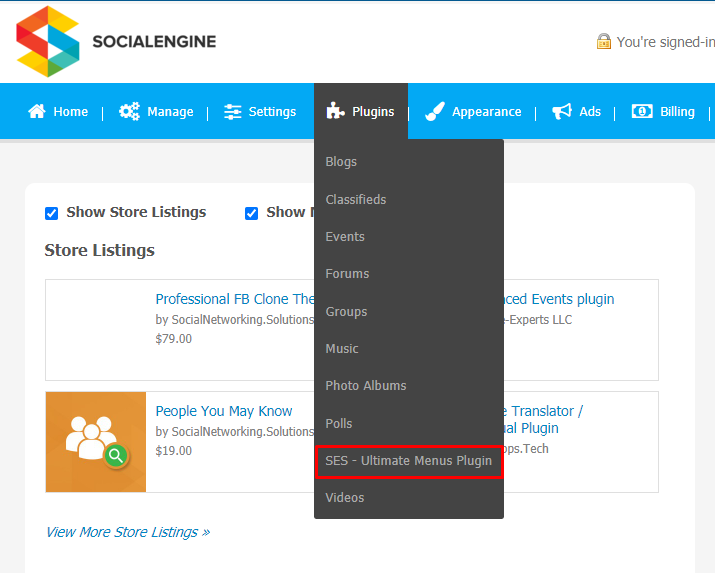
3. After the successful installation of the plugin as in Step 2 above, under the plugins section, click on “Ultimate Menus Plugin“.
Now, you will be asked for plugin activation. You can activate this plugin by entering the right license key in the given box.
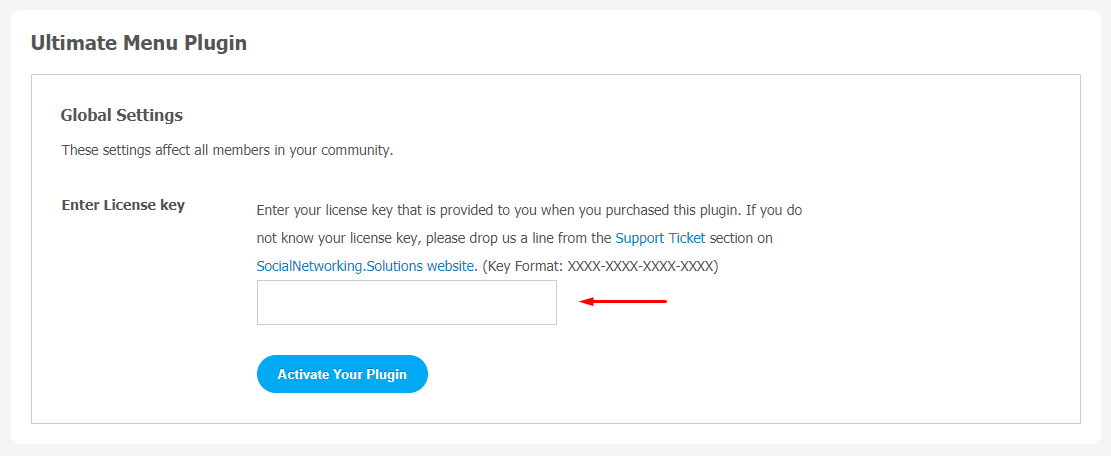
Once the plugin is installed and activated click on Global Settings. You will be landed straight to the plugin configuration page.
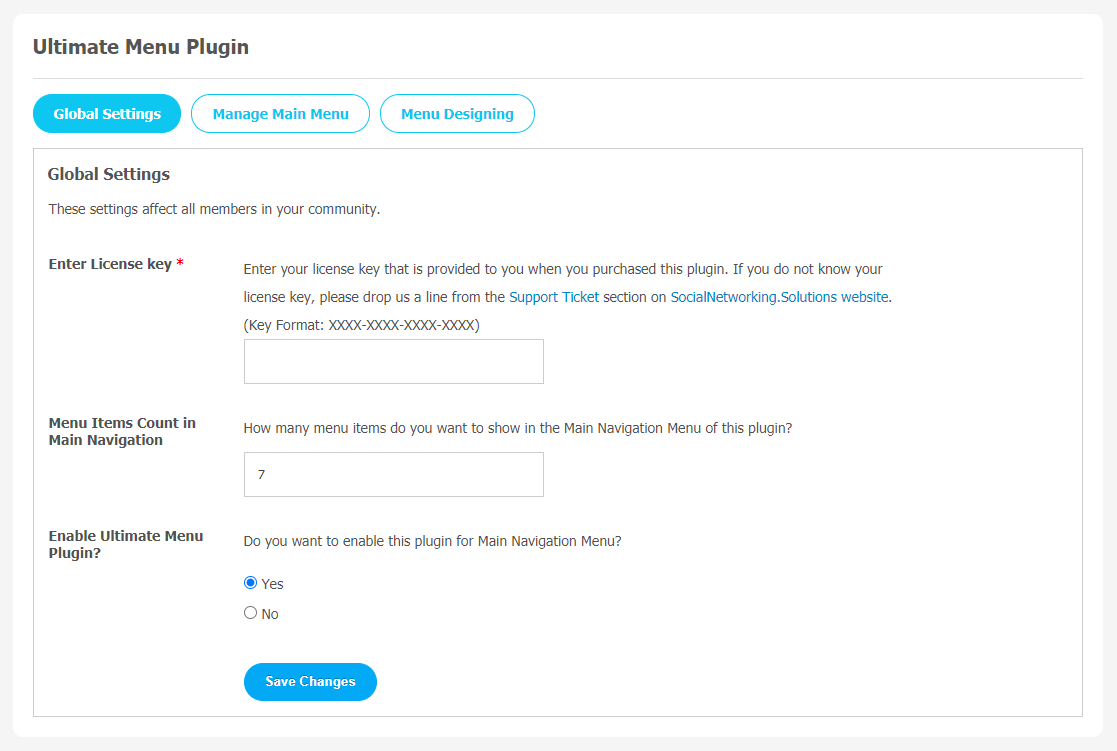
2. Global Settings
You can use Global Settings to manage multiple important features directly from the admin panel. You can manage “Menu Items Count in Main Navigation,” which can be used to show the number of menu items you want to display in the main navigation menu. You can enable/disable directly from the admin panel.
Note ~ Don’t forget to “Save Changes” when done.
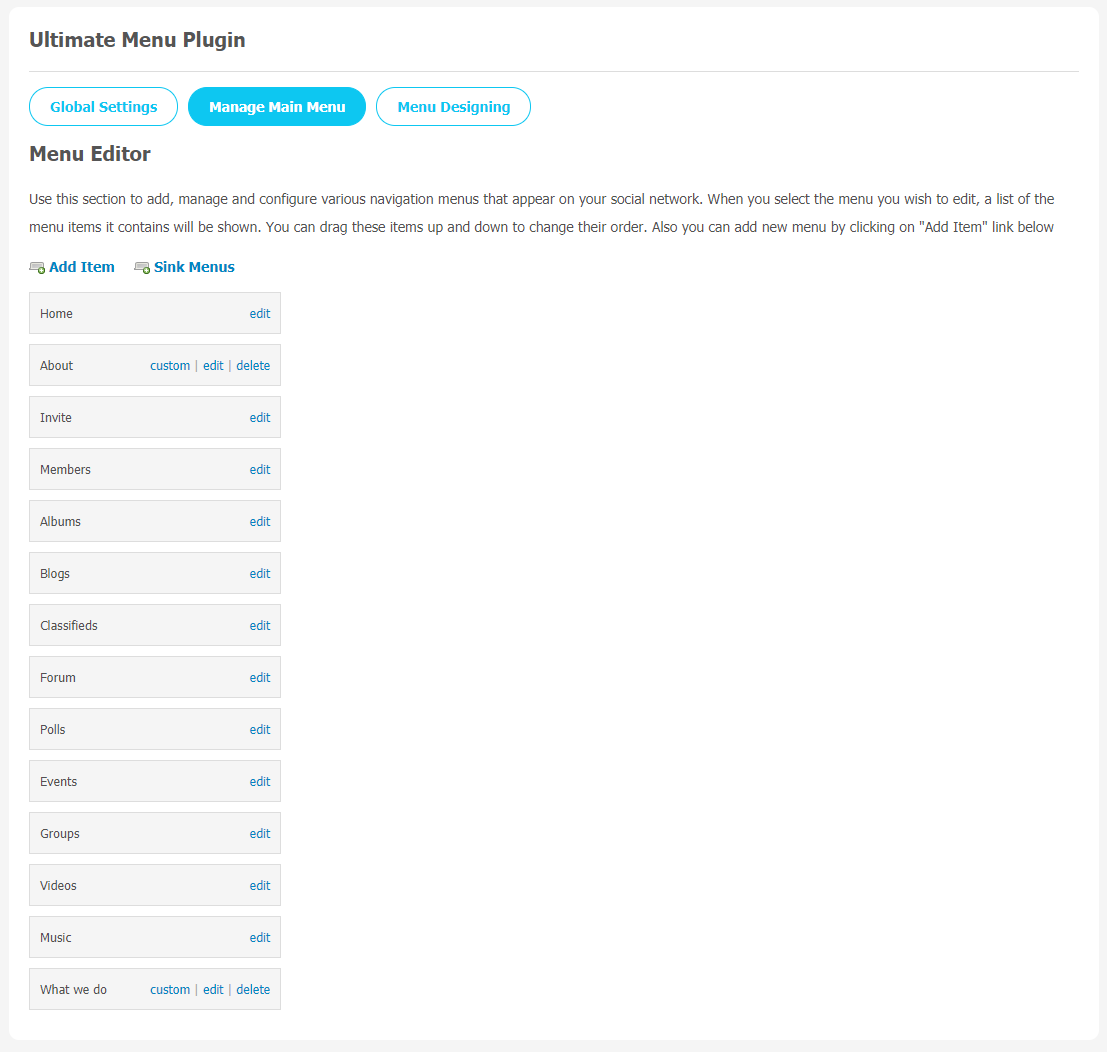
3. Manage Main Menu
When you open your website, all the icons you see on the Main menu can be easily managed. You can use this section to set any pre-existing menu as custom, or create a new custom menu by clicking on the “Add Item” link on this page. For every menu item, important settings can be added like icons, label, enable menu item, and privacy based on member level settings. Site admins can add as many menu items as they want.
(a) How to Edit a Menu Item?
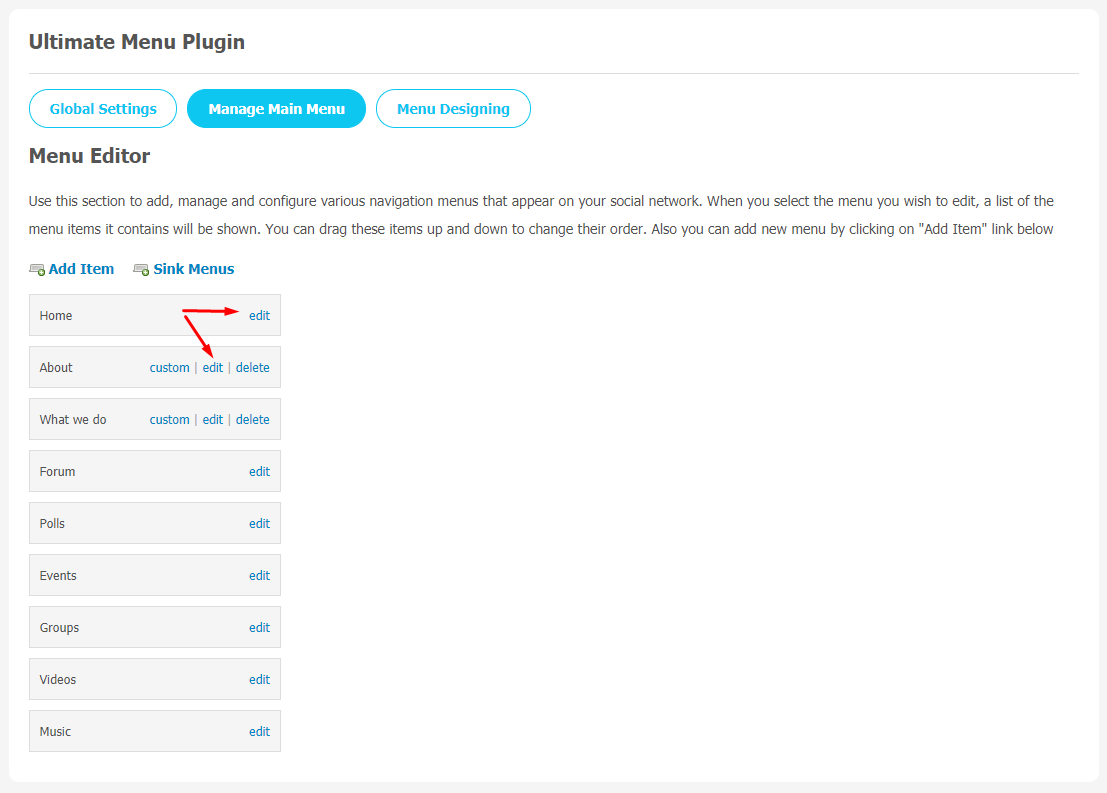
Here, we are editing the Home Menu item. First click on”Edit” as shown in the above image.
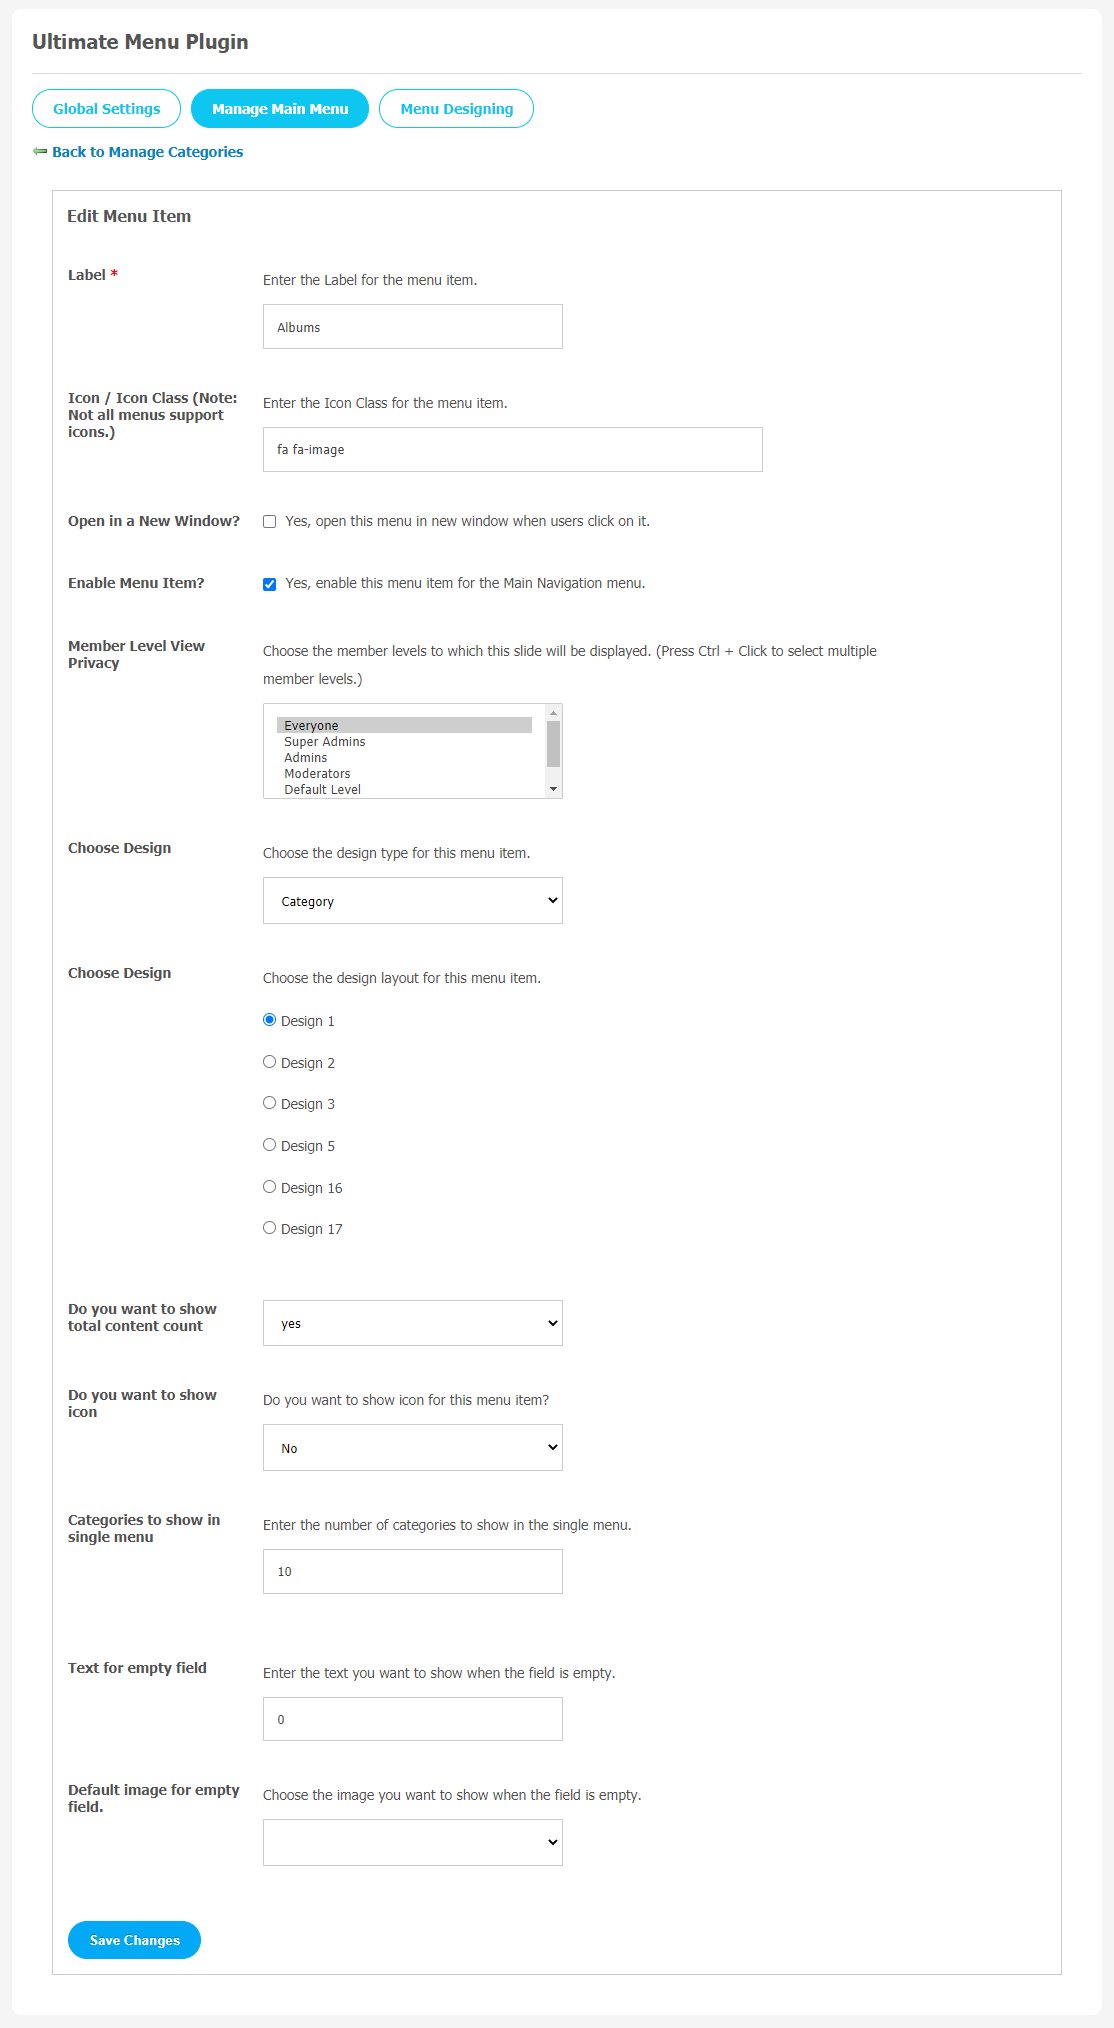
You can set your label name.
If you want to show this menu Item in a new window when users click on it, then enable “Open in new Window”.
There are 15 attractive designs given on this page. You can choose your favourite design for this menu item.
After making other required configurations, you can see this menu item in the main menu of your website.
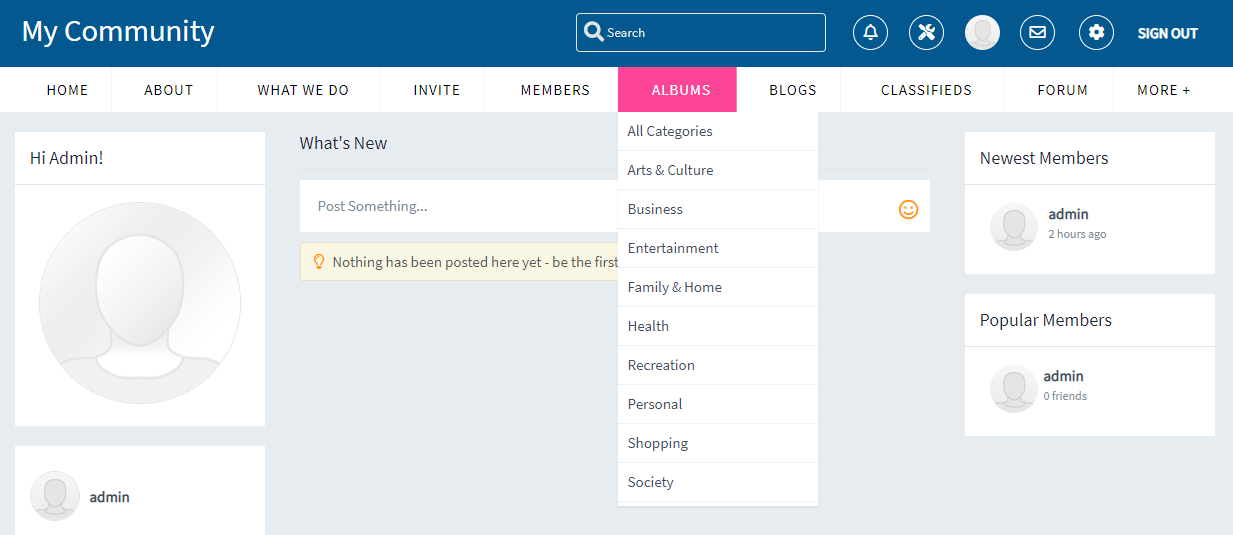
Here, Home Menu has been edited into the Home Page. You can follow the same for other menu items. This is what you will see at the user panel.
(b) Admin Panel View for Custom Menu Editing
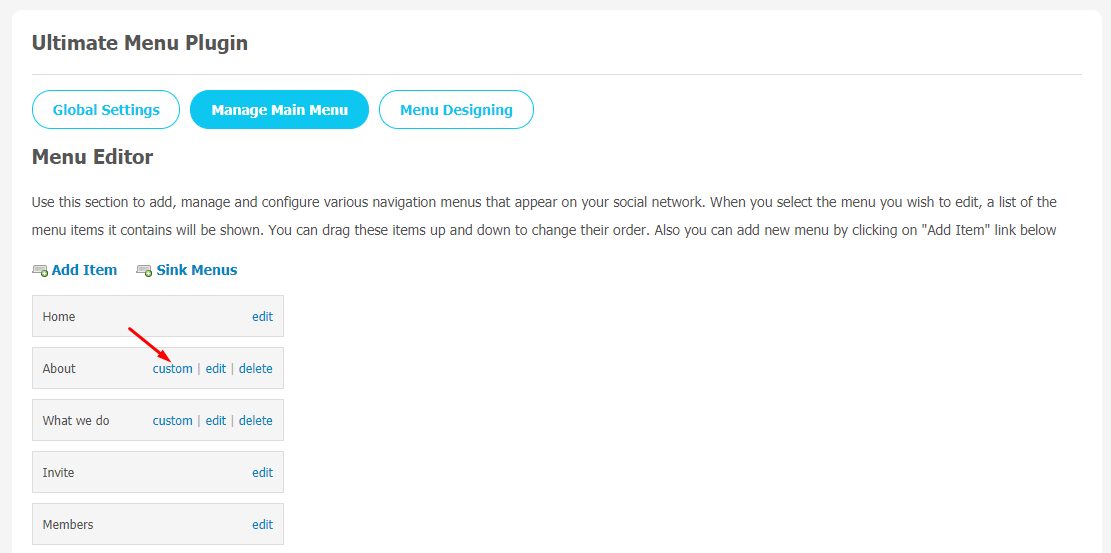
You can make your Menu item as per your requirement. When you click on “Custom” on the What we Do menu item, as shown in the above image, a new window will appear. Click on the “Add Item” link.
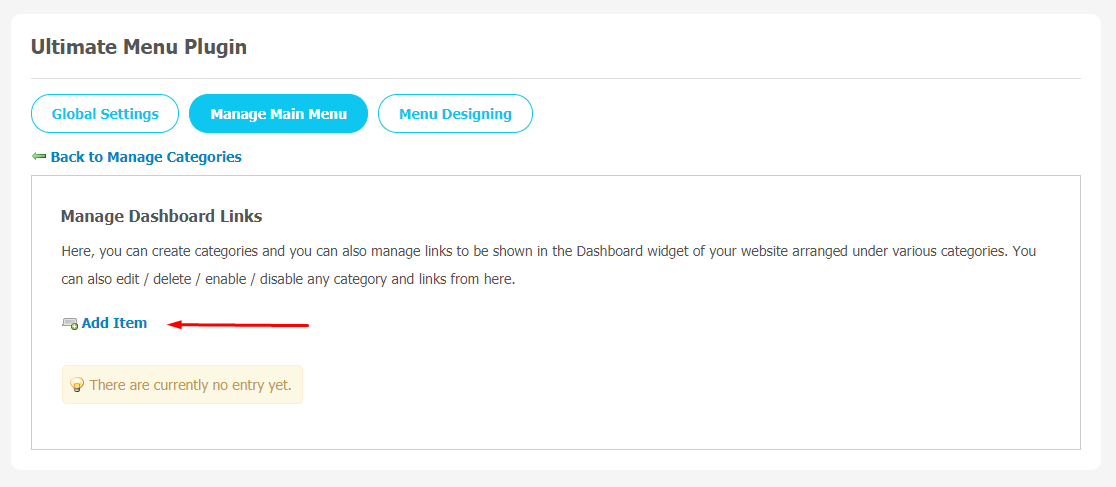
A new window will appear where you can make your menu item based on your website requirements. Make required configurations and “Save Changes” when done.

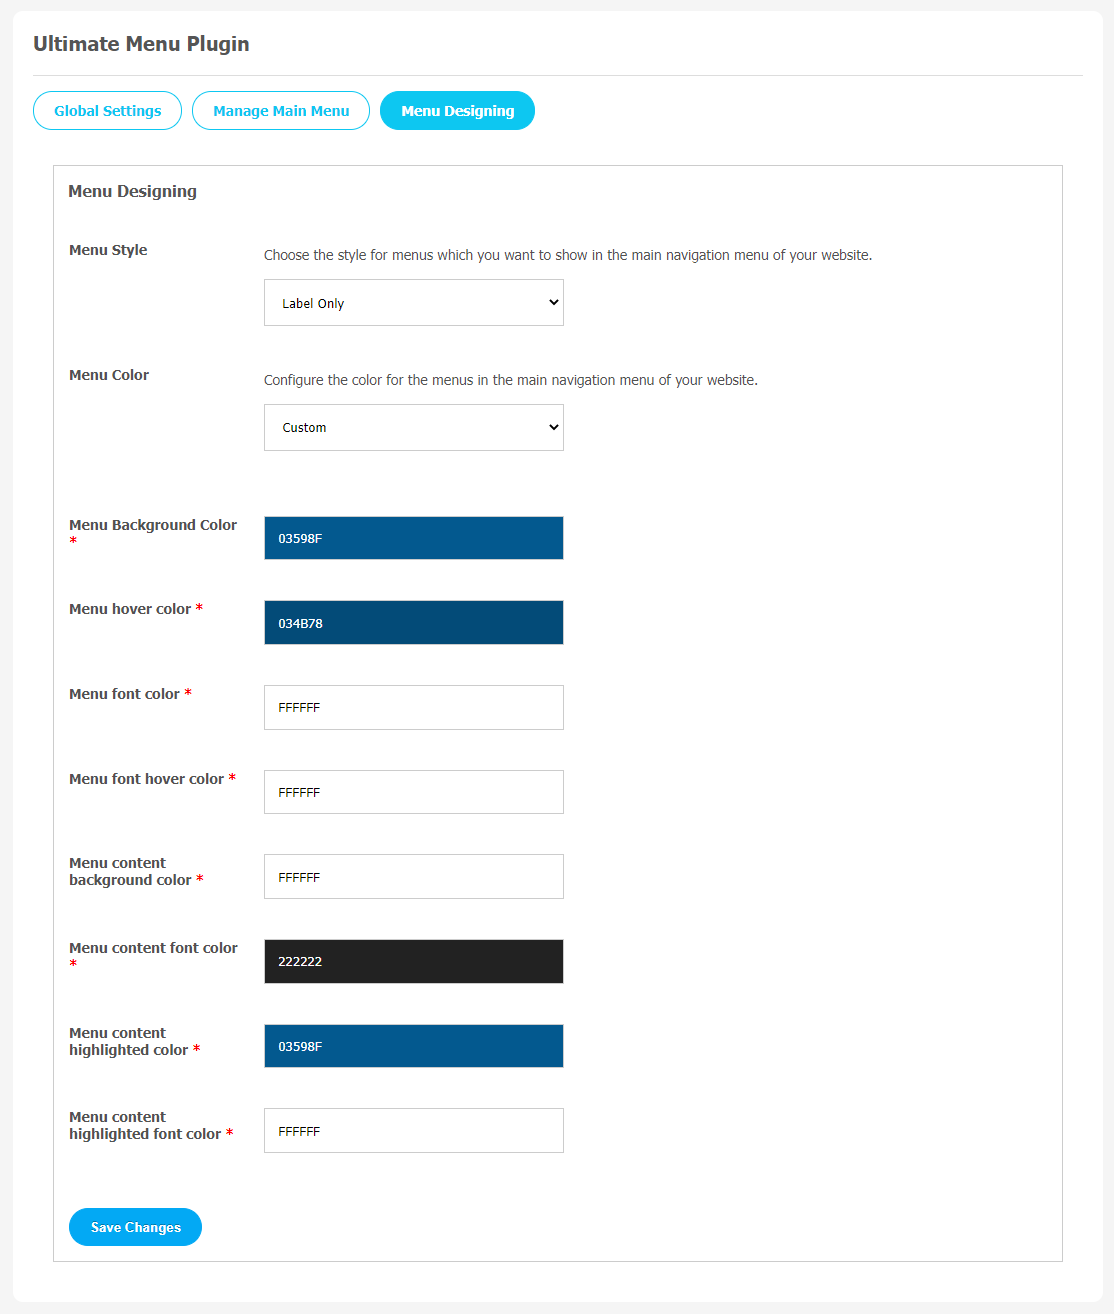
4. Menu Designing
In this section, you are allowed to change menu colors and their styles in multiple ways.
- When you choose the first option “Menu Style” you will be asked to select three options as: Label Only, Icon Only & Both.
- You can choose “Menu Color” as Theme-Based or Custom. Once you have configured colors and styles of the menu, you can change “Menu Background Color”, “Menu Hover Color”, “Menu Font Color”, etc.
With this step-by-step tutorial guide, we expect you to have successfully learnt how to use this plugin for your SocialEngine website. These are the key features of this Ultimate Menu Plugin. We hope you have completed the tutorial guide and are ready to go. You can use this plugin and utilize the new opportunities of engaging with customers.
Watch Video


