The world is changing very fast and the same goes for technologies.When the apps entered the mobile market, they created enough buzz to make people obsessed with it. We all are using Native apps and we have been using them for very long.
As the technology is constantly changing, PWA (Progressive Web App) is the new entry as a replacement of native apps. Basically, they are web apps that work quite similar to a native app. They can be installed like any normal app and can be easily accessed from the home screen.
Users are not required to download this from the App Store. Now, the whole point is why you want to choose the PWA (Progressive Web App) Plugin over Native Apps. The answer is quite simple.
- Instant Loading Time
- Better Customer Retention
- Multiple Platform Compatibility
- Best solution for a small business
Features that make this Plugin Unique
- Very Fast Loading Time
- Low Data Consumption
- Push Notifications Support
- Native Look and Feel
- Offline Mode Available
- Pull to Refresh
- SEO Friendly
Here, we are providing an interactive and easy to follow Progressive Web App Plugin setup & installation guide which will help you to use & configure it properly on your website & maximize the efficiency of your website by showcasing the exciting features. With this help-guide, you will get a better sense of usage when you actually install this plugin on your website.
Installation of this plugin is very easy, but if you still need our expert to install this plugin for you, then you can purchase the service by Clicking Here.
Step-by-Step Installation & Tutorial Guide:
** This tutorial assumes that you are already logged in to the Admin Panel.**
If not, then you have to log in first to the admin panel after filling the admin account credentials on your website.
1. Installation of Progressive Web App Plugin:
1. In the Main Menu section, click on the tab Manage and select “Packages & Plugins” to install this plugin.
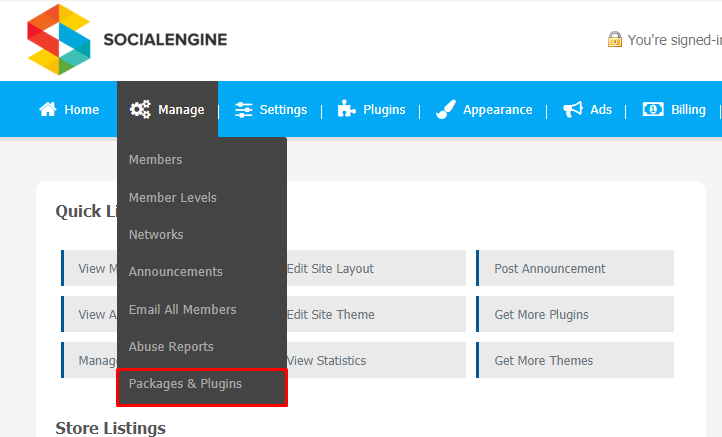
2. Our Plugin is based on SE standards, so this will get installed on your website as any standard theme can. Please read the tutorial on installing themes and plugins in SE: Click Here

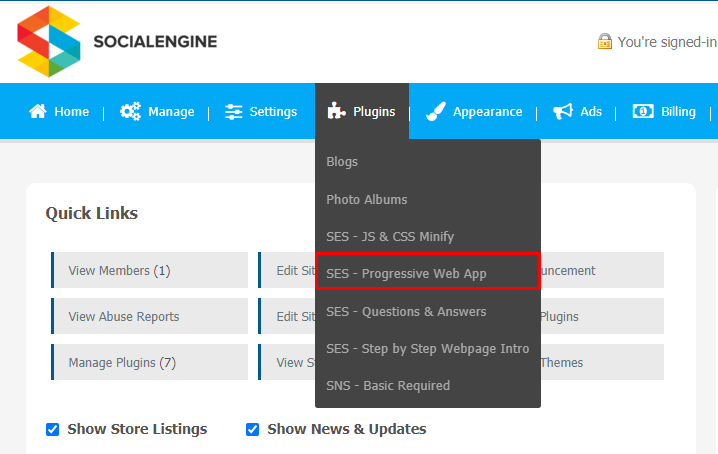
3. After the successful installation of the plugin as in Step 2 above, under the plugins section, click on “Progressive Web App Plugin”.
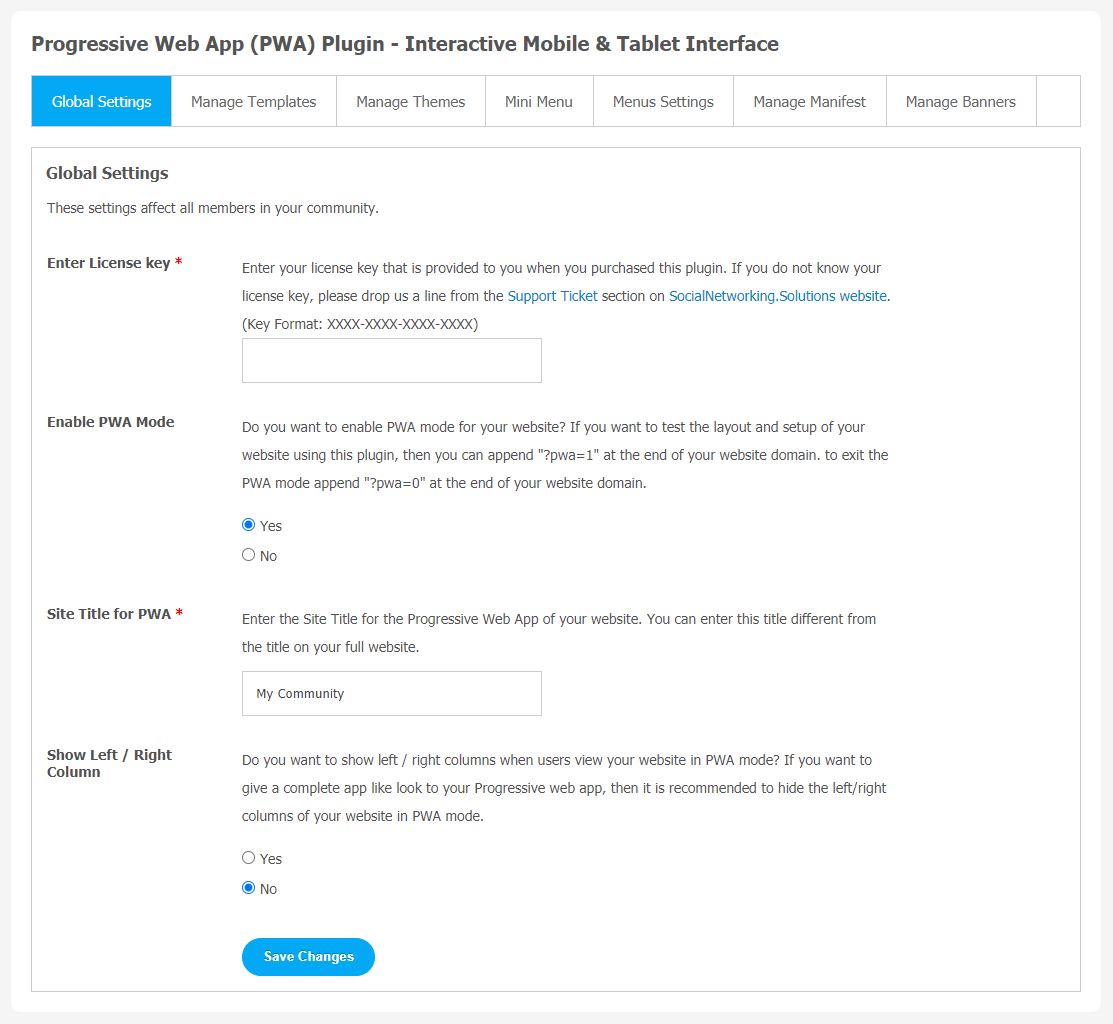
2. Global Setting
After a successful installation, a new Global Setting tab will appear where all the plugin settings can be managed easily. First, click on Global Settings. Then,
- Enter the required license key in the box.
- Also, you can enable/disable PWA mode for your website.
- You can add a site title for PWA.
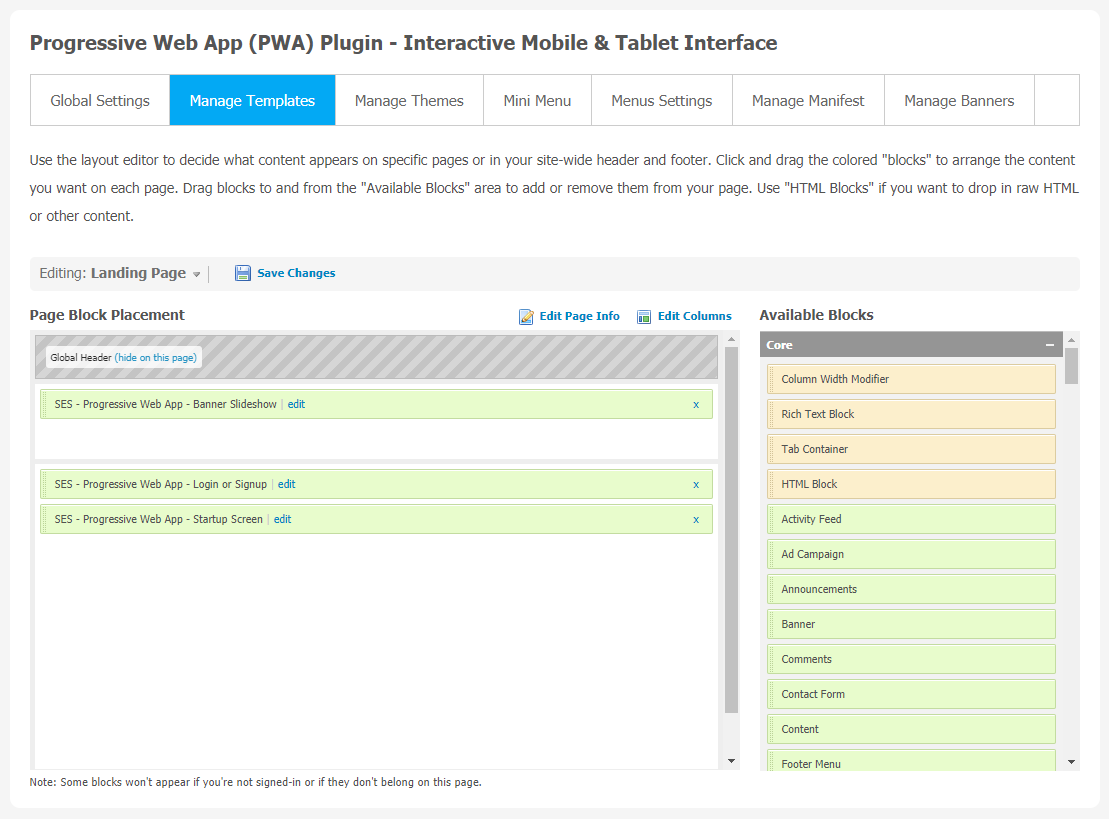
3. Manage Templates
If you want to manage content on specific pages, use the layout editor. In the layout editor, click and drag the blocks to organize the content you want on each page. Don’t forget “Save Changes” when done. You can delete or edit the required block if necessary.
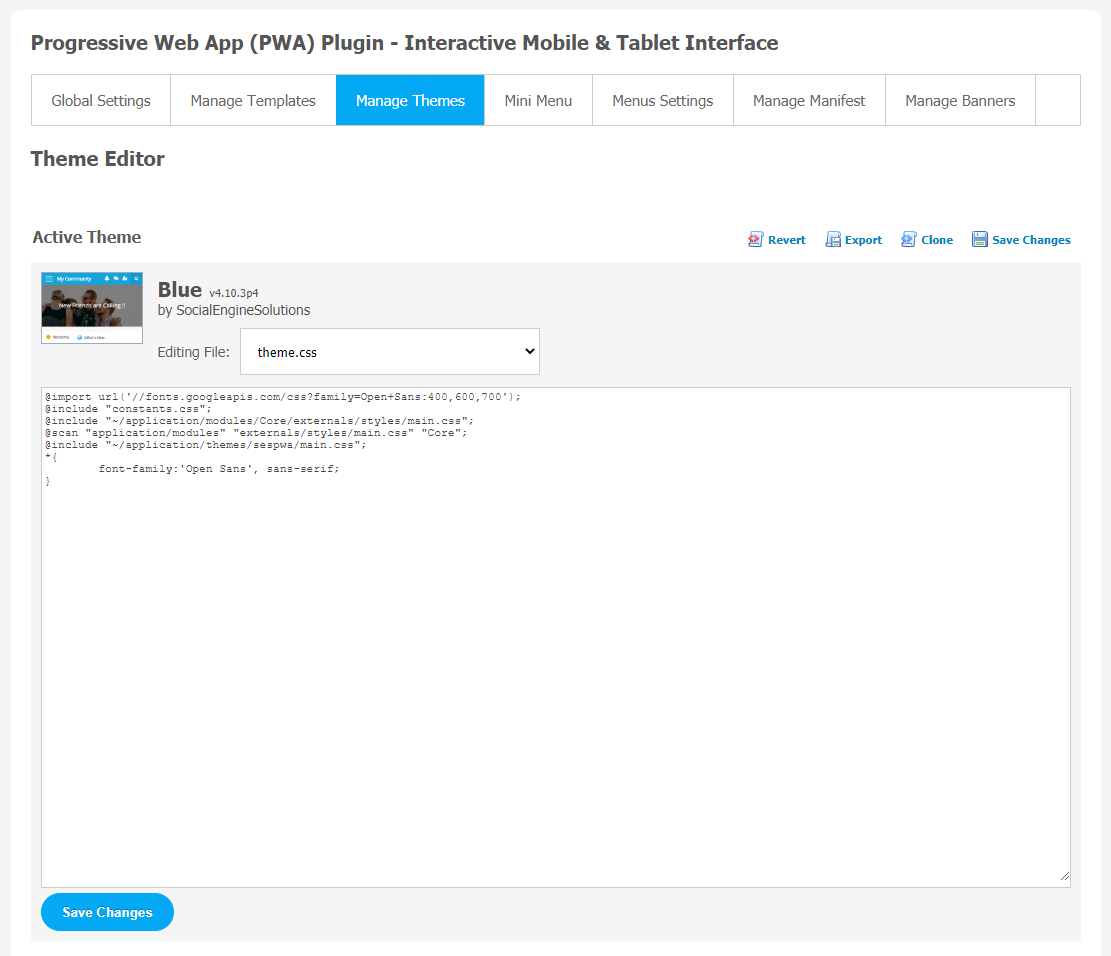
4. Manage Themes
With the help of the theme editor, you can activate your favourite theme.
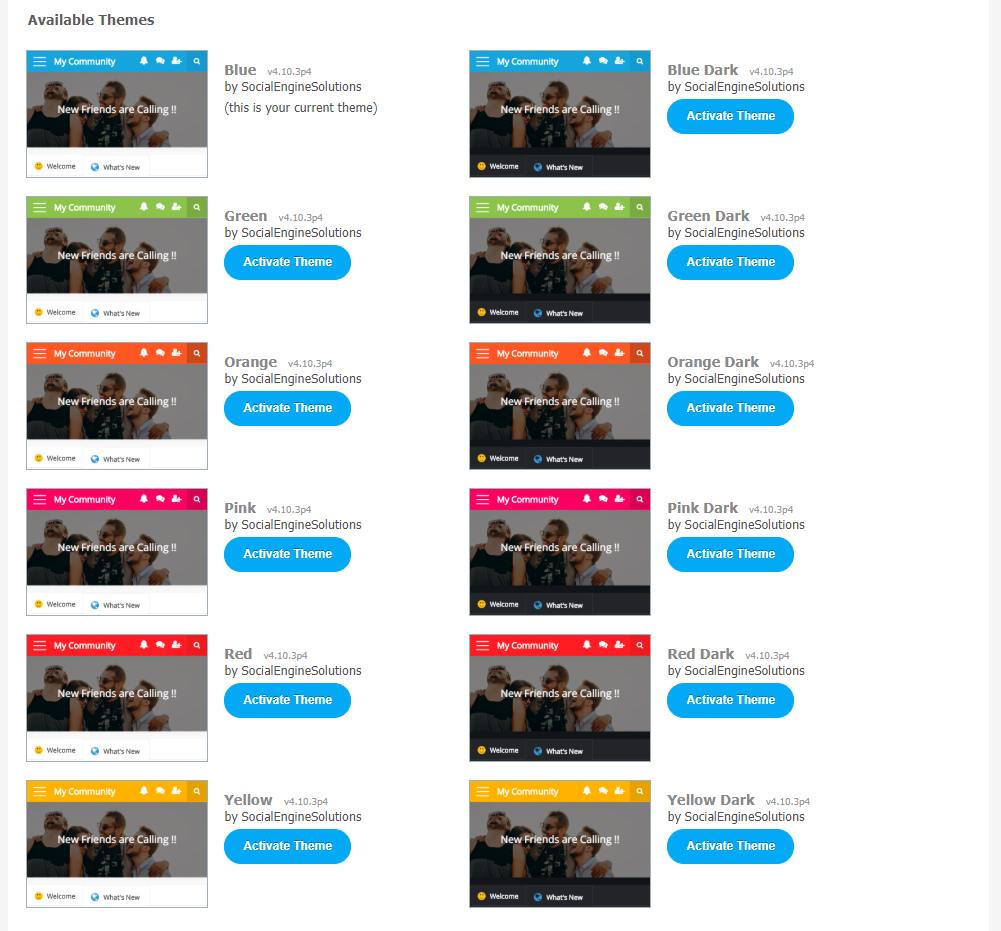
a) Multiple Themes
There are 12 theme color options provided for the users. You can activate the desired theme by selecting Save Changes.
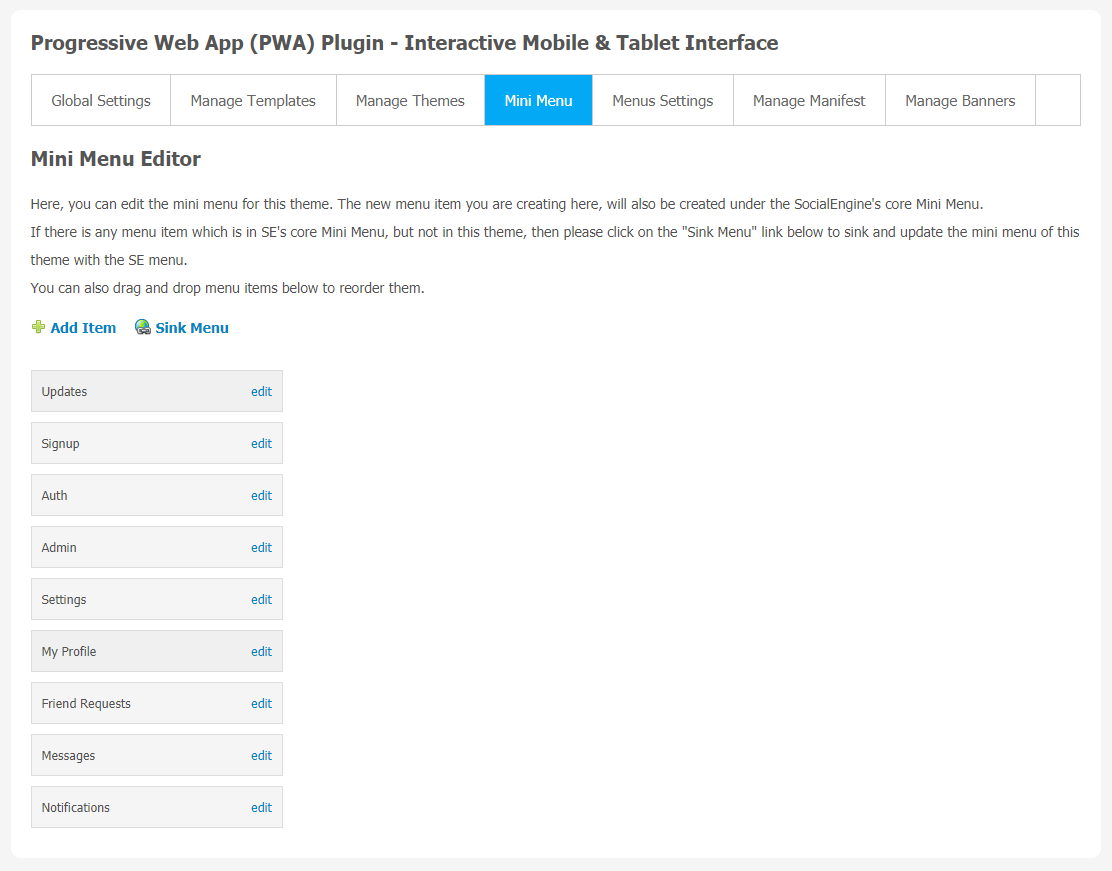
5. Mini Menu
Users can edit the mini menu for this theme. If you are creating a new menu item in this page, automatically it will also be created under the SocialEngine’s core Mini Menu. If you want to add some new Menu items which are available in SE core Mini Menu but not in this theme, simply click on “Sink Menu” link. Menu items can be dragged and dropped in this section.
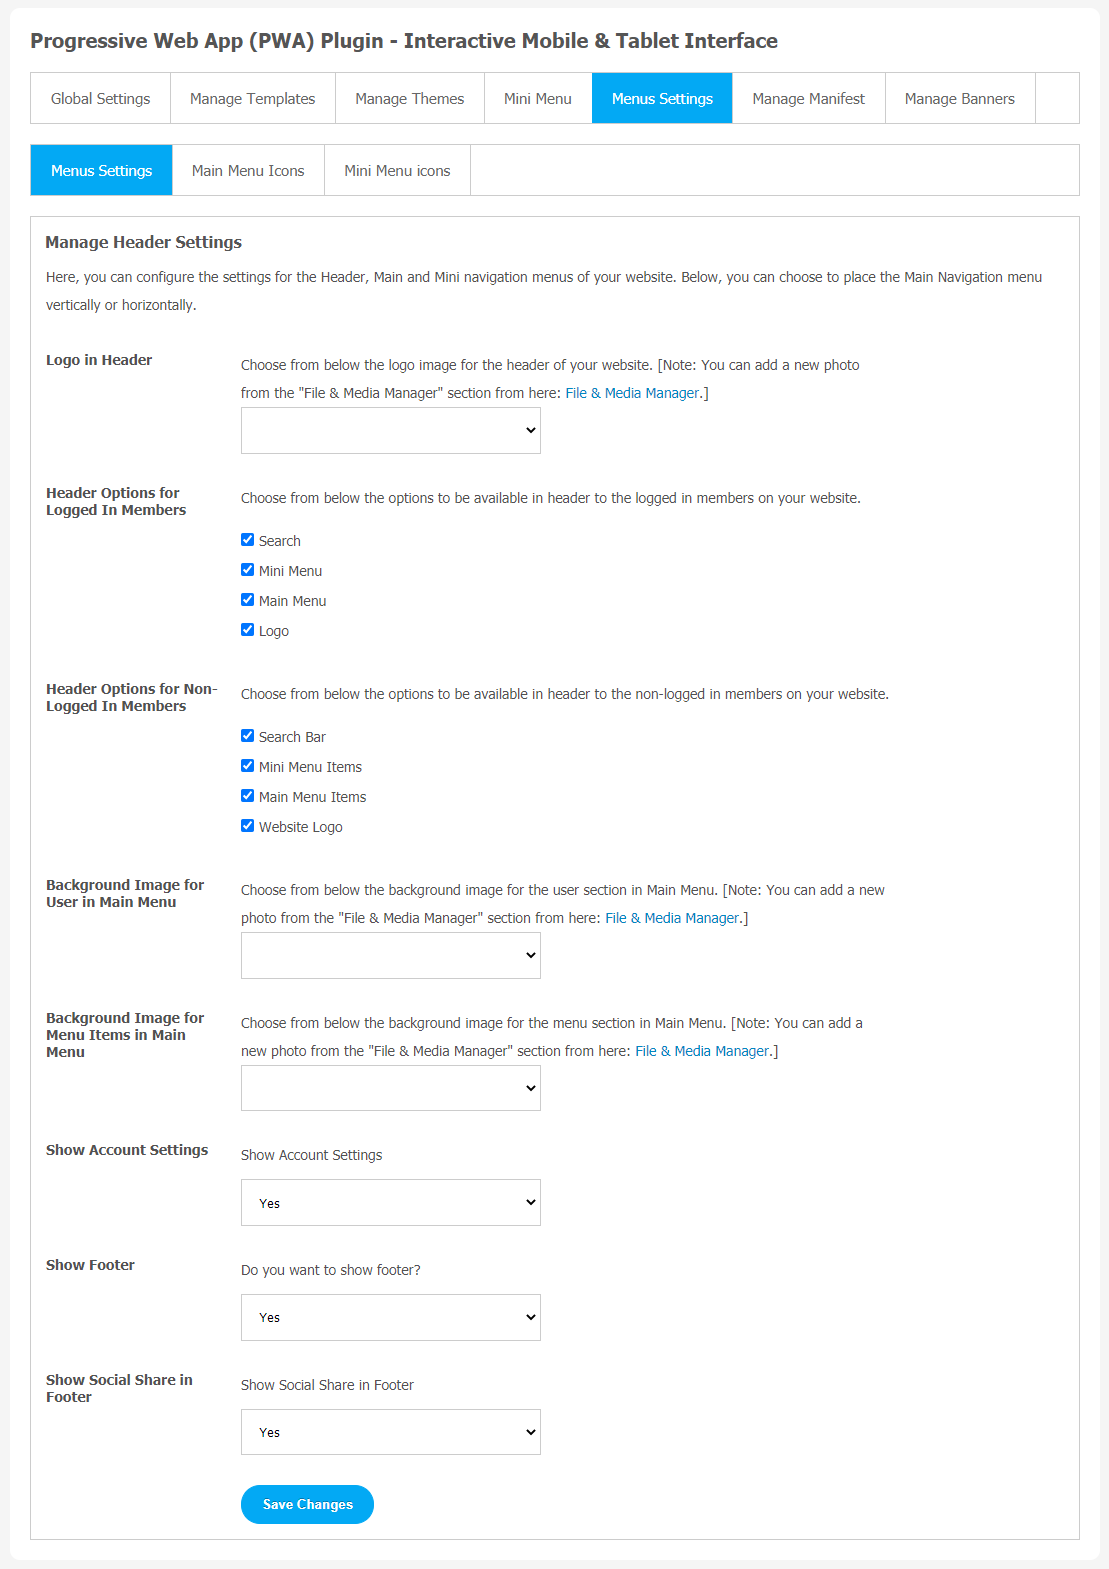
6. Menu Settings
Menu settings are divided into three sections:
- Menus Setting
- Main Menu Icons
- Mini Menu Icons
(a) Menu Settings
Menus setting is used for all header configurations for the website. The important features like Logo in Header, Header options for Logged-In members, Background Image for users in Main Menu, Background Image for Menu Items in the main menu and show footer.
(b) Main Menu Icons
With this setting, users can add icons for the Main Navigation Menu Items of your website. Add or delete the icons if necessary.
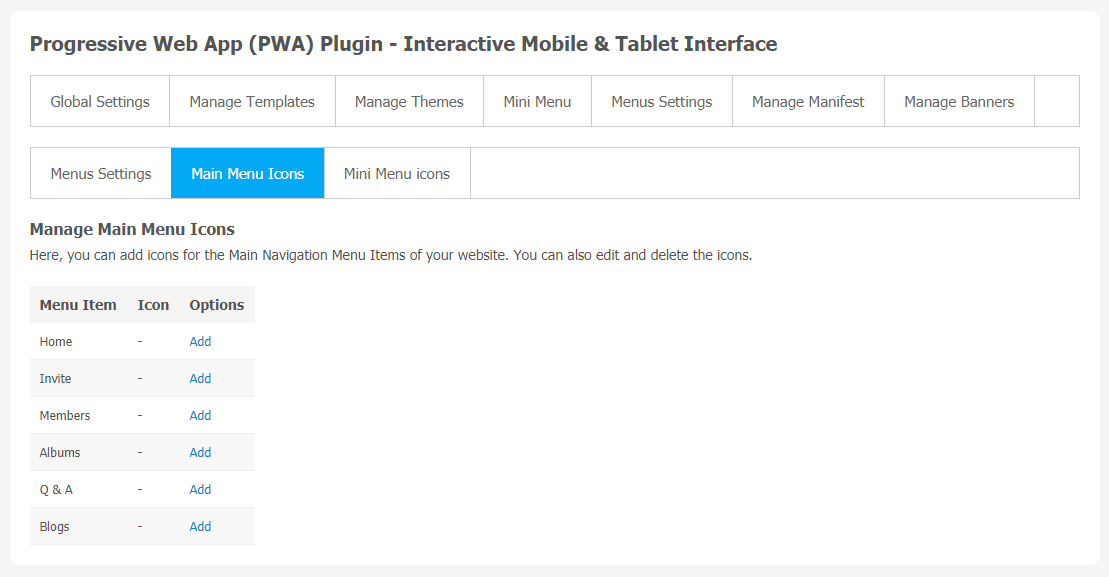
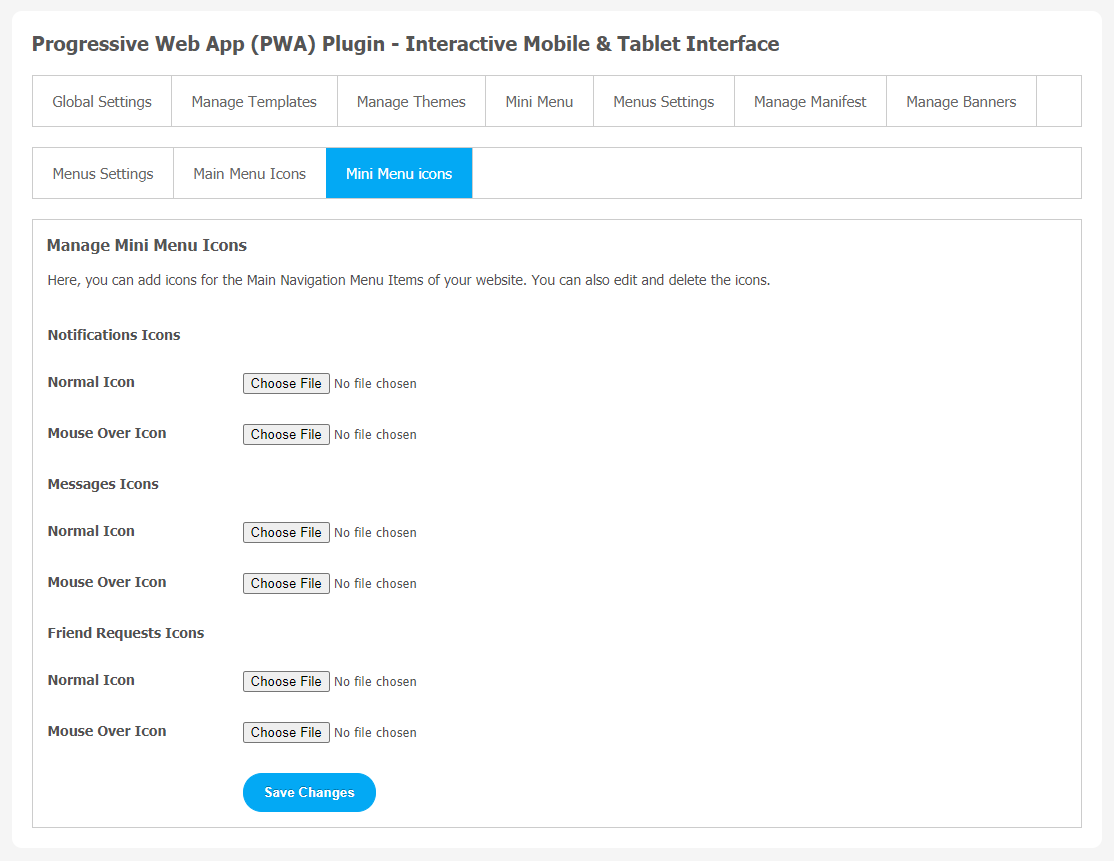
(c) Mini Menu Icons
You can add icons for the Main Navigation Menu Items of your website.Add or delete the icons if necessary.
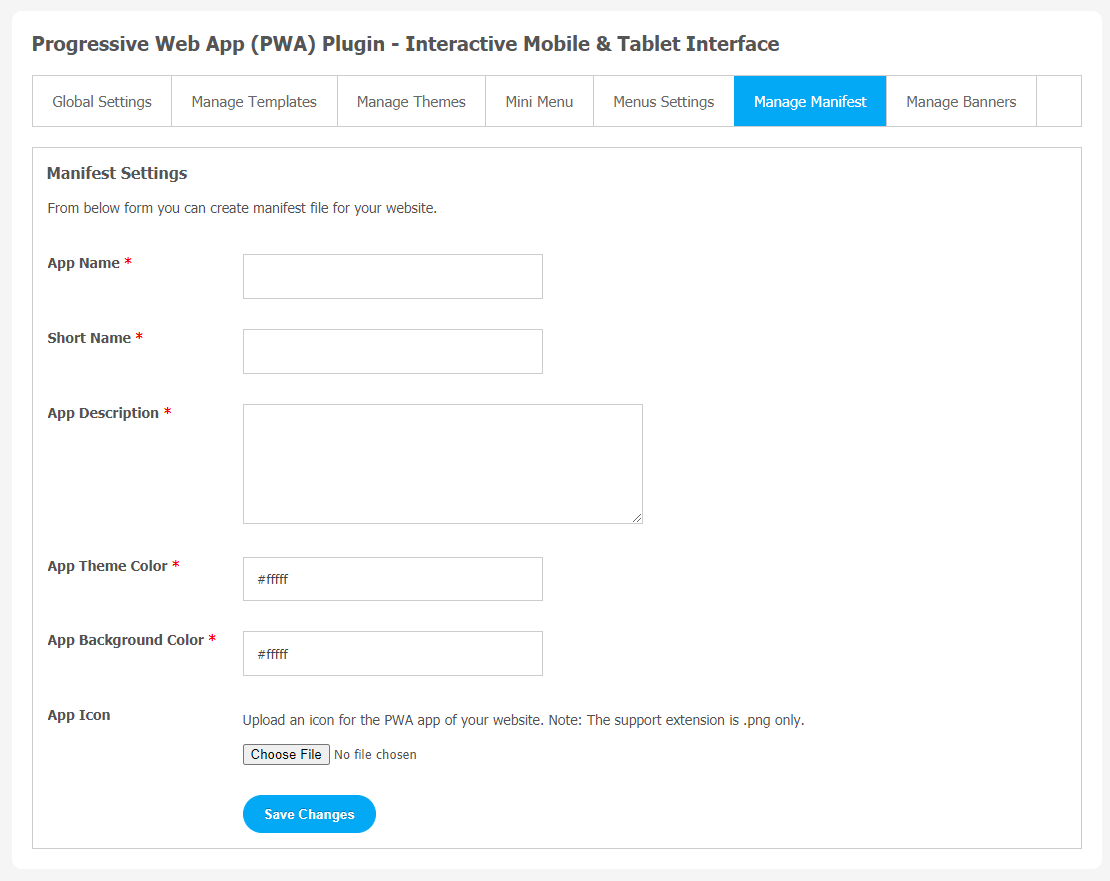
7. Manage Manifest
This feature is given to create a manifest file for your website.Don’t forget Save Changes when done.
8. Manage Banners
All the Banner Slideshow created by you will be shown at this page. Managing multiple banner slideshows can be very easy on your website. Place these banners anywhere on your website including the Landing Page and other widgetized pages of your choice.
A banner image makes your website more interactive for your audience. So this feature gives you more freedom to add and manage any number of photo slides in each banner slideshow. The best thing about these photo slides is that they are highly configurable. Click on the “Create New Banner Slideshow” link below to create a new banner slideshow.

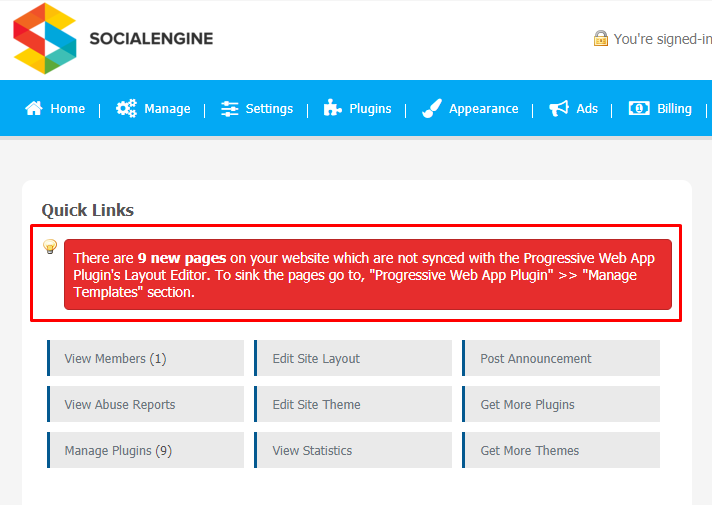
9. Sync Website Pages with PWA
Here, you can synchronize website pages with the Progressive Web App Plugin’s Layout Editor.
- Go to Progressive Web App Plugin
- Manage Templates Section
- Synchronize the Website Pages
Finally!! You have completed the installation procedure and also explored various exciting features of this Progressive Web App Plugin. Now, your visitors and website members will be able to access & use your website with new features.
Installation of this Plugin is very easy, but if you still need our expert to install this Plugin for you, then you can purchase the service by Clicking Here.


