With the rise of the Internet and new technologies, the concept of traditional education has been completely changed in recent years. As long as you have access to a computer or mobile device, you can have direct access to an infinite source of information whenever and wherever you want. Especially in the time of an unprecedented crisis, access to online education can be very crucial.
So, this is the right time to invest in an online tutorial website. Either you belong from corporate houses, higher education institutions, test preparation or vocational training institutes, this plugin is just made for you. Moreover, businesses of all shapes and sizes can use this online tutoring as a medium to gain new customers and deliver value to existing customers.
Courses-Learning Management System Plugin allows you to create Unlimited Classrooms & Courses, either free or paid in them. Lectures can be created based on a document or video tutorials. You can allow your students to take tests for the specific course. They will be further notified of their final test status. You can build fully-functional eLearning courses for your users and make money through secure payment Gateways systems like Stripe and PayPal.
This plugin is divided into two parts, i.e, Course and Classroom. You will get awesome features in courses such as Free/Paid discounted Course, Easy to Manage Courses via Dashboard, Secure Payment Gateways, Unlimited Lectures and Tests, Categories, etc. Similarly, the classroom segment comes with features like 4 Attractive Profile Design Views, Shareable Classrooms, Classroom Roles, Manageable Course Orders, Categories, Review and Ratings, etc.
You can explore more about this plugin with this tutorial guide. Here, we are providing an interactive and easy-to-follow course -Learning Management System Plugin setup & installation guide, which will help you to use & configure it properly on your website & maximize the efficiency of your website by showcasing the exciting features. With this help guide, you will get a better sense of usage when you install this plugin on your website.
Here, you can see the Live Demo of this plugin.
Installation of this plugin is very easy, but if you still need our expert to install this plugin for you, then you can purchase the service by Clicking Here.
Watch Video
Step-by-Step Installation & Tutorial Guide:
** This tutorial assumes that you are already logged in to the Admin Panel.**
If not, then you have to log in first to the admin panel after filling the admin account credentials on your website.
Installation of Courses-Learning Management System Plugin:
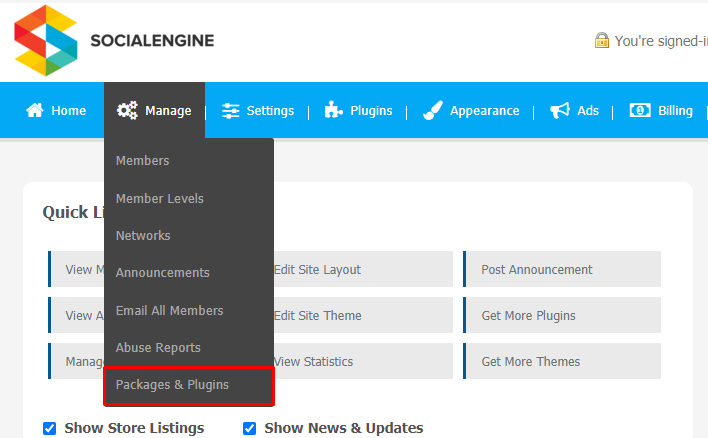
1. In the Main Menu section, click on the tab Manage and select “Packages & Plugins” to install this plugin.
2. Our Plugin is based on SE standards, so this will get installed on your website as any standard plugin can. Please read the tutorial on installing themes and plugins in SE: Click Here

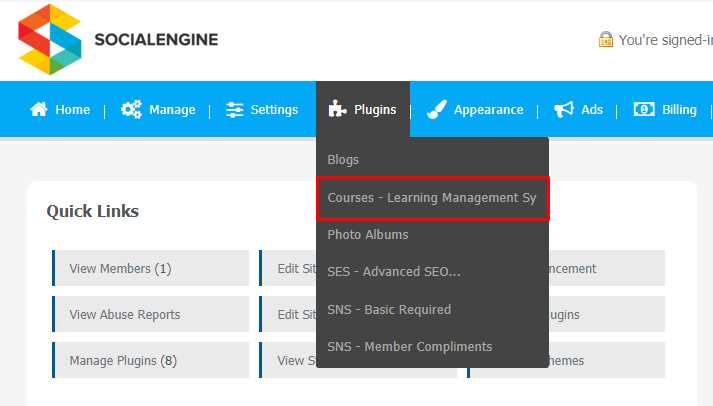
3. After the successful installation of the plugin as in Step 2 above, under the plugins section, click on “Courses-Learning Management System“.
Once you click on plugin, now you will be asked for entering required License Key for plugin activation. Now, your plugin is ready to go!
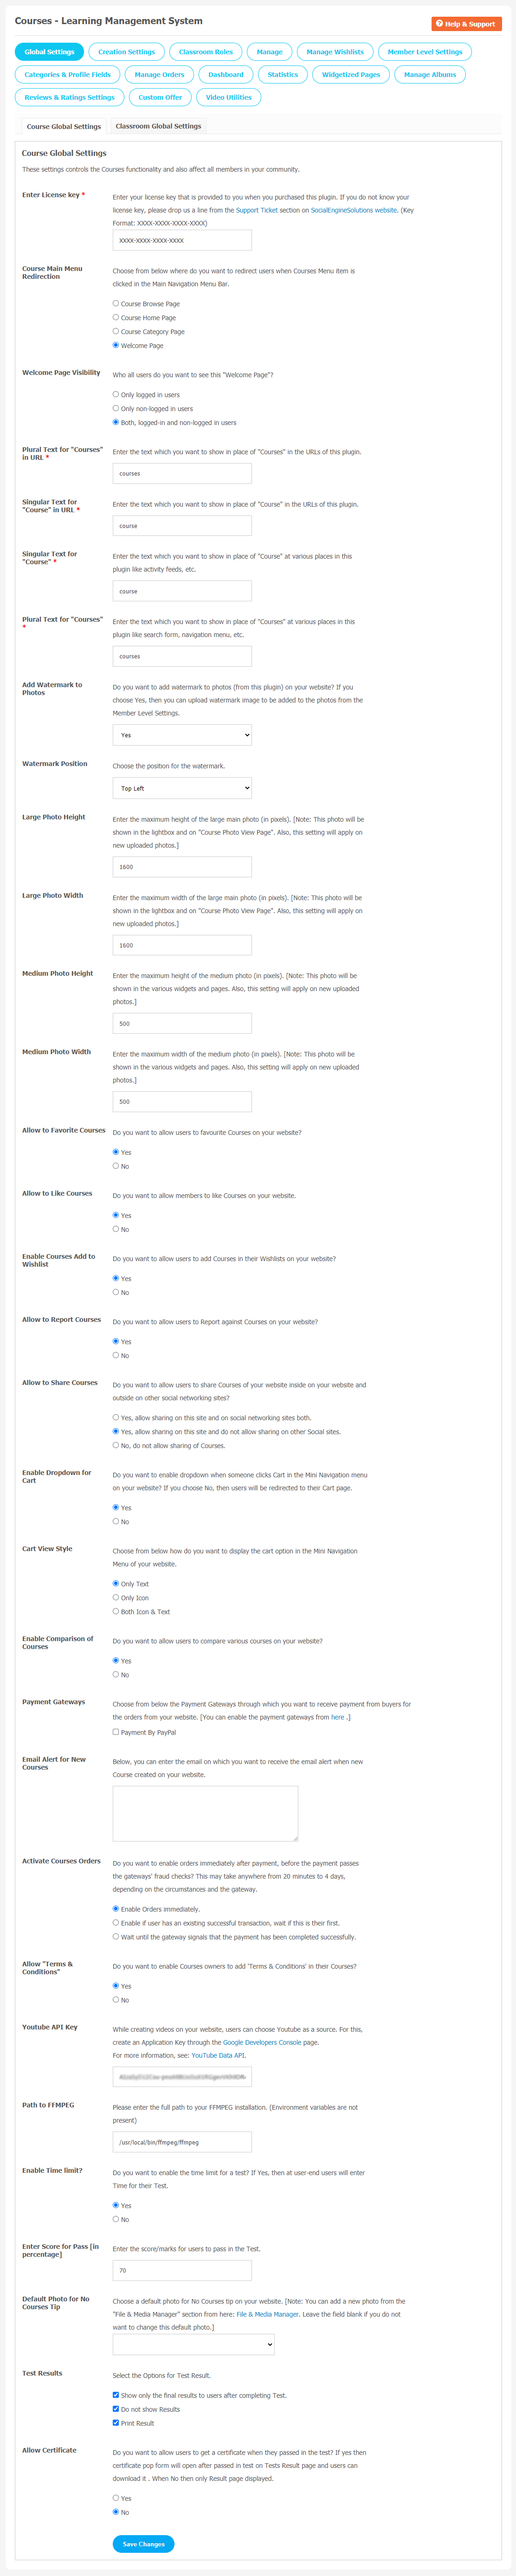
2. Global Settings
(a) Course Global Settings
After a successful installation, a new Global Setting tab will appear where all the plugin settings can be managed easily. First, click on Global Settings. Then,
- Enter the required license key in the box.
- You can redirect users in 4 different categories when the course’s main menu is clicked.
- Set Welcome Page visibility.
- Manage the Photo width and height as per your requirement.
- You can allow courses to report, share, like, etc, for users.
- You can also set Payment Gateways.
(b) Classroom Global Settings
You can configure Global Setting for Classrooms from this page. You can set a Welcome Page as Landing Page. You can redirect your users to three different pages when they choose the Main Menu Item. Features like adding Plural Text for “classroom”in URL, Allow to Favourite Classrooms, Set Menu Items counts in Main Main Navigation etc.

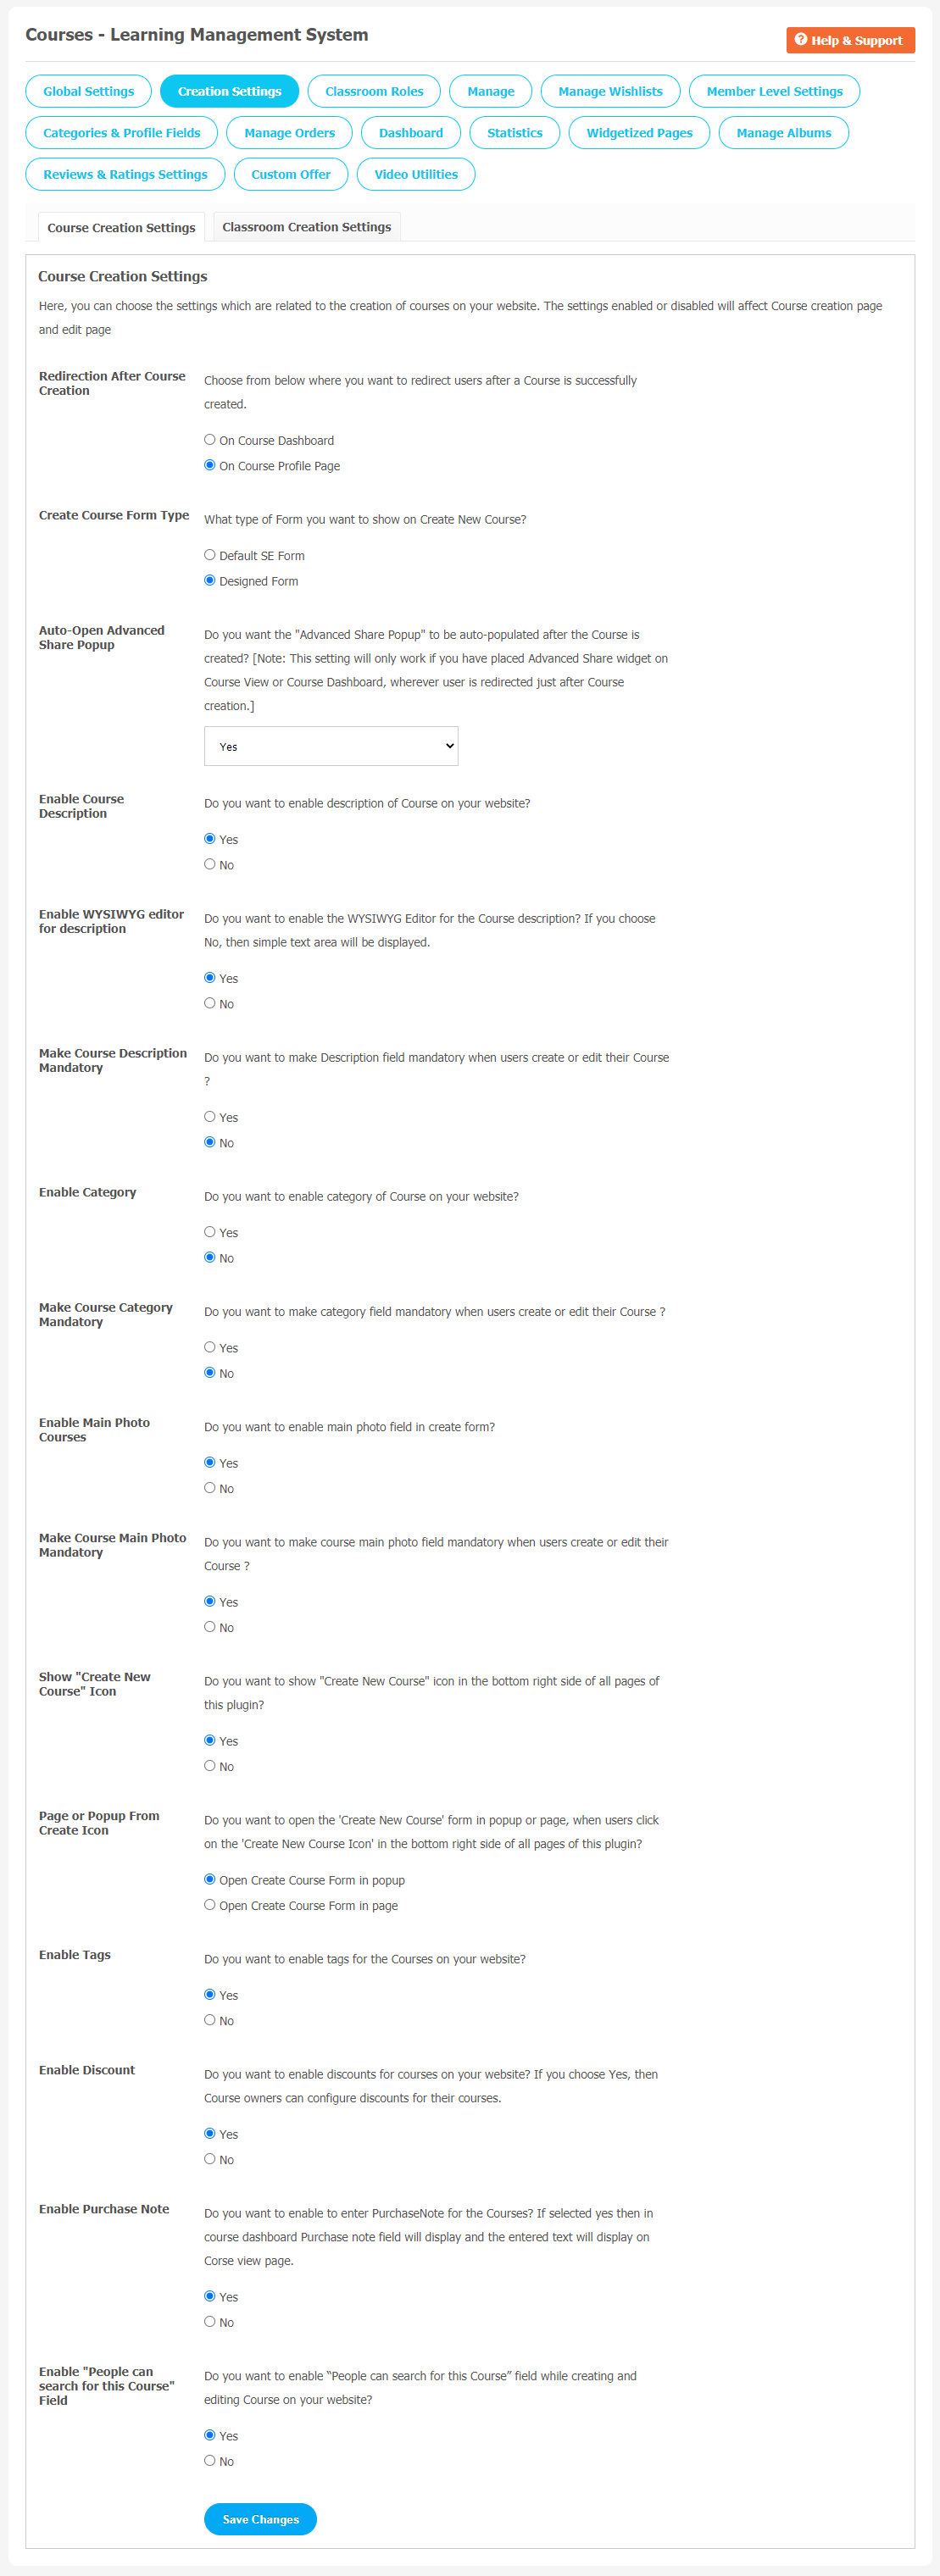
3. Creation Settings
(a) Course Creation Settings
In this page, you can configure Course Creation settings. In the given list, you can enable or disable required features if necessary.
- Choose Redirection on two multiple pages after Course Creation
- Set the Create Course Form Type
- Enable Course Description
- Page or Popup from Create Icon
- Enable Tags, Discounts
- Enter Guidelines
- Enable Purchase Note
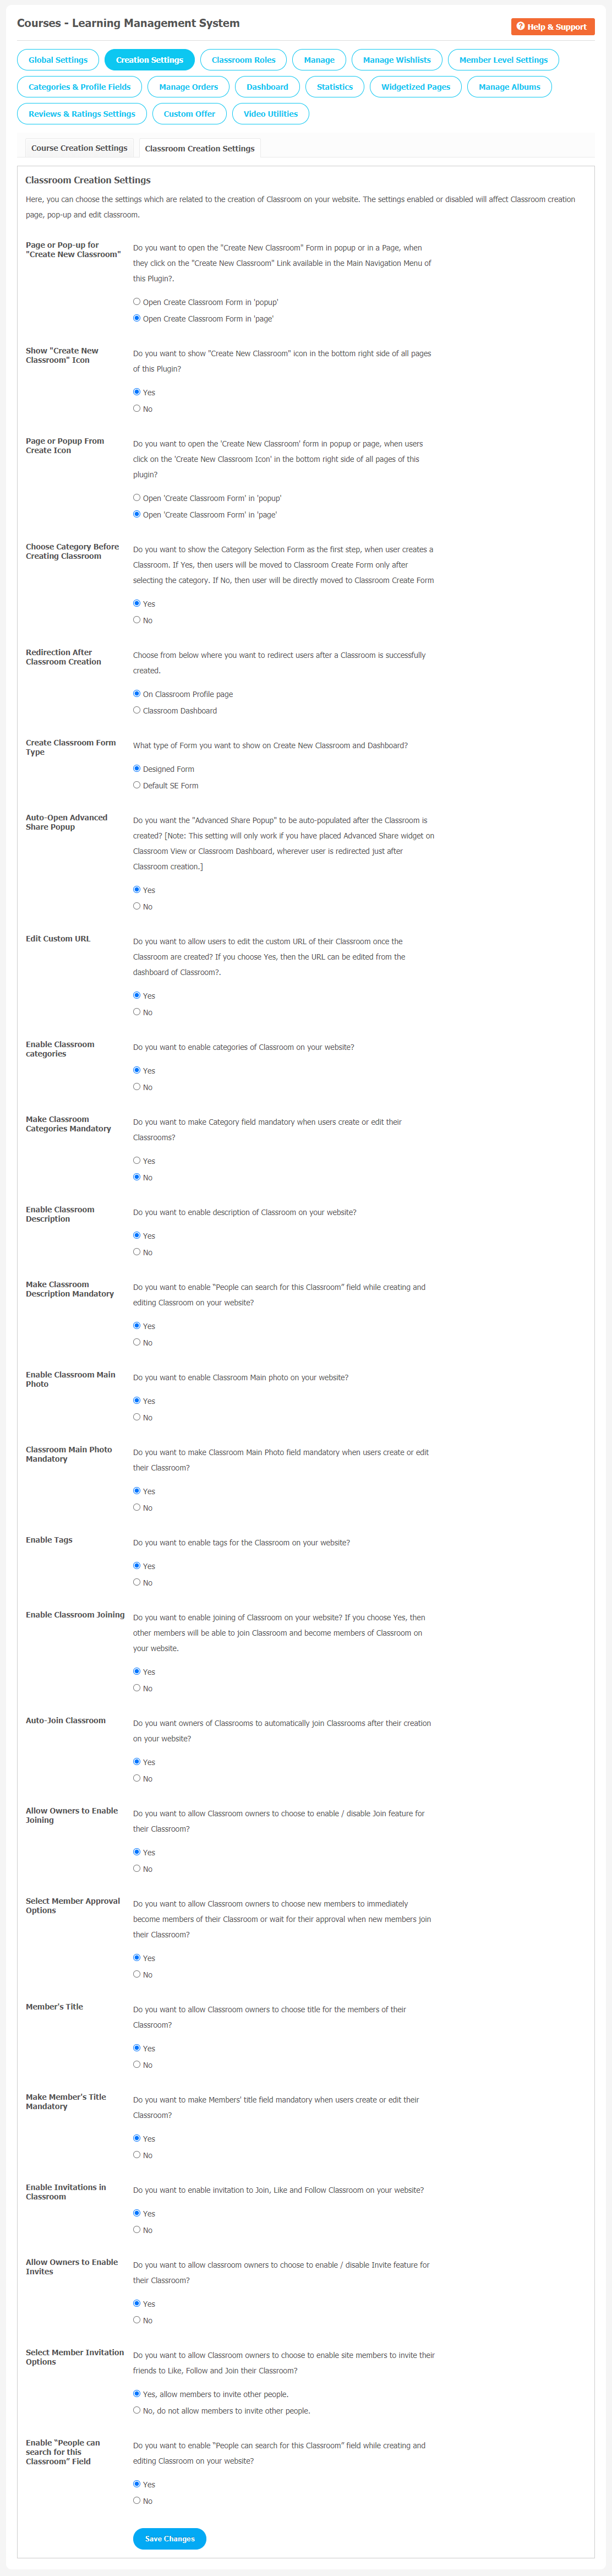
(b) Classroom Creation Settings
You can make similar changes for Classroom Creation Settings like Page or Pop-Up for “Create New Classroom”, Page or Pop-up from Create Icon, Edit Custom URL, Enable Classroom Categories, Enable Product Description, Make Classroom Description Mandatory, etc. from here.
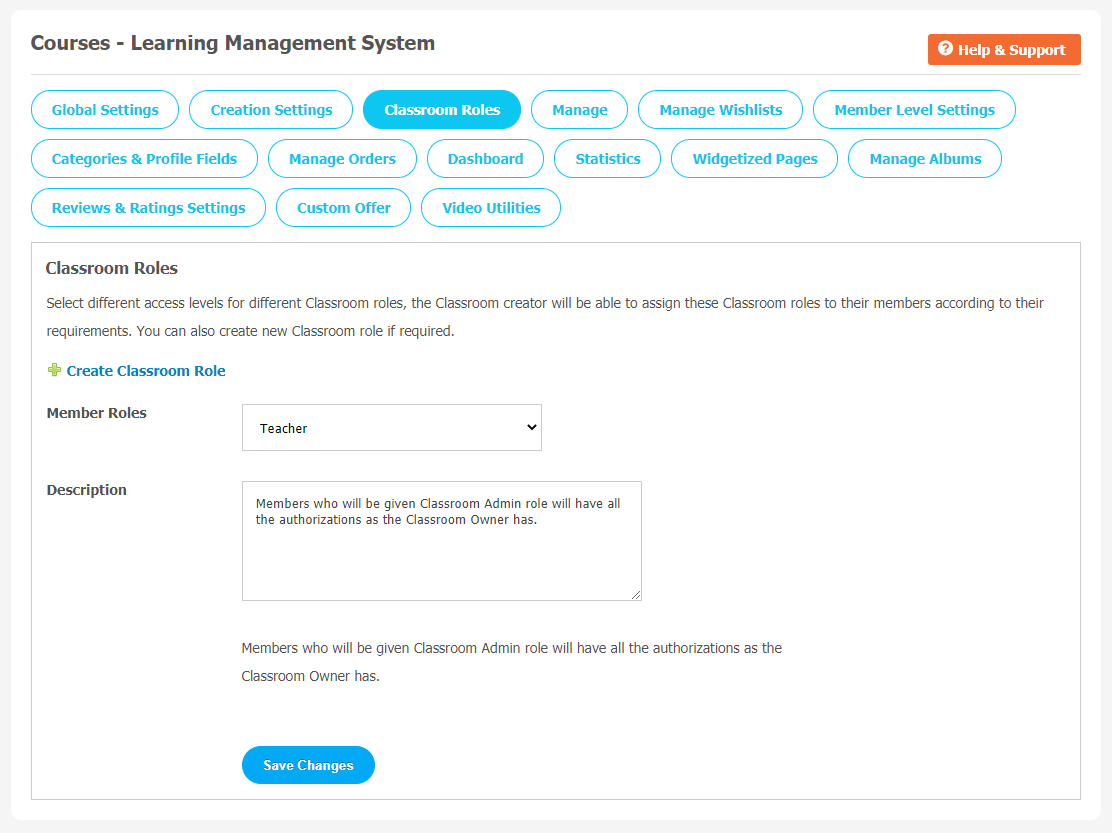
4. Classroom Roles
You can choose different access levels for different Classroom roles. One who creates a Classroom will be responsible for assigning these store roles as per their requirement.
5. Manage
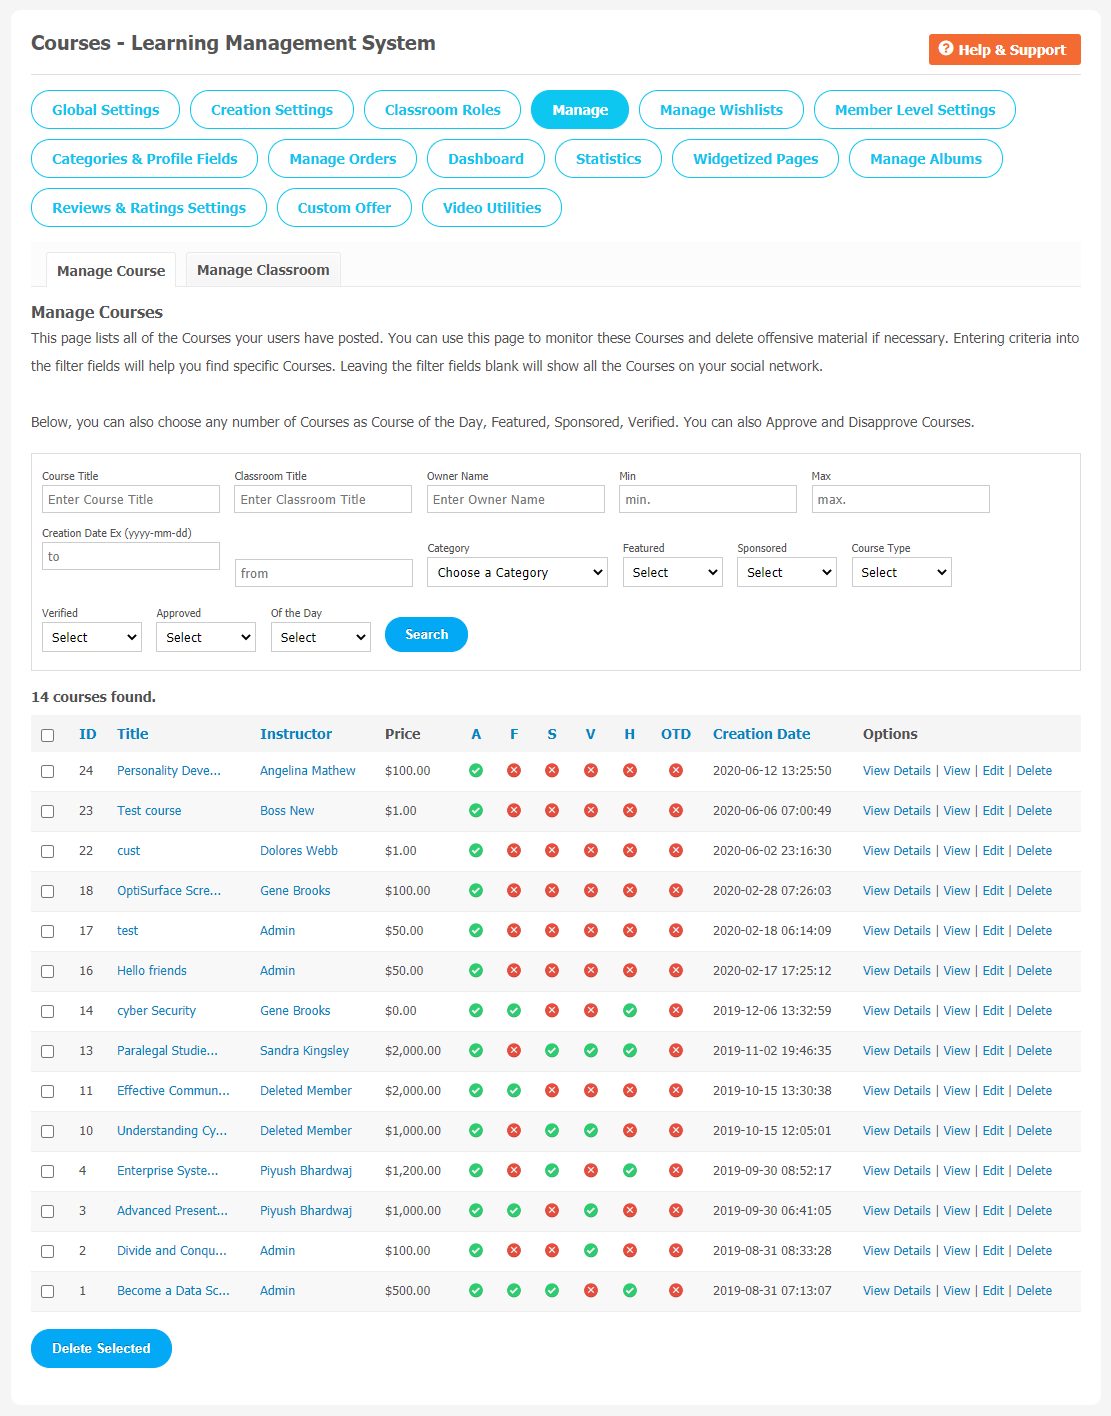
(a) Manage Course
This page records all of the Courses your website members have created on your website. All the Courses can be managed and monitored through this page. If you find some offensive material on your website, you can delete it. Fill in the required information to find a specific Course.
In the given below search box, you can choose any number of Courses as Course of the Day, Featured, Sponsored and much more. You can approve/disapprove courses whenever required.
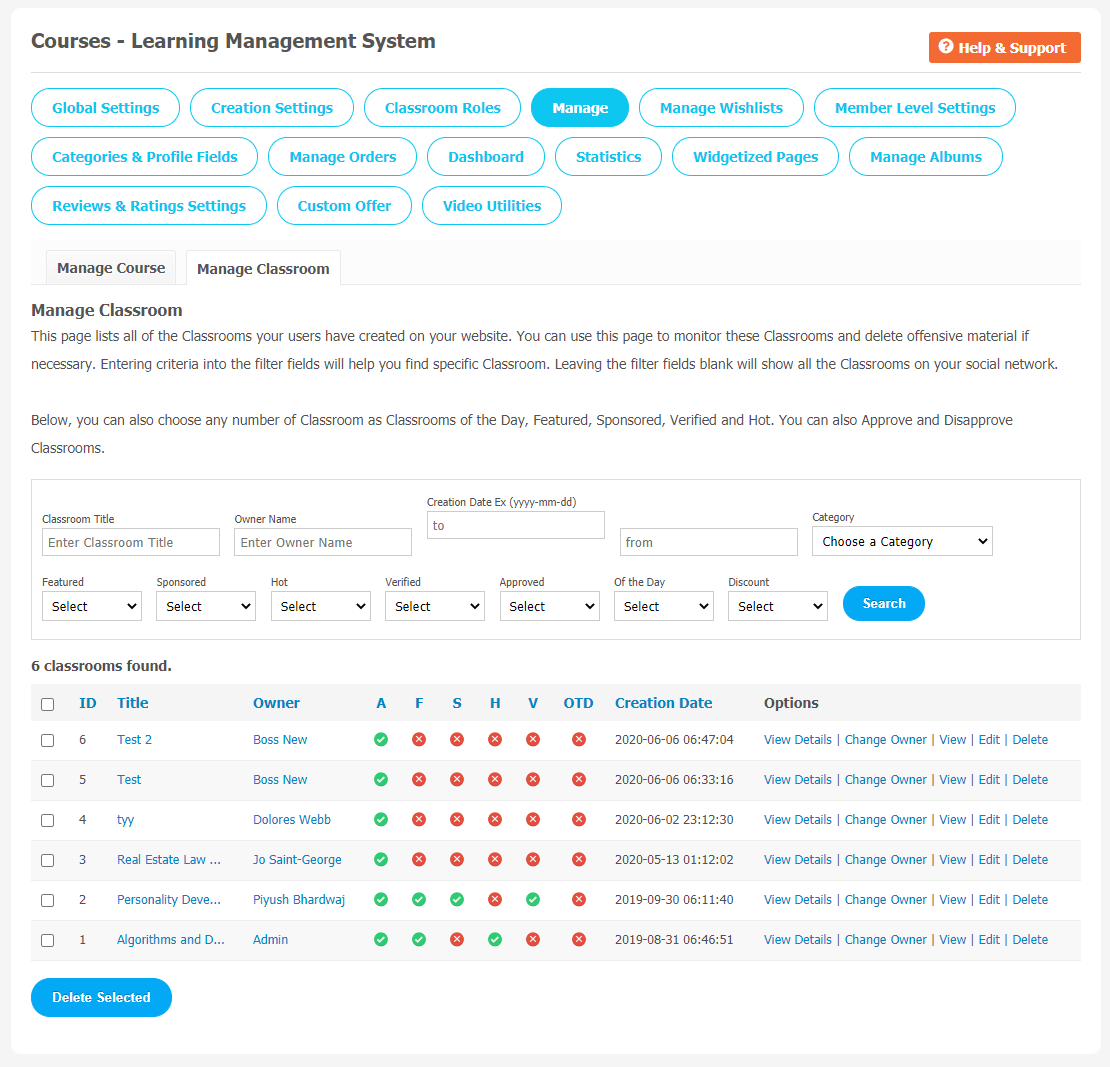
(b) Manage Classrooms
In this page section, all the required Classroom related settings can be configured. You can see all the classrooms here that have been created by your users. If you are looking for a particular classroom, just enter the relevant information in the given search box.
6. Manage Wishlist
You can manage the wish lists your users have created on your website. If you want to delete some wishlists, you are free to delete offensive wishlists. Enter the required information to search for a specific wishlist.

7. Member Level Settings
(a) Courses
This section is used to manage Member Level Settings. Here are some important features of the Plugin that can be managed by the site admin for different member levels are as following:
- Allow Viewing of Courses
- Allow Creation of Courses
- Allow Editing of Courses
- Allow Commenting of Stores
- Allow to upload the Courses Main Photo
- Course Privacy
- Auto Approve Courses
- Enable Background Photo
- Maximum Allowed Courses

(b) Classroom
Similar configurations can be managed for classrooms with different member levels. You can allow viewing, commenting on classrooms, Auto Approve Products, Classroom View Privacy, etc.

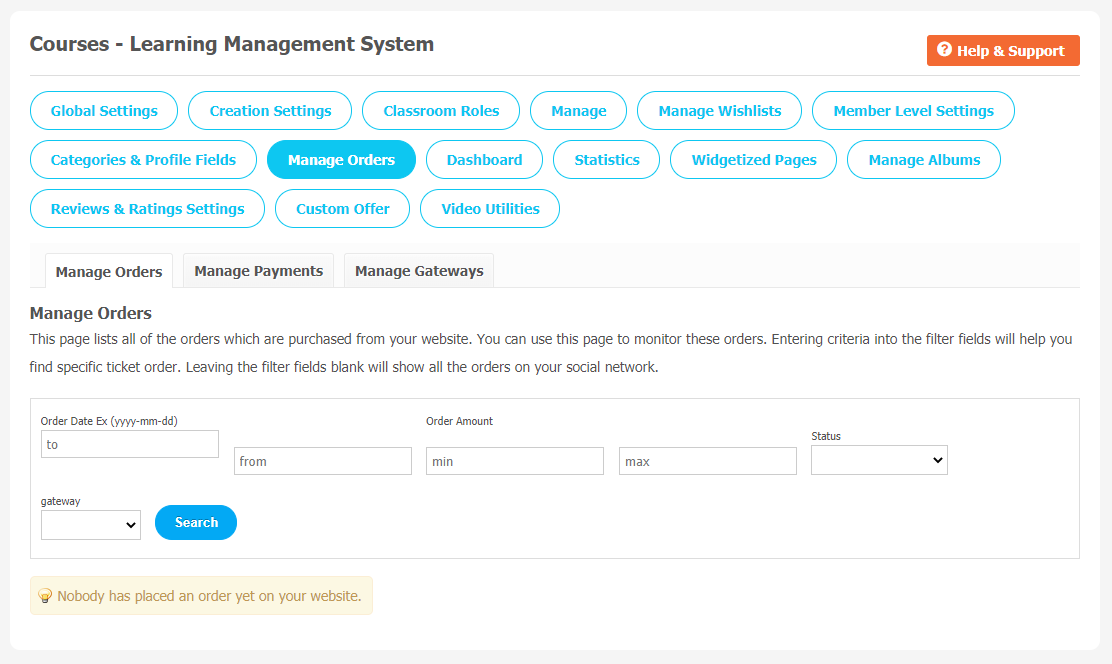
8. Manage Orders
(a) Manage Orders
You can see a list of all the orders that are bought from your website. You can manage and monitor these orders from this page. If you find out a specific ticket order, fill in all the required details in the given search box.
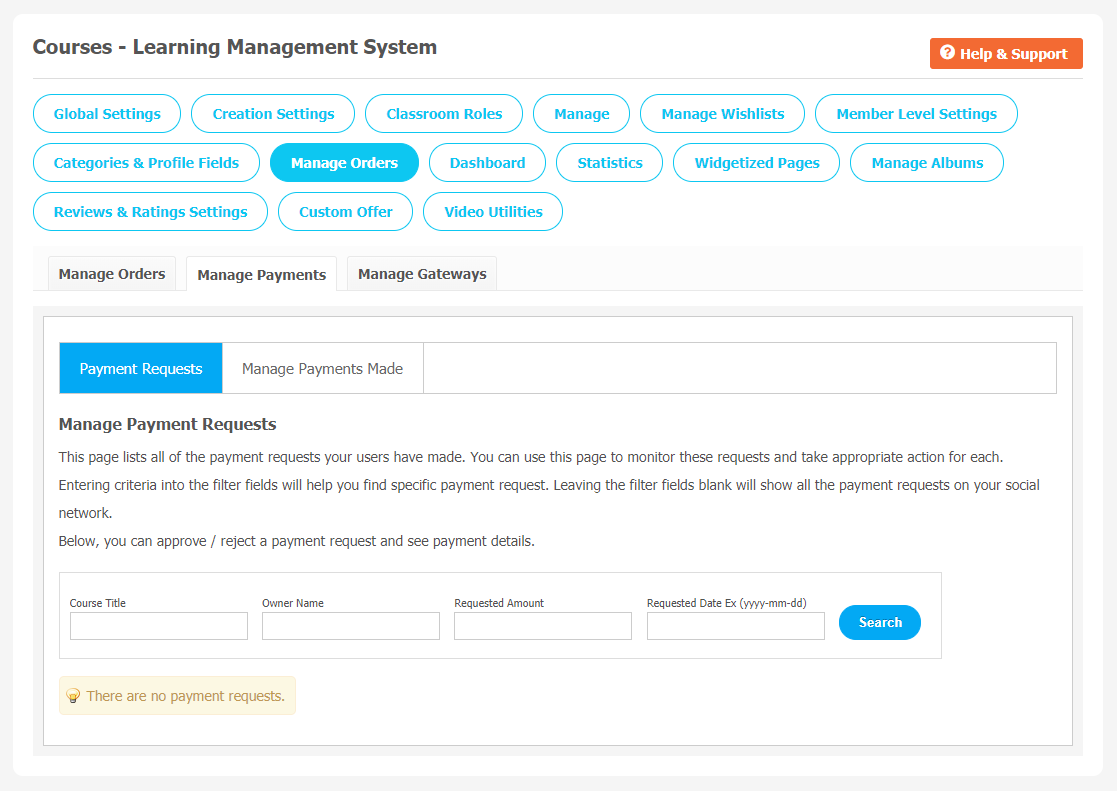
(b) Manage Payments
1. Payment Requests
All the payment requests made by users will be shown here. Manage and monitor these requests from this page. If you find out a specific ticket order, fill all the required details in the given search box. Admin can approve or reject payment requests if they encounter any issue in payment status. He can also use this page to see payment details if required.
2. Manage Payments Made
Here, you will see all of the payment made to course owners on your website.These payments can be managed and monitored from this page. If you find out a specific ticket order, fill all the required details in the given search box.

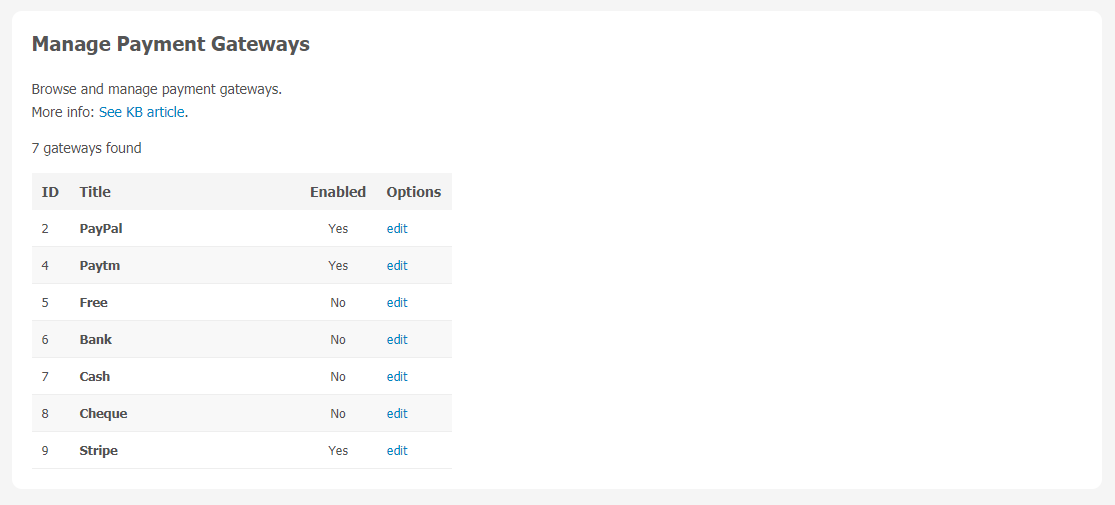
(c) Manage Gateways
You can see all the major payment gateway details here.
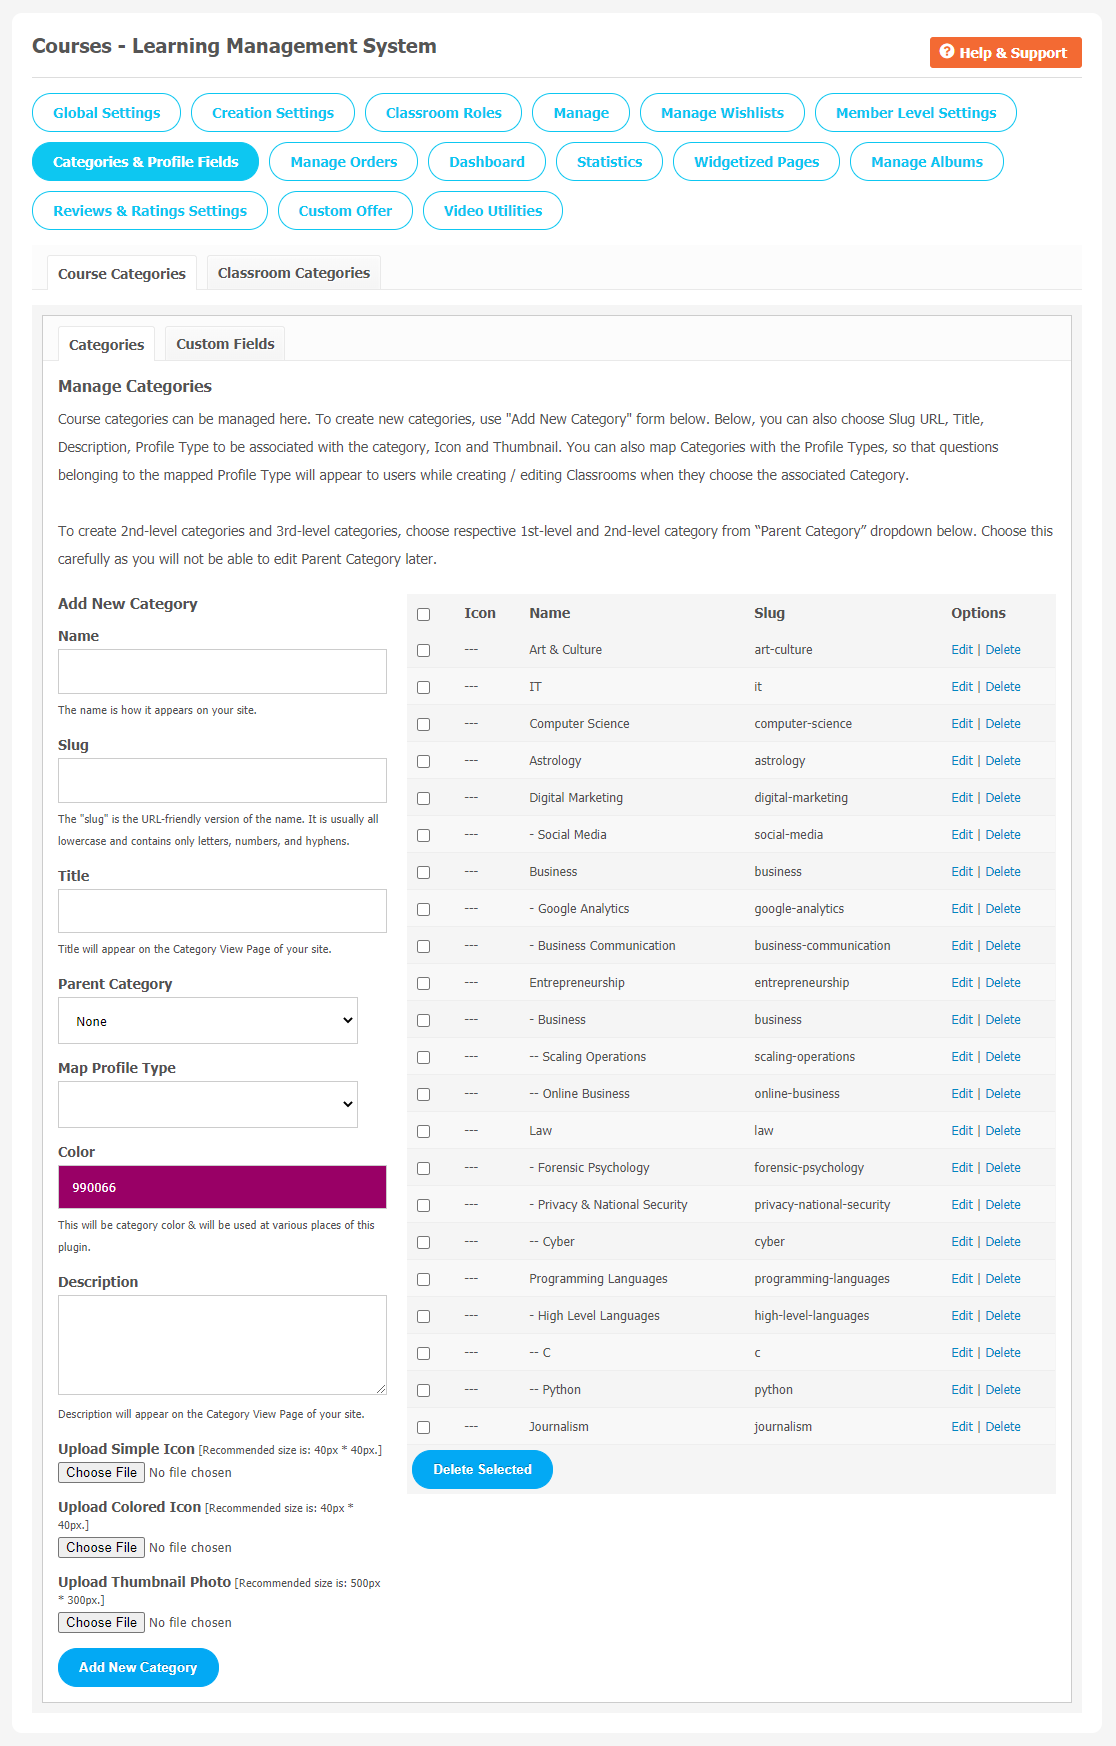
9. Categories and Profile Fields
(a) Course Categories
(1) Categories and Mapping
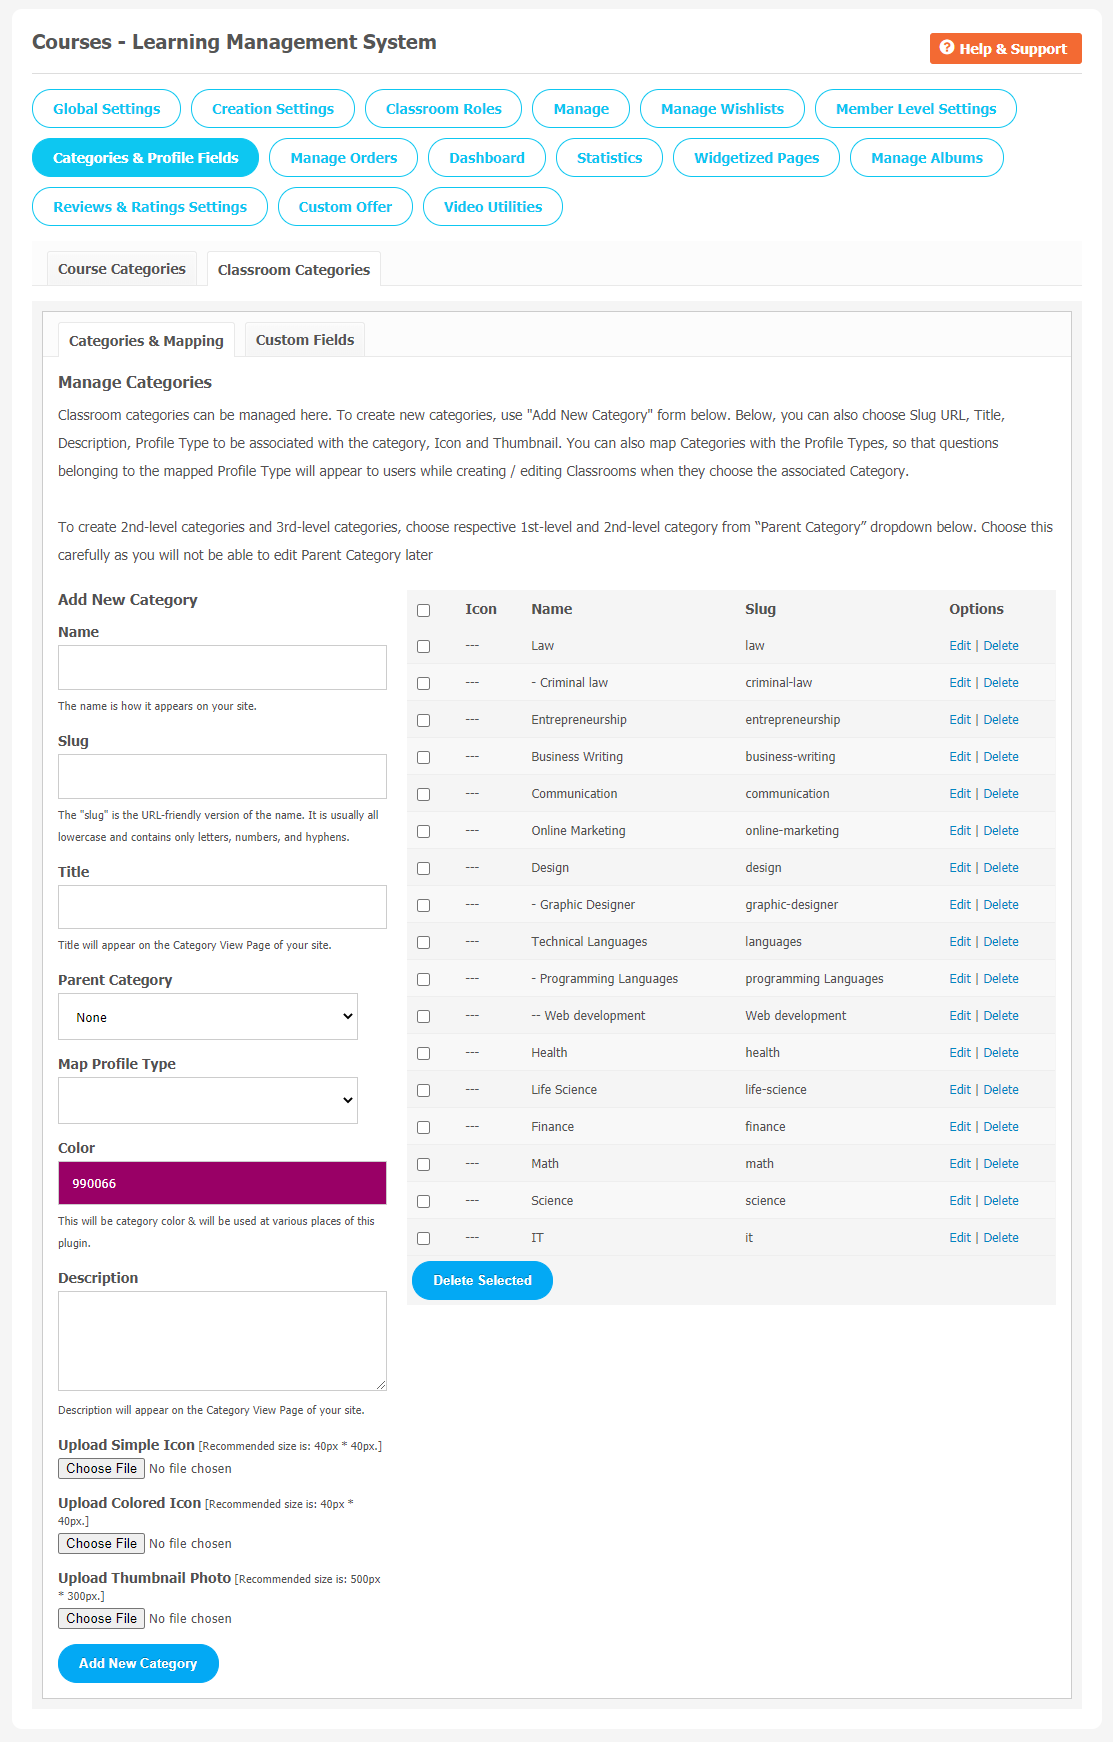
You can create a category for the Courses by clicking on “Add New Category”. You can choose options like Title, Slug URL, Description, Profile Type to be associated with the category, icon and Thumbnail.
(b) Classroom Categories
1. Categories
You can also create classroom categories from this page. You can create a new classroom category by clicking on the “Add New Category” link on this page.
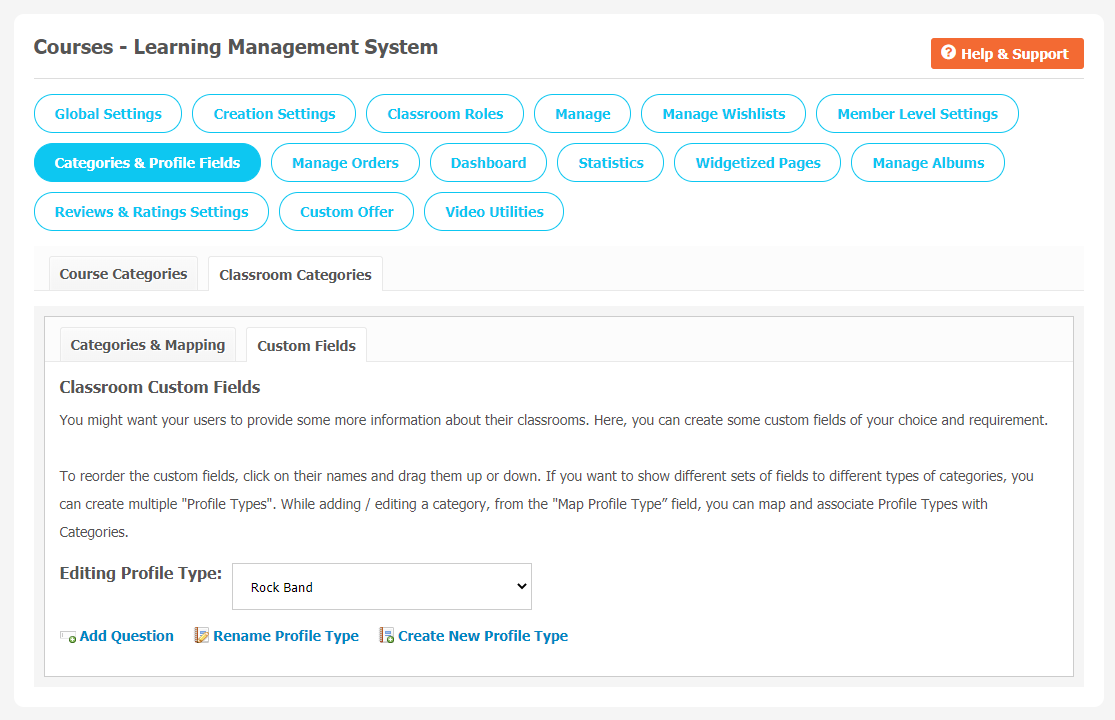
2. Custom Fields
As its name suggests, you can create custom fields about the classroom information for your users. So that your users can provide information about their classrooms.
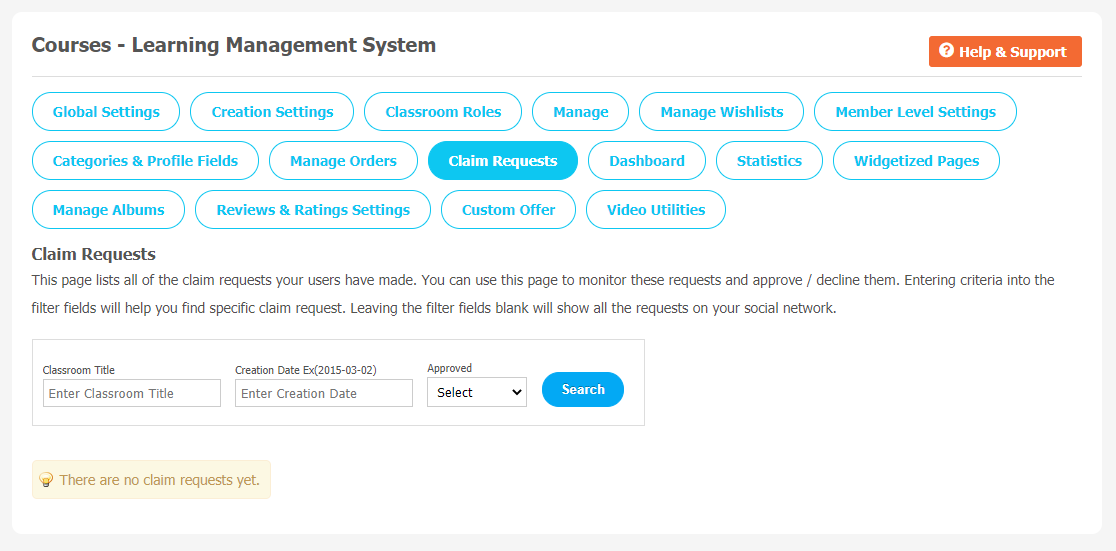
10. Claim Requests
All the data related to the claim requests your users have made is stored here. You can manage and monitor this page by approving/disapproving those claim requests. Enter the required details to find out the specific claim request.
11. Dashboard
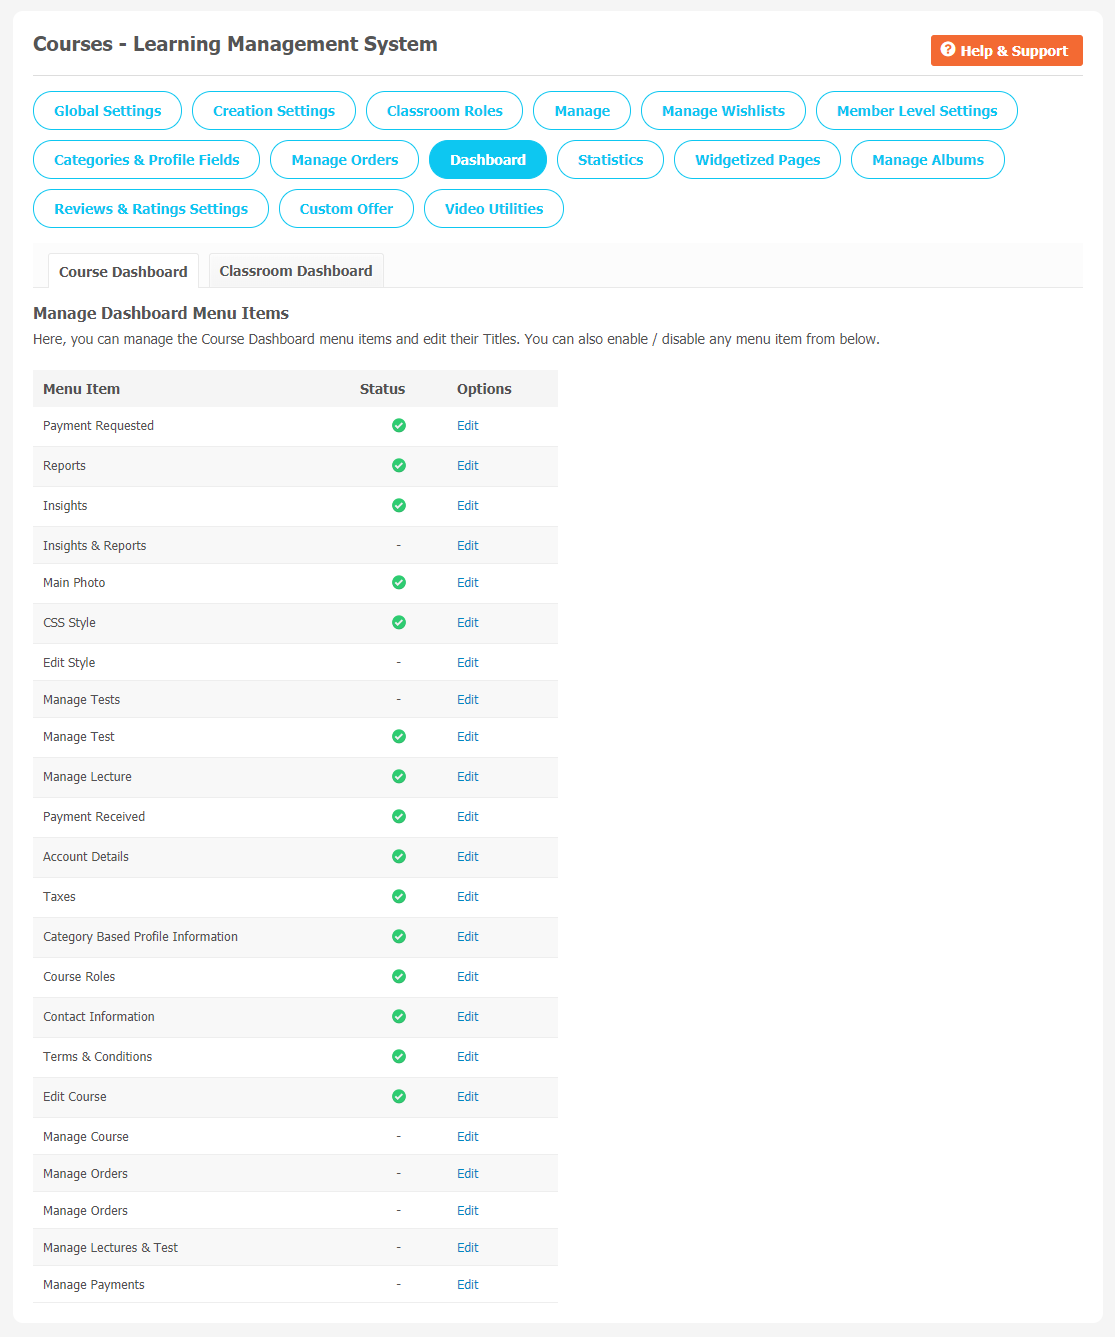
(a) Course Dashboard
Managing the course dashboard becomes very easy with this feature. You can create new items and arrange them into particular categories. You can add or arrange menu items in categories by dragging and dropping them vertically as shown on the page below.
This feature allows you to edit, enable/disable, delete the menu items if necessary. Also, note that the default menu items cannot be deleted. There are few menu items you can manage from this feature like Payment Request, Edit Style, Manage Payments,Edit Course etc.
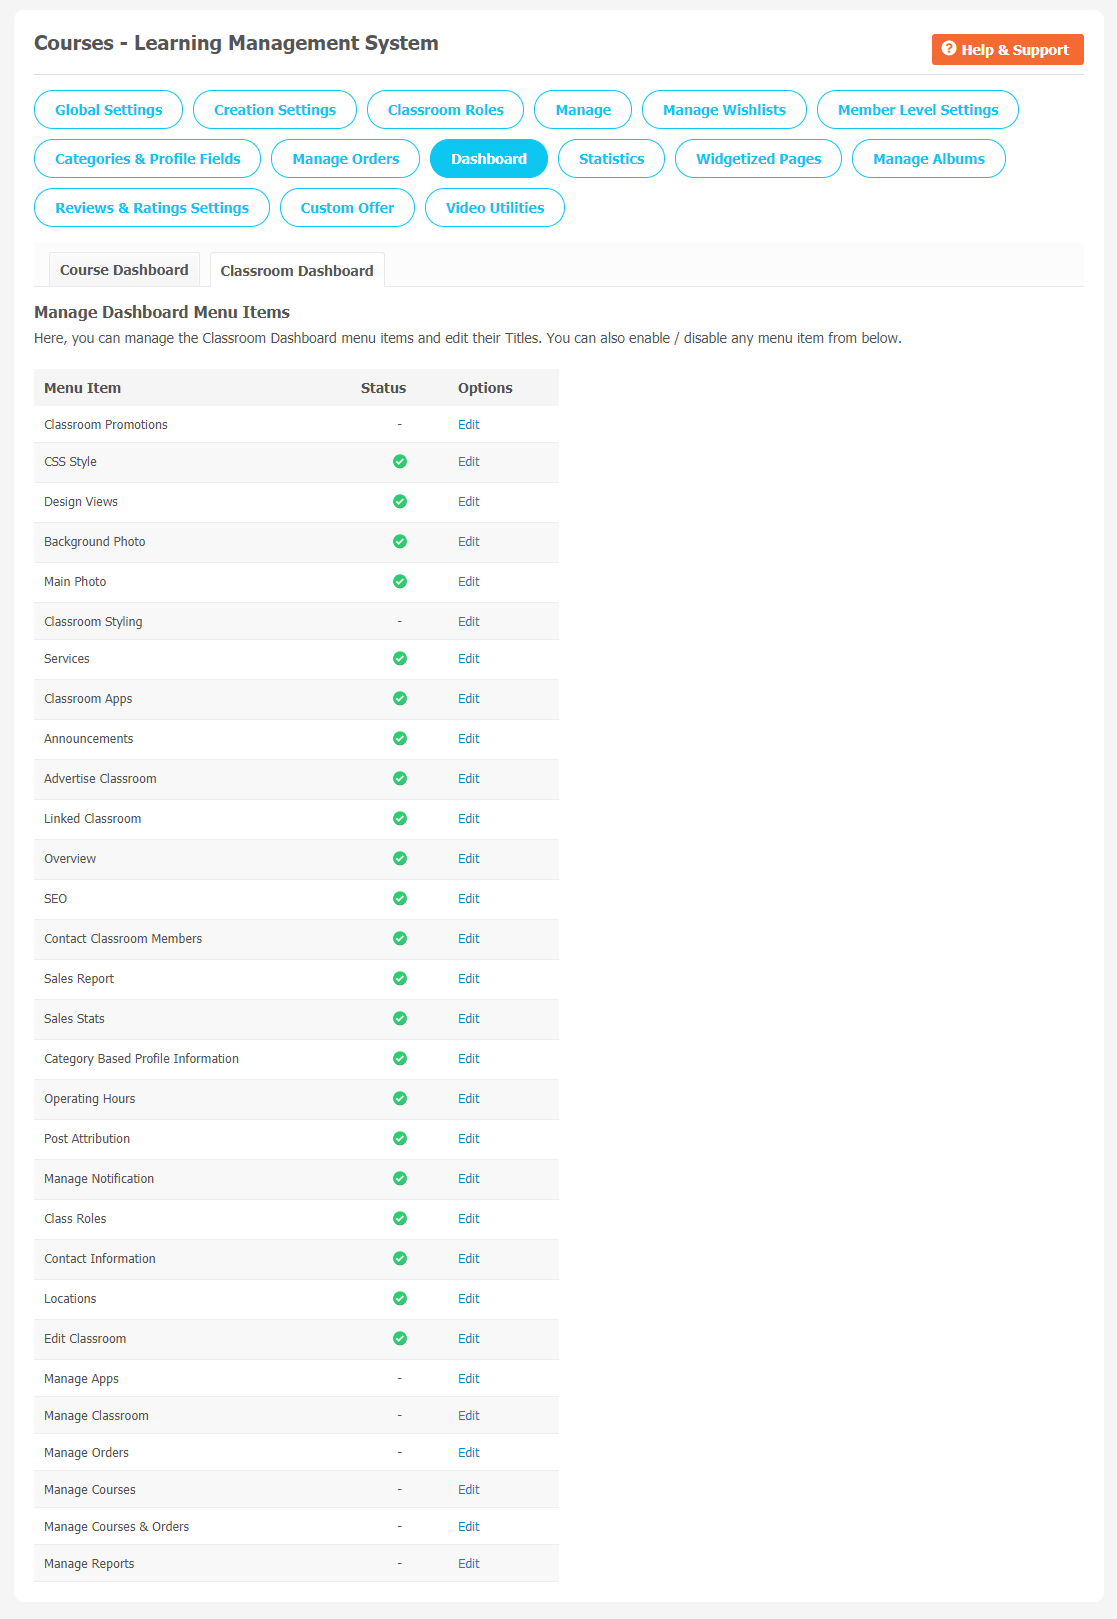
(b) Classroom Dashboard
You can manage the product dashboard items as well from this page. Simple drag and drop the menu items and enable/disable them whenever required. You can edit menu items as per your requirement.
12. Statistics
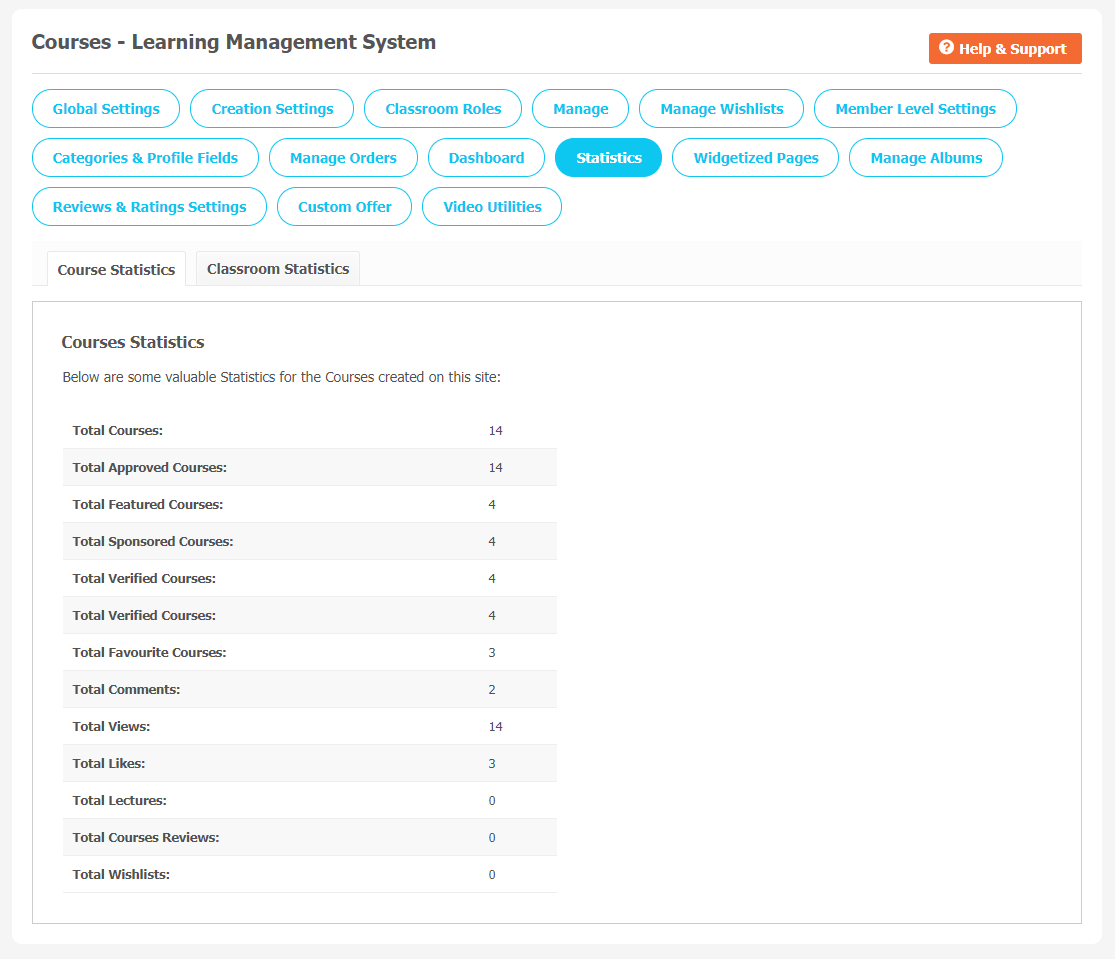
(a) Course Statistics
Statistics help website owners to better understand the important events and activities that are happening on their website. We often require these statistics to track our website performance, too. You can see the list of important Course statistics on this page. Through this page, the admin can track how many total approved courses, featured & sponsored courses, and a total number of followers have been registered with the website.
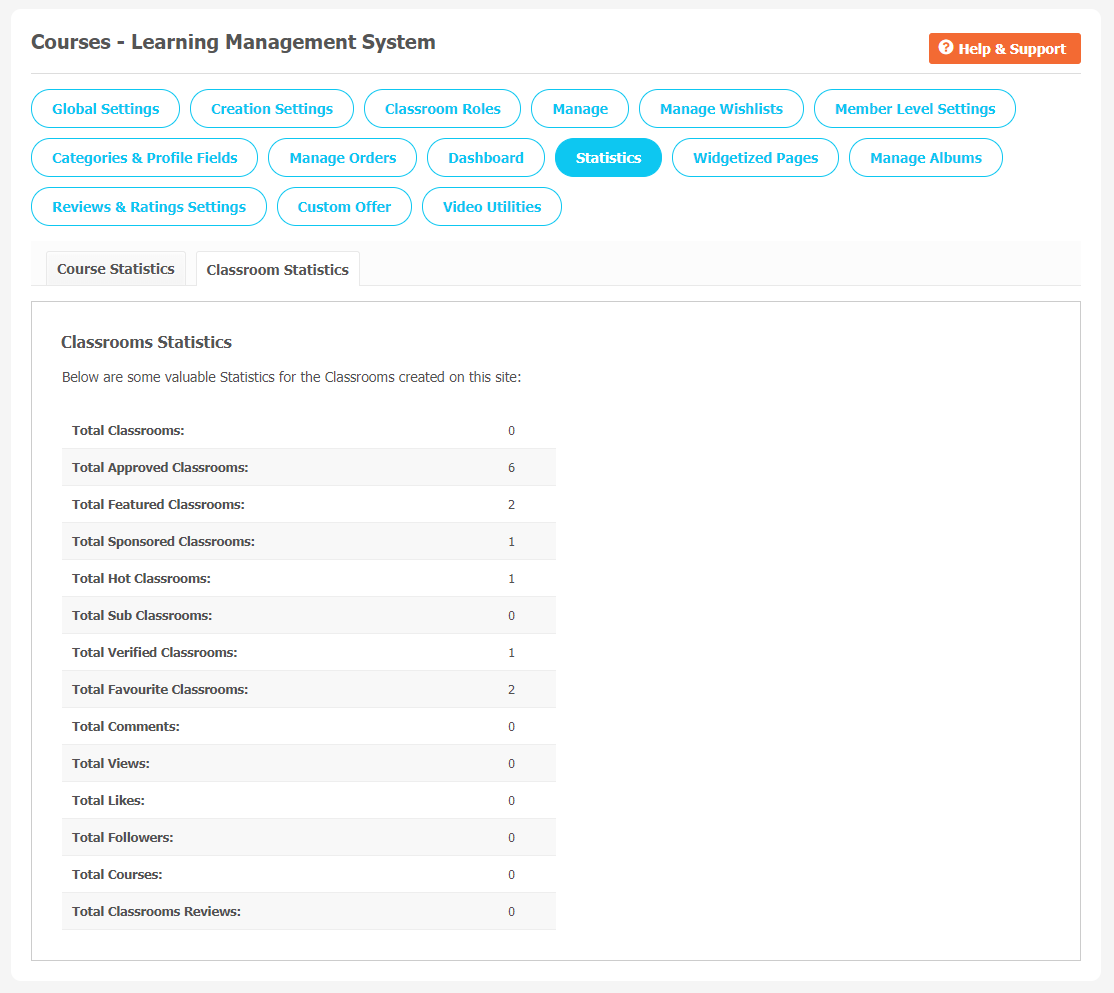
(b) Classroom Statistics
Similarly, you can see useful classroom statistics on this page. How many classrooms have been approved,Total Verified Classroom, total number of reviews for your classrooms etc will appear on this page.
13. Widgetized Pages
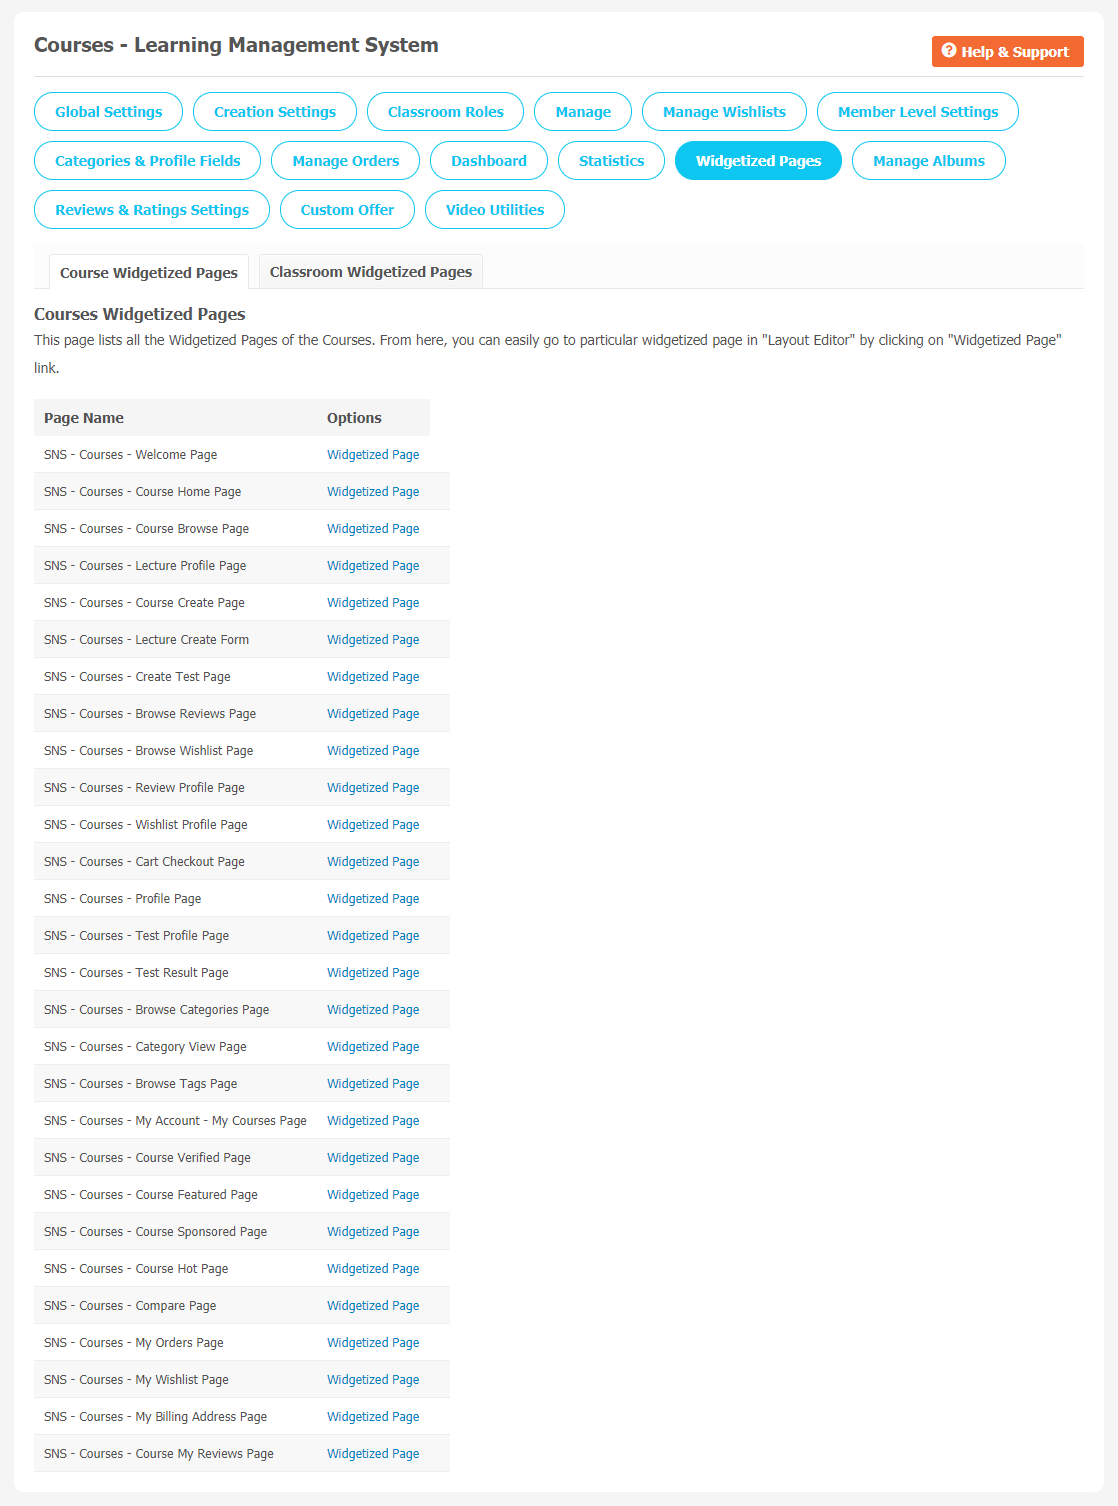
(a) Course Widgetized Pages
All the widgetized pages are shown in this section. You can go to “Layout Editor” by clicking on the respective Widgetize Page Link.
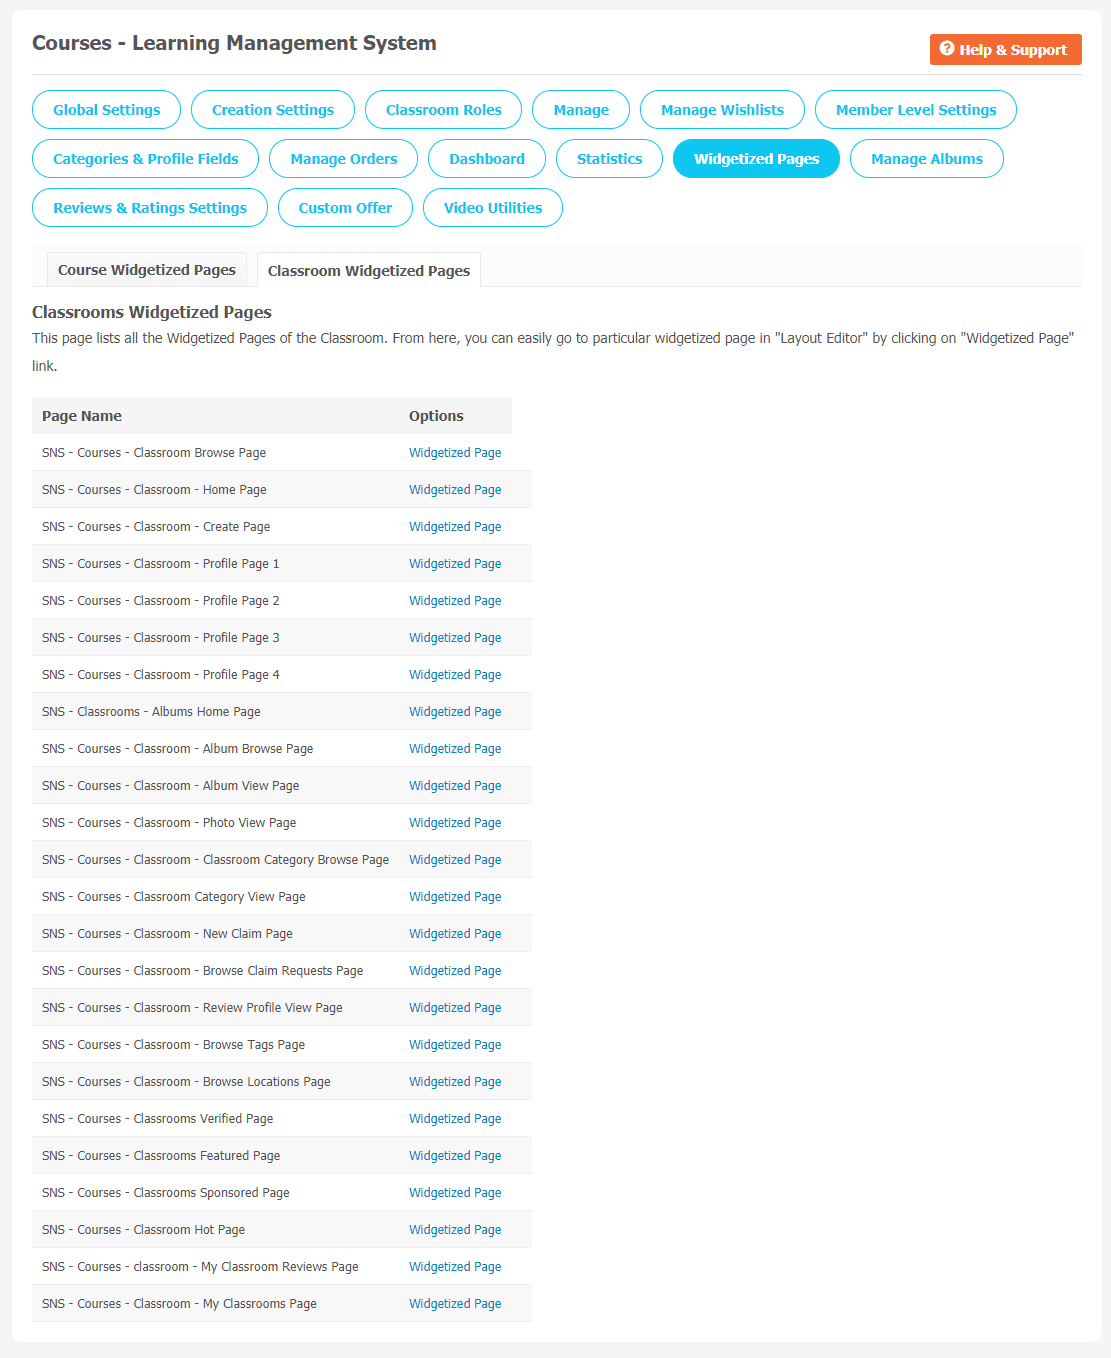
(b) Classroom Widgetized Pages
This works the same as Classroom Widgetized Pages.
14. Manage Albums
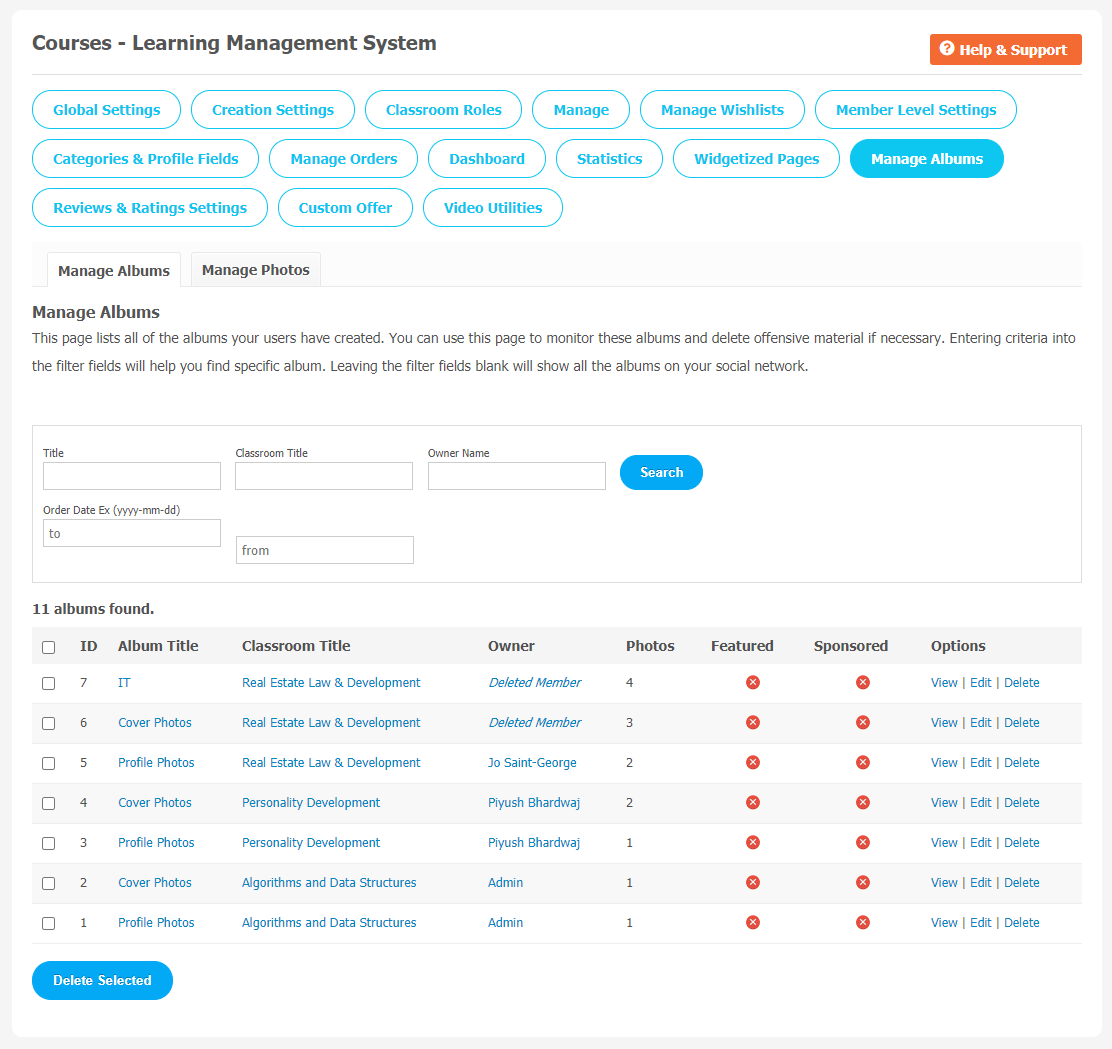
(a) Manage Albums
You can manage and monitor all the albums your users have created from this page easily. Enter the information as per required fields and you can find out specific albums.
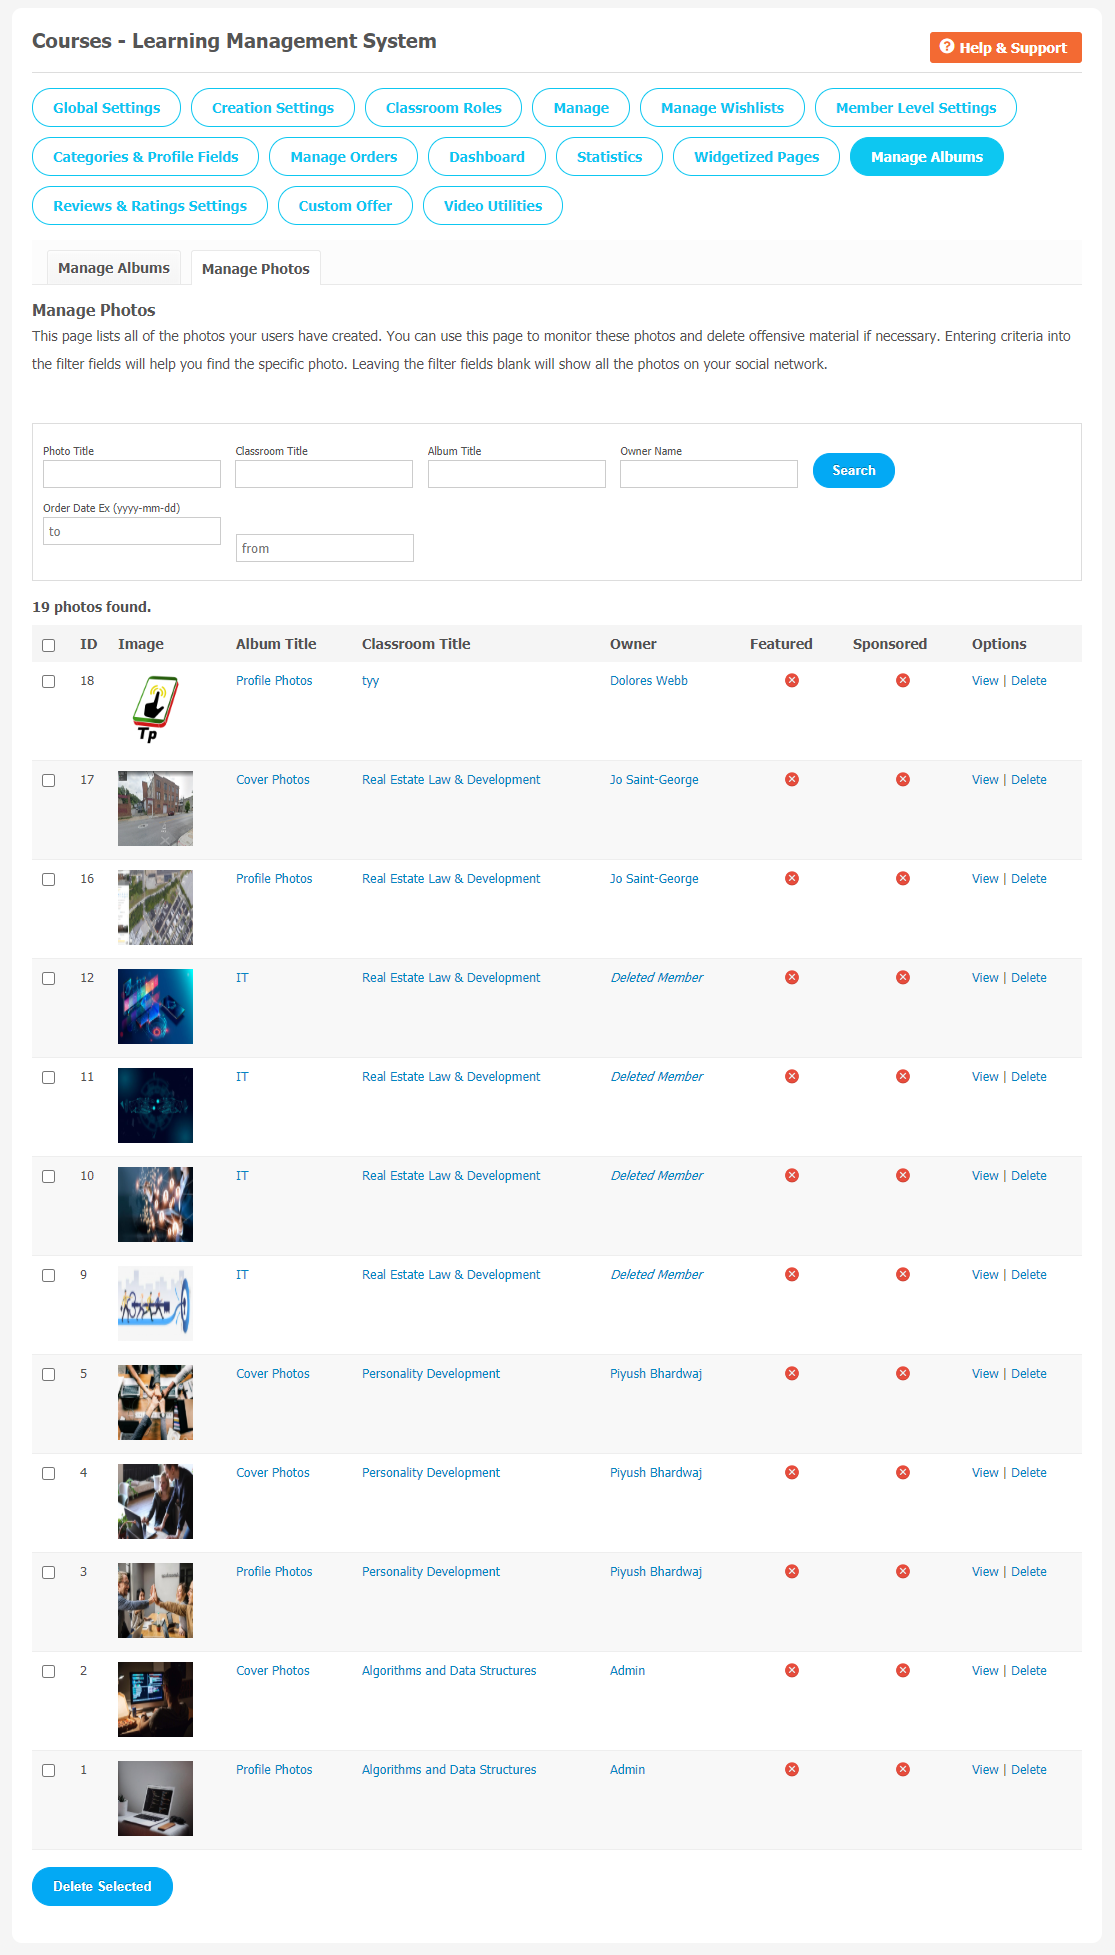
(b) Manage Photos
You can manage and monitor all the photos your users have created from this page easily. Enter the information in per required fields and you can find out specific albums. You can delete these photos if you find them violating your platform guidelines.
15. Review and Rating Settings
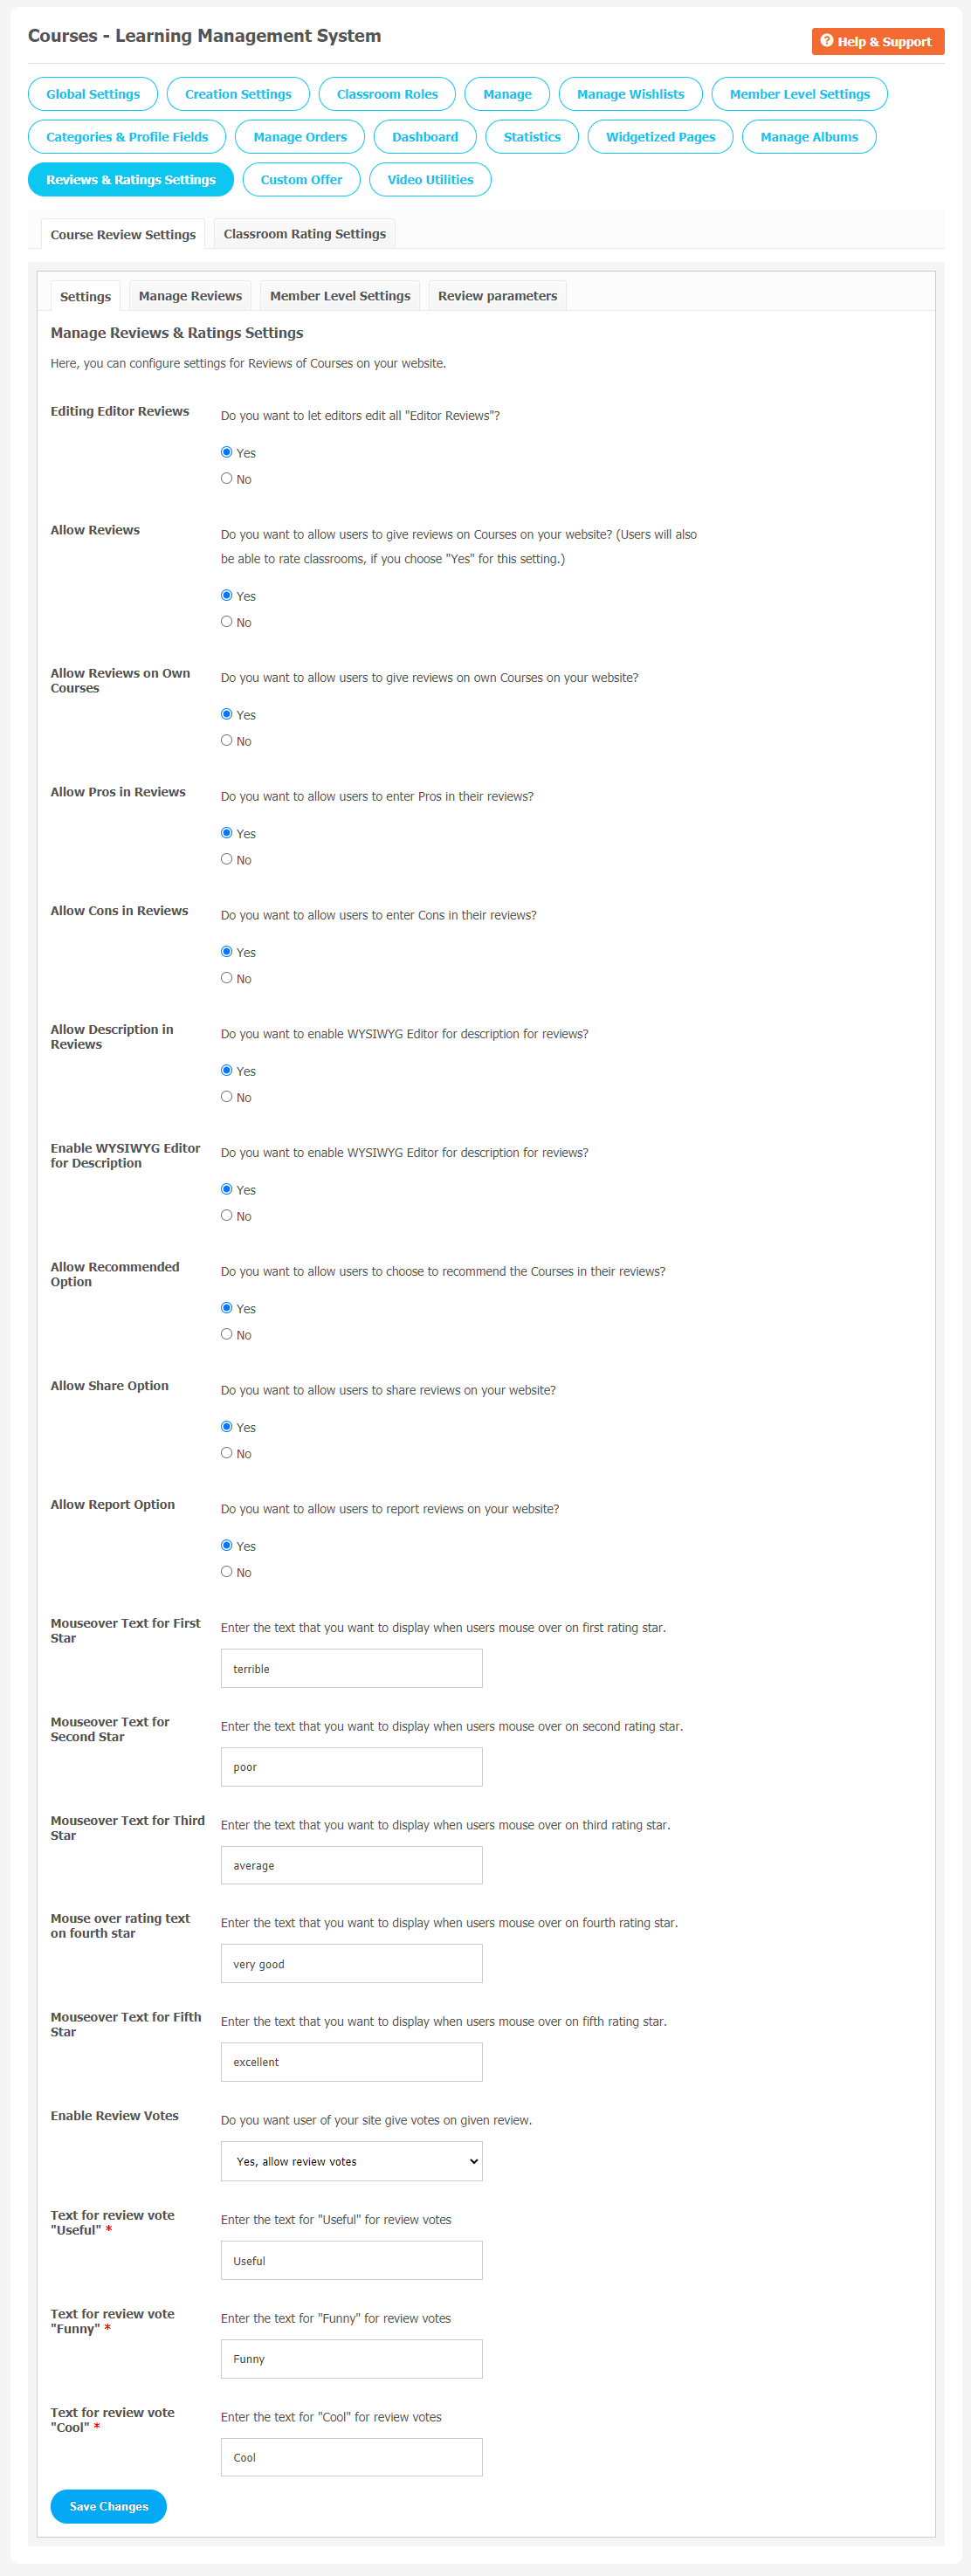
(a) Course Review & Rating Settings
(1) Settings
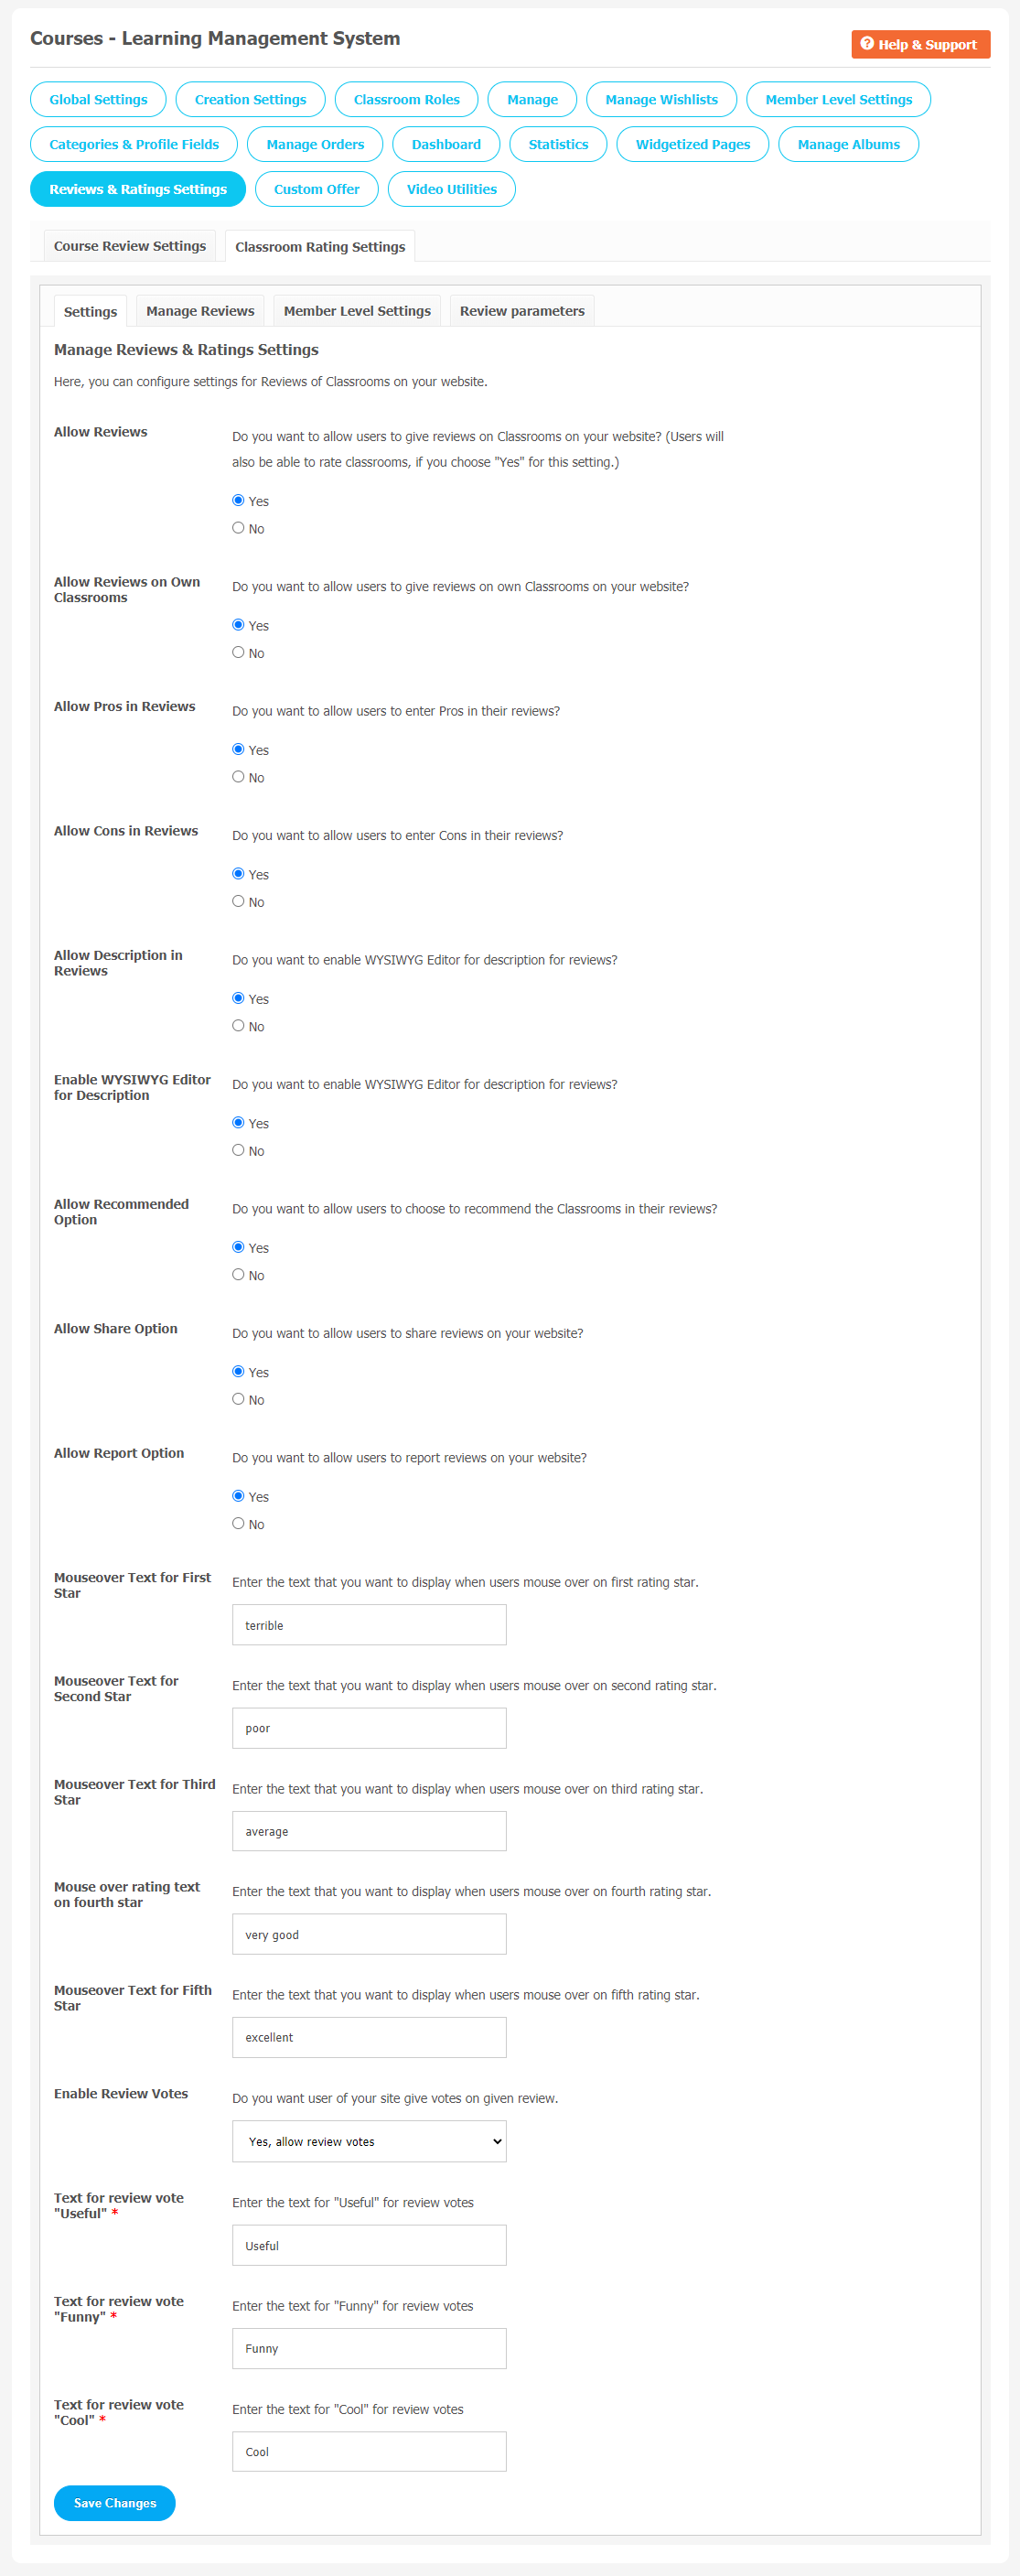
This section lists the settings for the review. These settings include
- Editing Editor Reviews
- Allow Reviews
- Allow Reviews on Own Courses,
- Allow Pros in Reviews
- Allow Cons in Reviews
- Allow Share Options and much more..
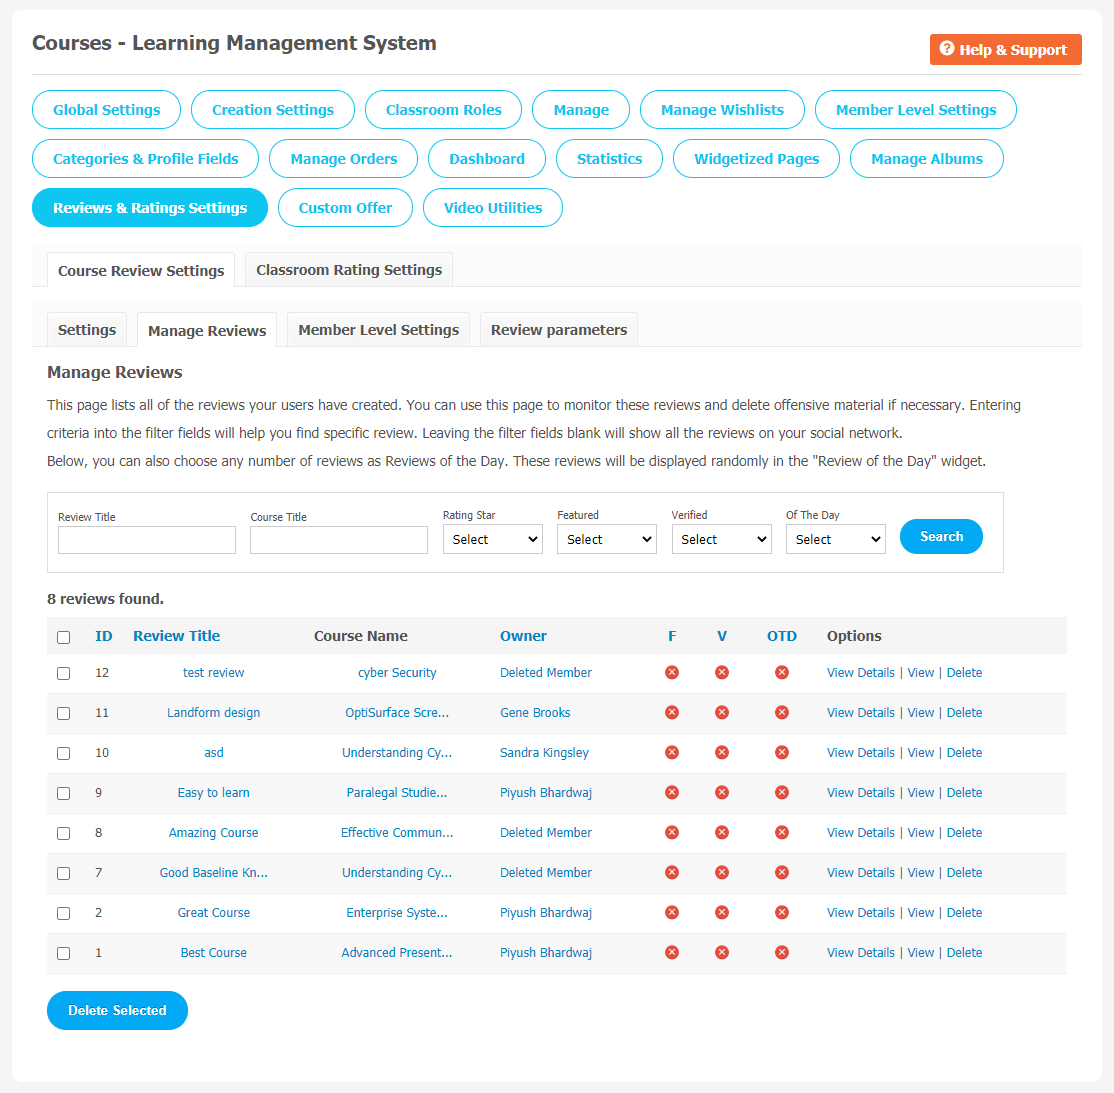
(2) Manage Reviews
In this section, you can manage various reviews that have been created so far. You can delete the reviews that you find incorrect/offensive. Here you can search for any reviews by filling various fields like Review Title, Course Title, Creation Date, Rating Star, etc.
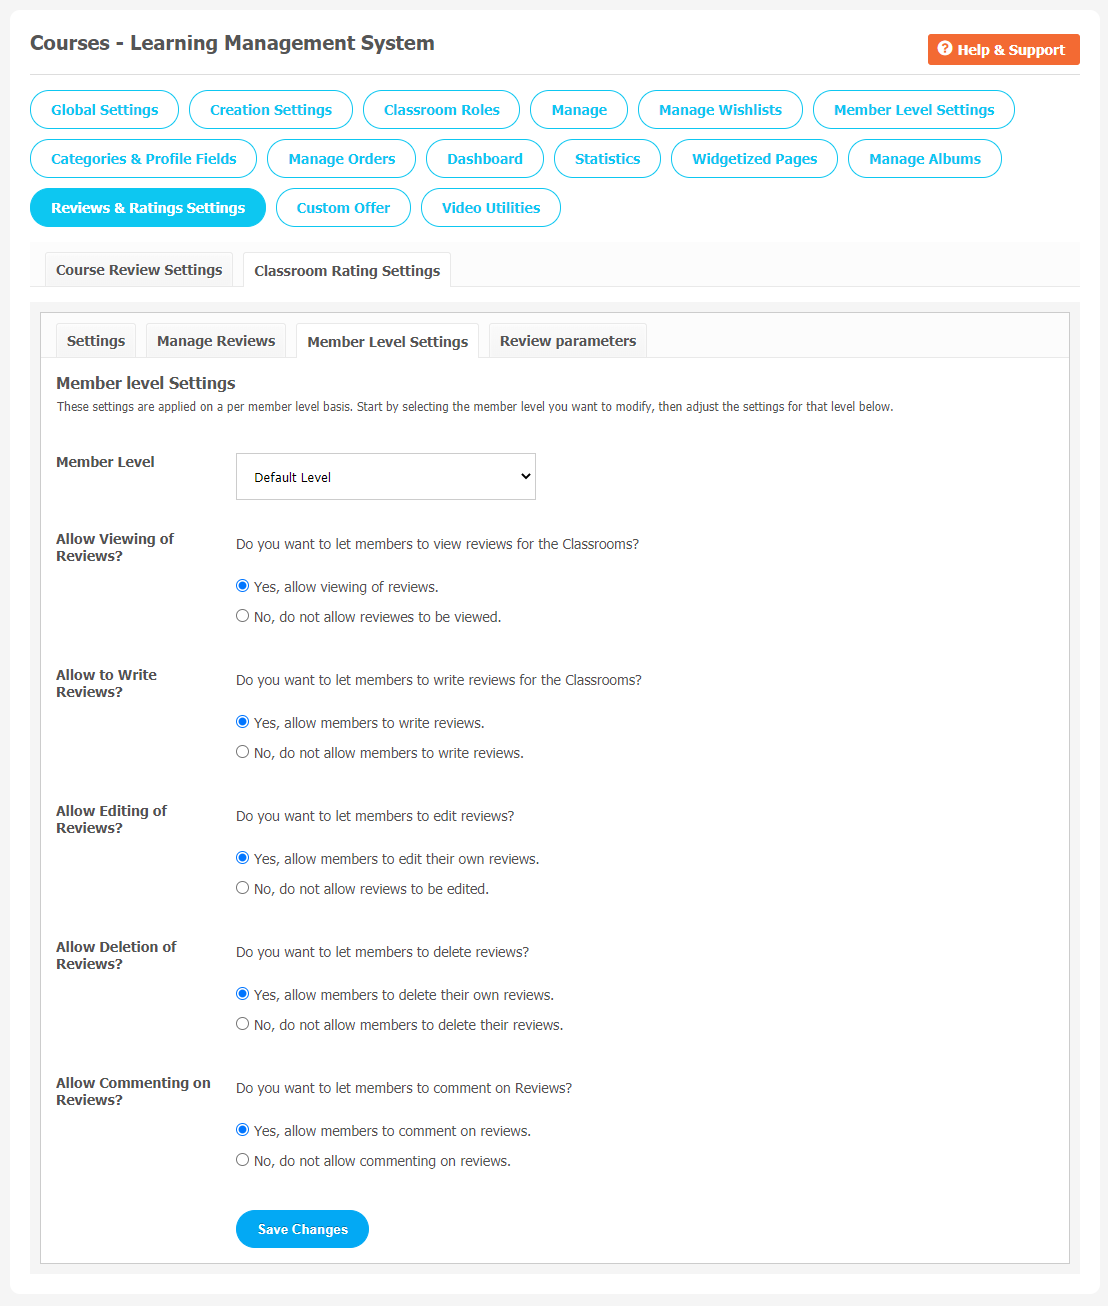
(3) Member Level Settings
These are the settings that are based on the different member levels configured by the admin of the site. These settings allow you to view, write, edit, delete, and comment on the reviews.

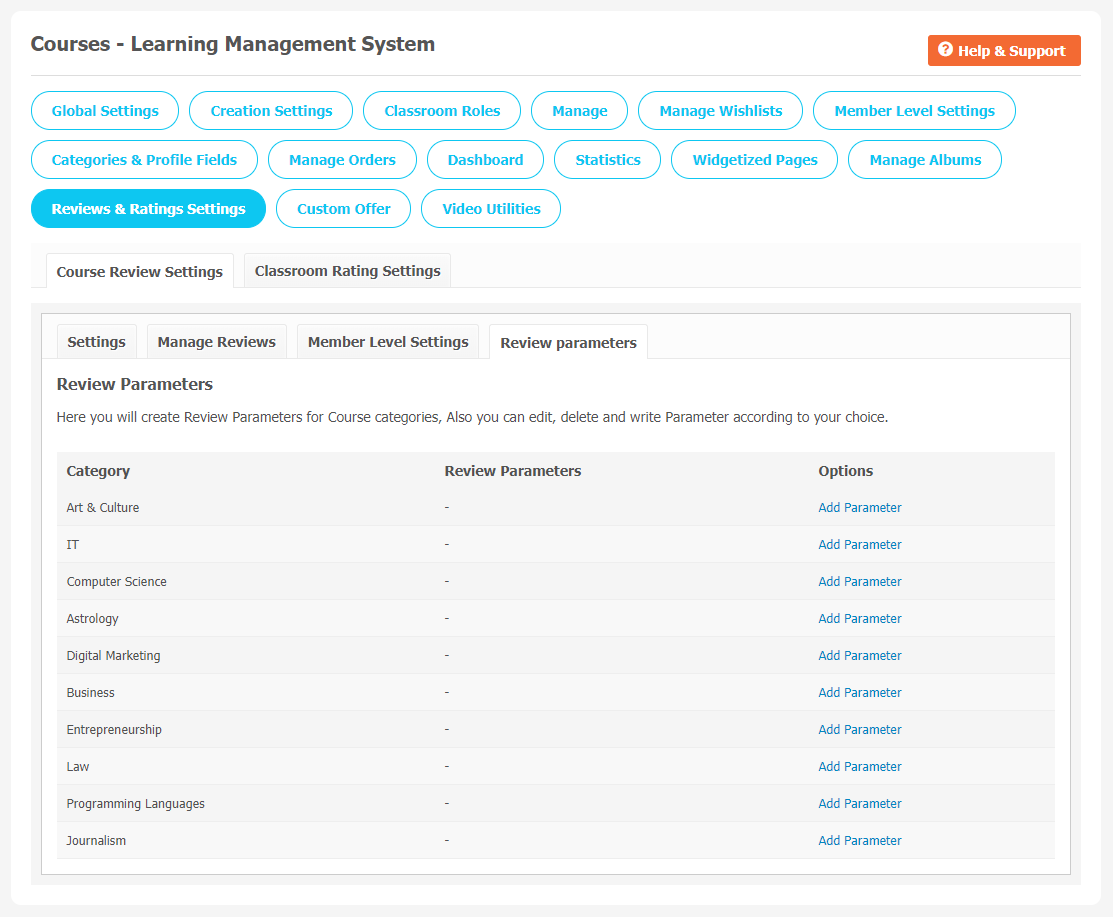
(4) Review Parameters
Under this section, you can add the parameters for the given reviews to the different profile types. In this page, all the events categories created by users are stored here.
(b) Classroom Review & Rating Settings
(1) Settings
This section lists the settings for the review. These settings include
- Allow Reviews
- Allow Reviews on Own Classrooms,
- Allow Pros in Reviews
- Allow Share, Report, and Recommended options.
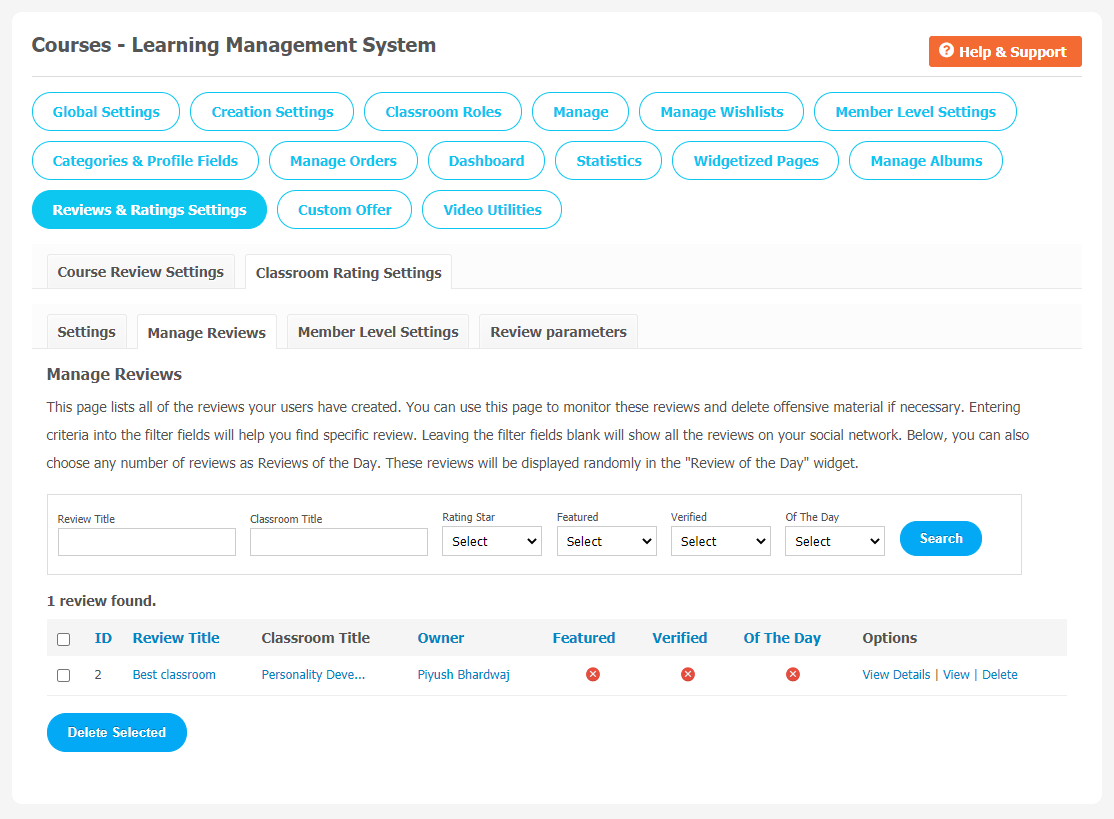
(2) Manage Reviews
In this section, you can manage various reviews that have been created so far. You can delete the reviews that you find incorrect/offensive. Here you can search for any reviews by filling various fields like Review Title, Classroom Title, Creation Date, etc.
(3) Member Level Settings
These are the settings that are based on the different member levels configured by the admin of the site. These settings allow you to view, write, edit, delete, and comment on the reviews.
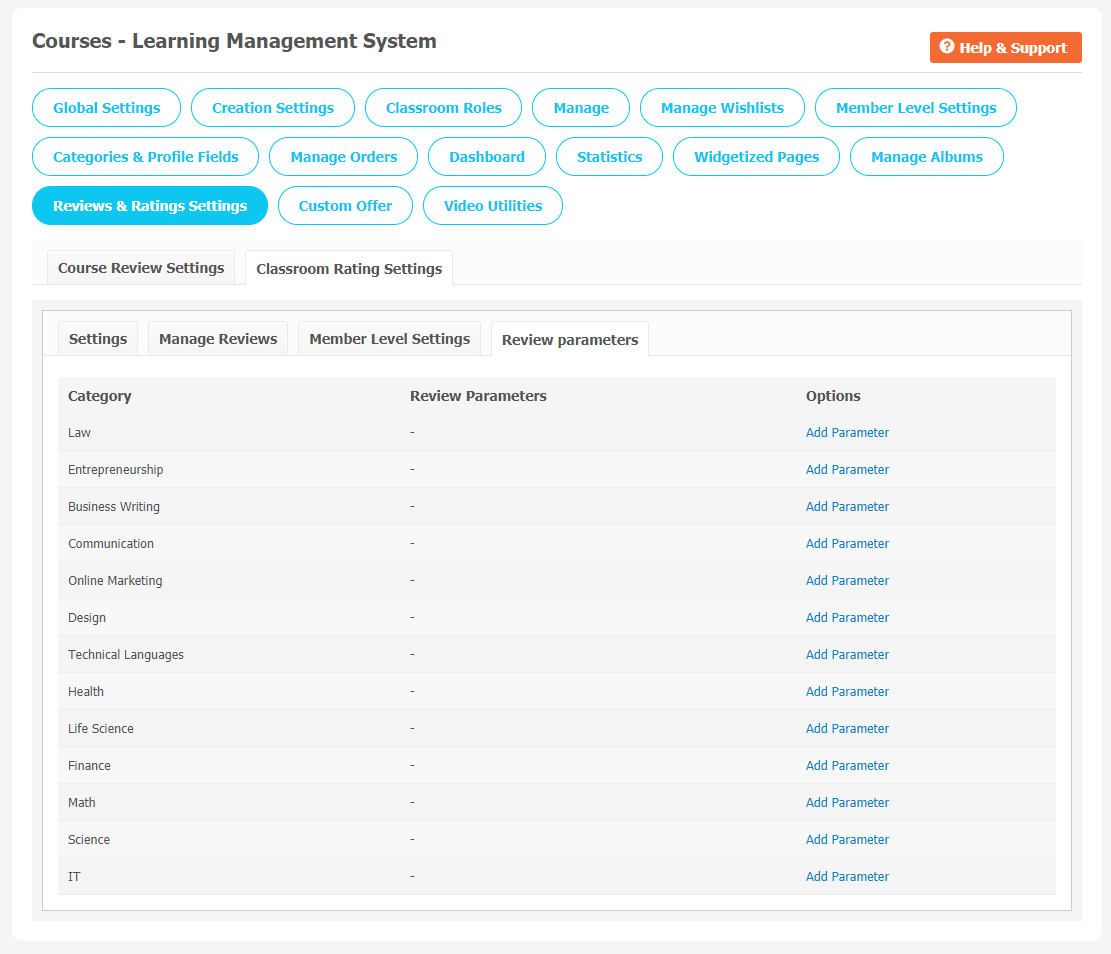
(4) Review Parameters
Under this section, you can add the parameters for the given reviews to the different profile types. In this page, all the events categories created by users are stored here.
16. Custom Offer
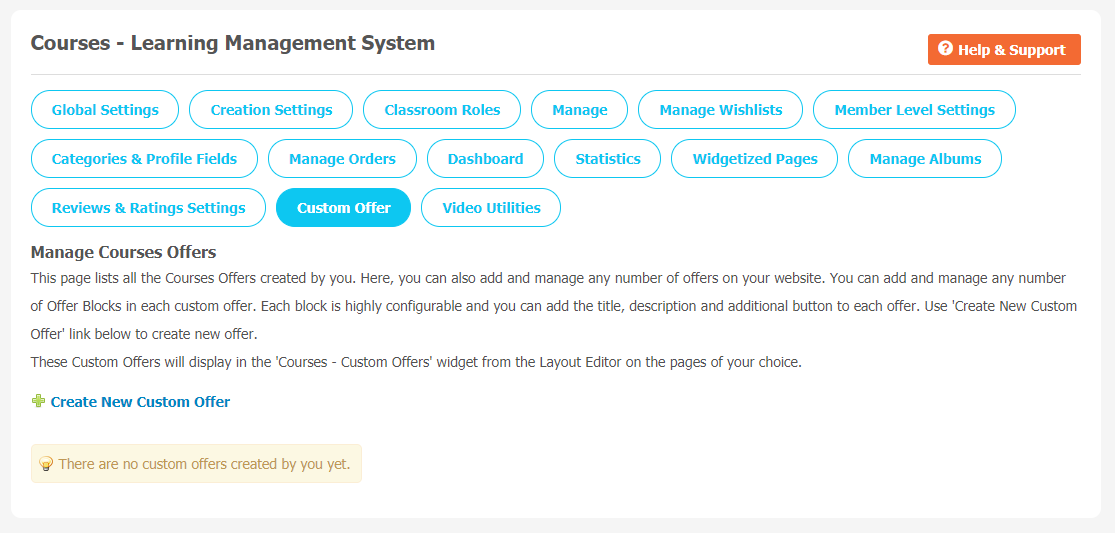
Custom offers are useful for your website. You can see all the custom offers created by you on this page. You can place these offers on the landing page or any widgetized page of your choice.
Any number of offer blocks can be managed in every custom offer. You can configure every block and add the required title, description, etc., if you want to create a new offer, then please click on the “Create New Custom Offer” link.
You can see these custom offers in the “Courses-Custom Offers” widget from the layout editor on the page of your choice.
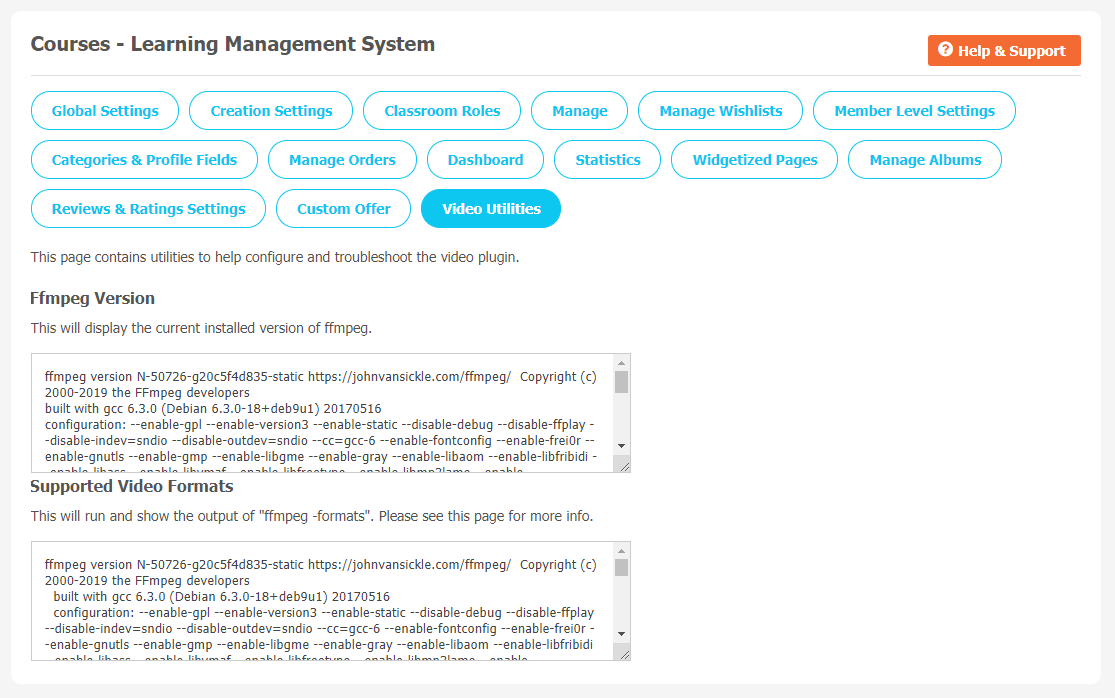
17. Video Utilities
You can use this page to configure and fix the video plugin with the help of the given utilities.
Finally!! You have completed the installation procedure and also explored various exciting features of this Courses-Learning Management System Plugin. Now, your visitors and website members will be able to access & use your website with new awesome features.
Installation of this plugin is very easy, but if you still need our expert to install this Plugin for you, then you can purchase the service by Clicking Here.
Watch Video


