Nowadays, people are calling less and texting more. The same goes for your community users, too. Many recent surveys claimed that around 76% of young adults prefer to interact with companies via texting. Texting is a more effective and less distracting means of communication. If you own a SocialEngine-based website, you can offer them a Professional Messages Plugin so that they can communicate with each other more effectively and instantly.
Professional Messages Plugin is a simple but wonderful Message tool for your SocialEngine website platform for easy communication between users. Text has higher engagement potential than any other communication medium. This plugin offers a Better User Interface & Message Management, Quick Message Response, the Most Powerful Admin Panel, and much more exciting things to do. Take a quick look at its most popular features listed below.
Key Features
- Configurable Messages
- Group Messaging
- Multi-Media Type Supported
- Integration with GIPHY
- Multiple Photo Upload
- Message Page Settings
- Search users via auto-suggestion
- User-Based Messaging
- Last Seen Visibility
- Online Status, Clear Chat & Block Users
You can click on the Live Demo Link of this plugin.
Here, we are providing an interactive and easy-to-follow Professional Messages Plugin setup and installation guide that will help you use and configure it properly on your website and maximize its efficiency by showcasing its exciting features. With this help guide, you will get a better sense of usage when you actually install this plugin on your website.
Installation of this plugin is straightforward, but if you still need our expert to install this plugin for you, then you can purchase the service by clicking here.
Step-by-Step Installation & Tutorial Guide:
** This tutorial assumes that you are already logged in to the Admin Panel.**
If not, then you have to log in first to the admin panel after filling the admin account credentials on your website.
1. Installation of Professional Messages Plugin:
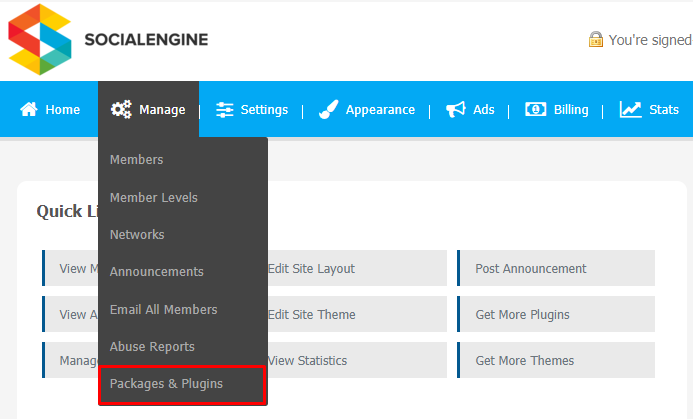
a) In the Main Menu section, click on the tab Manage and select “Packages & Plugins” to install this plugin.
2) Our Plugin is based on SE standards, so this will get installed on your website as any standard plugin can. Please read the tutorial on installing themes and plugins in SE: Click Here
3) After the successful installation of the plugin as in Step 2 above, under the plugins section, click on “Professional Messages Plugin“.
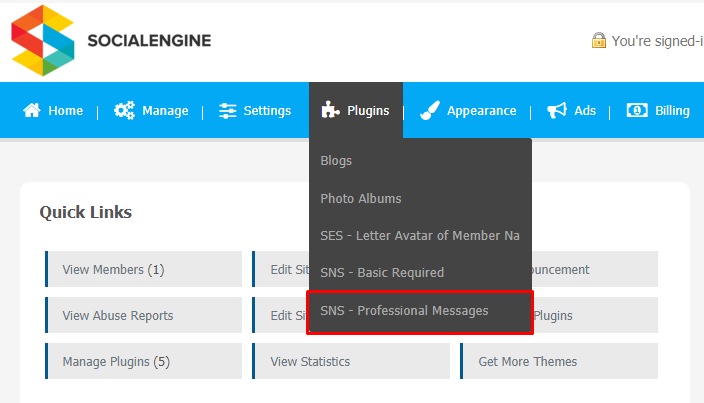
Once you click on this plugin, the link will redirect to a new page where you will be asked to enter the license key. You must enter the right license key to activate this plugin.
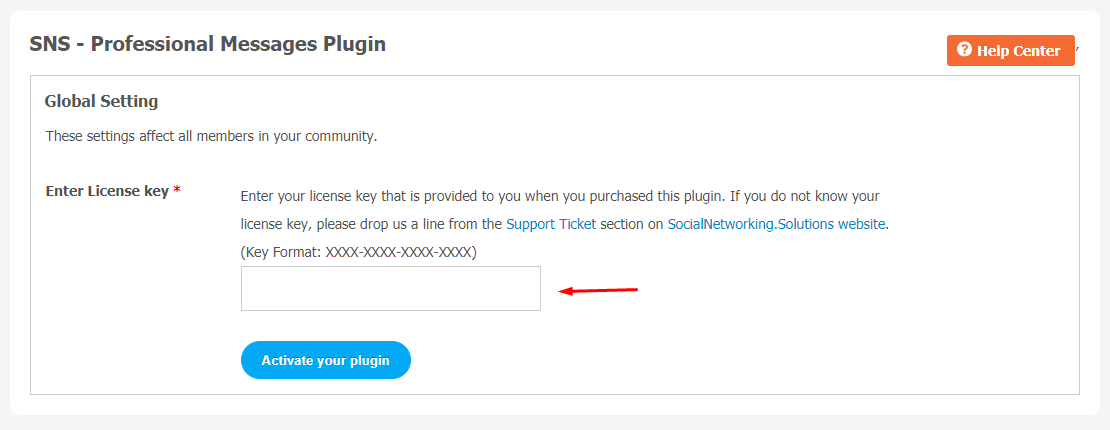
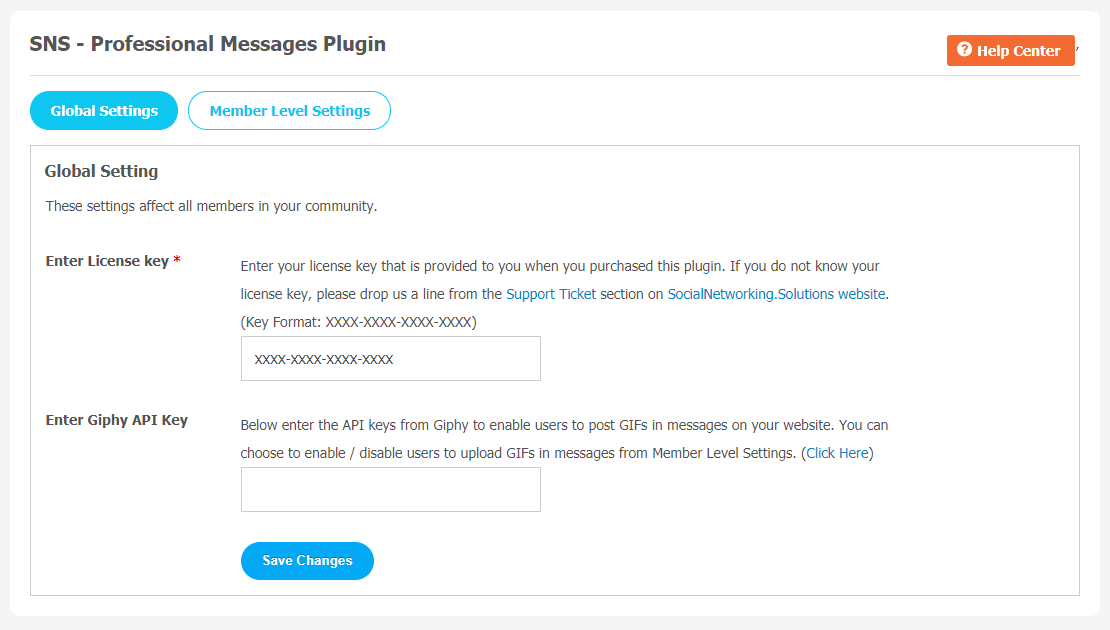
2. Global Settings
Activate this plugin from the Global Settings section of this plugin. In this section, you can enable/disable the various settings for the different fields, like
- You can enter Giphy API Key. You can also enable/disable your users to upload GIFs in messages from Member Level Settings.
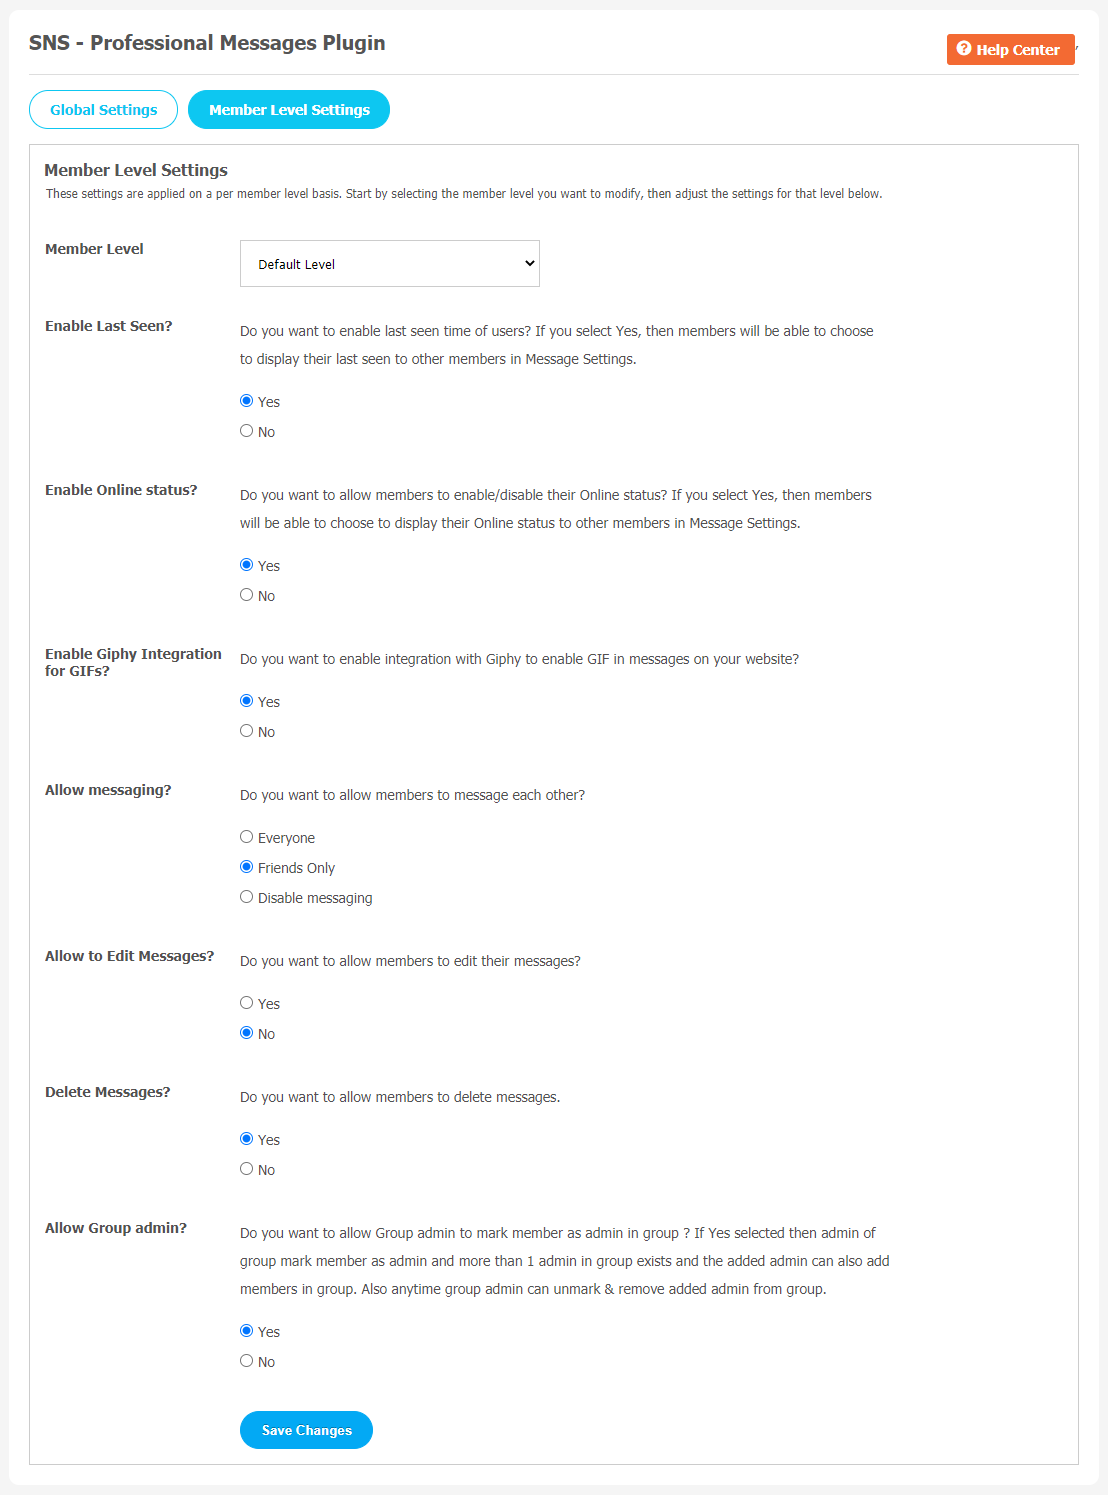
3. Member Level Settings
These are the settings which are based on the different member levels configured by the admin of the site. With the help of this page, you can allow your site member to use specific features of this plugin.
- You can enable/Disable Last Time for Users.
- Enable Online Status
- Enable Giphy Integration for GIFs
- Allow Messaging
- Allow editing of Messages
- Delete Messages
- Allow Group Admin to mark members as admin in group.
Finally!! You have successfully completed the installation procedure and also explored various exciting features of Professional Messages Plugin. Now, your visitors and website members will be able to access & use your website with some new multipurpose features.
Installation of this Plugin is straightforward, but if you still need our expert to install this Plugin for you, then you can purchase the service by clicking here.


