Blogging is one of the most effective ways to draw traffic to your website and boost your SEO. If you post more blogs regularly, the more content the search engines have to crawl and index. Advanced Blog Plugin provides advanced features for writing blogs on your websites – custom Publish date, custom URL for blogs, location, multiple photo upload, reviews, etc. With the option to change text Blog and URL to any other texts of your choice, you can use this plugin for Articles, News, Classified, etc. You can also enable/disable all the features from the admin panel to make complete use of the plugin.
Unique and attractive 10 different views of blogs will enable you to highlight and showcase blogs easily on your website. Also, it has the possibility of adding Watermarks/Advertisements for each individual image on Member Level Basis.
Here, we are providing an interactive and easy to follow Advanced Blog Plugin setup & installation guide which will help you to use & configure it properly on your website & maximize the efficiency of your website by showcasing the exciting features. With this help-guide, you will get a better sense of usage when you actually install this plugin on your website.
For the demo, click here
Installation of this theme is straightforward, but if you still need our expert to install this theme for you, then you can purchase the service by clicking here.
Step-by-Step Installation & Tutorial Guide:
** This tutorial assumes that you are already logged in to the Admin Panel.**
If not, then you have to log in first to the admin panel after filling the admin account credentials on your website.
1. Installation of Advanced Blog Plugin:
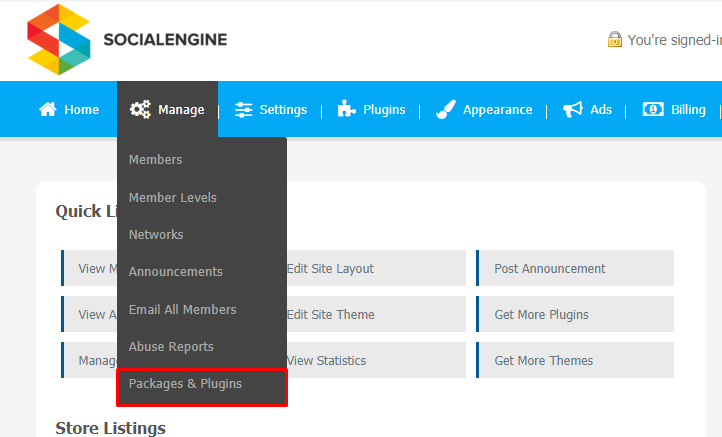
(a) In the Main Menu section, click on the tab Manage and select “Packages & Plugins” to install this plugin.
(b) Our Plugin is based on SE standards, so this will get installed on your website as any standard theme can. Please read the tutorial on installing themes and plugins in SE: Click Here
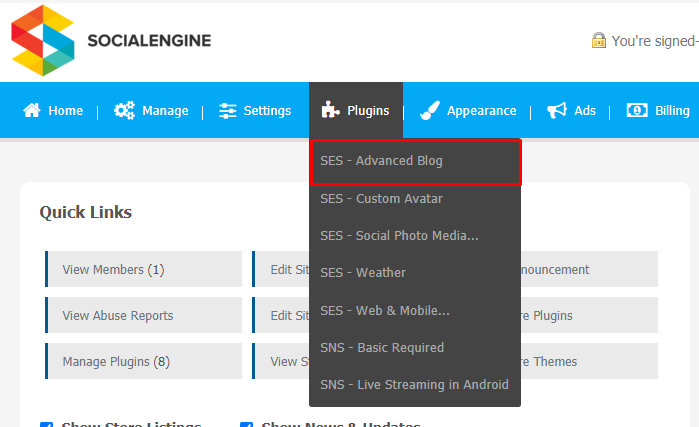
(c) After the successful installation of the theme as in Step 2 above, under the plugins section, click on “Advanced Blog Plugin“.
2. Global Setting
After clicking on “Advanced Blog Plugin”, a new window will be opened where you can activate your plugin by entering the license key as shown below:
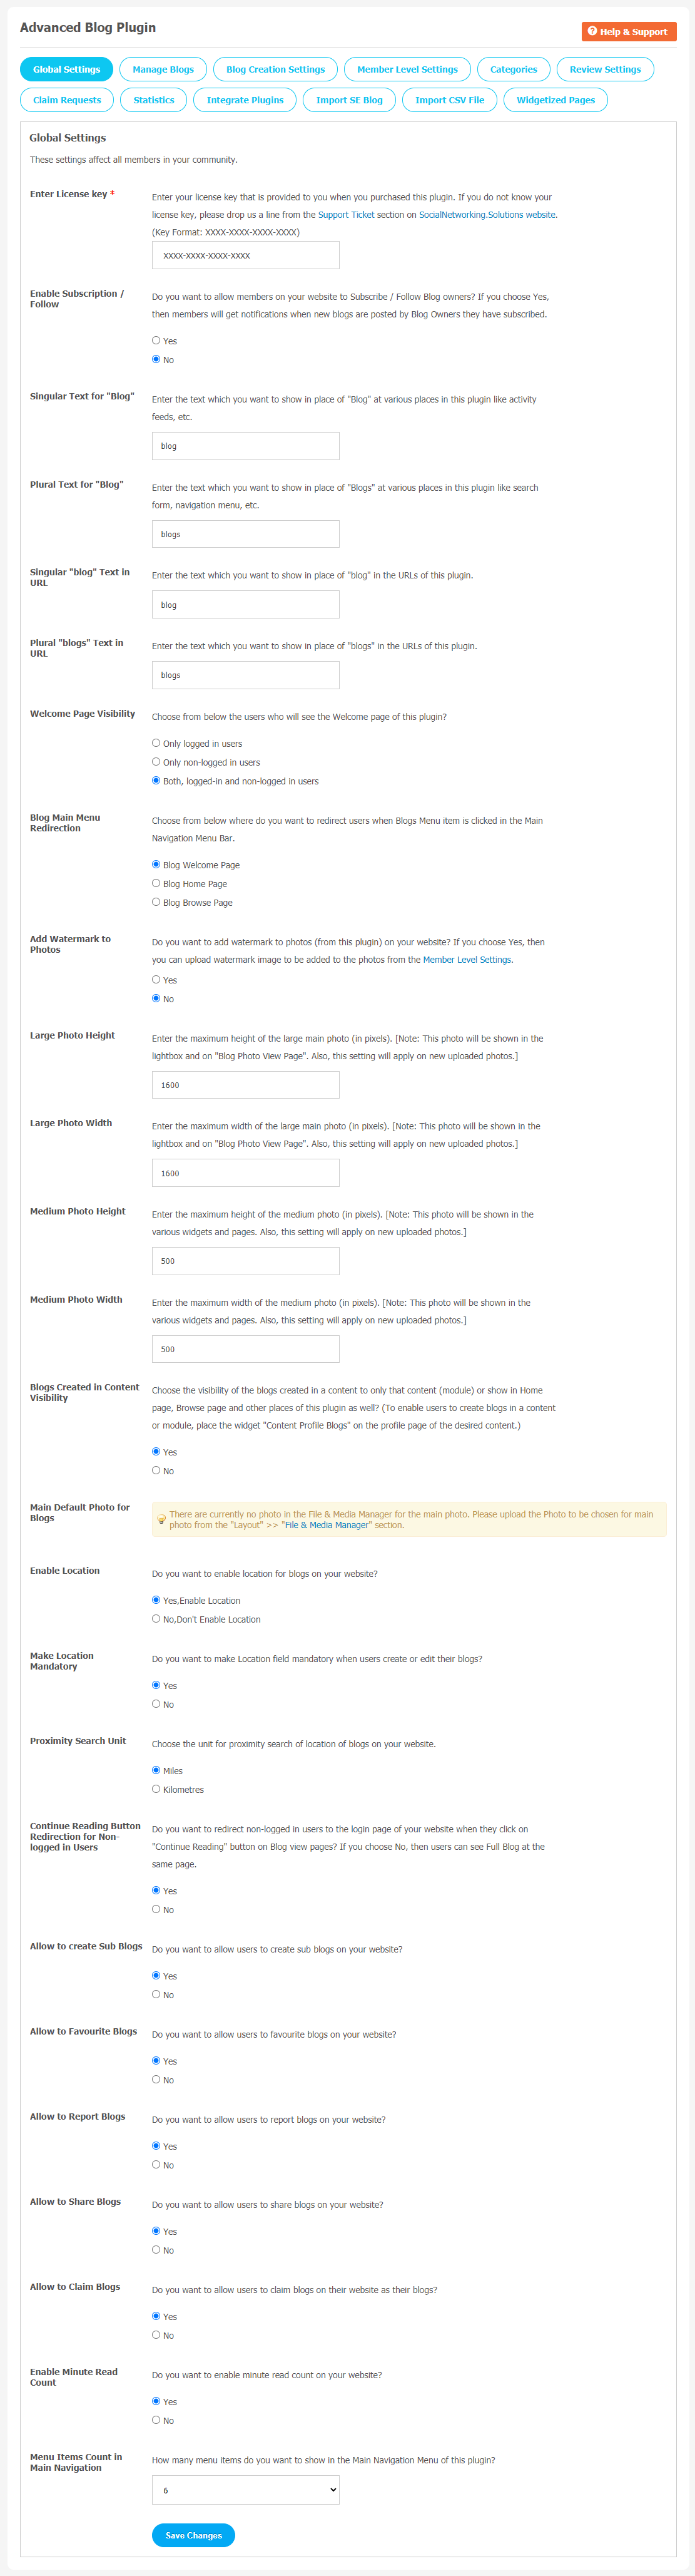
After activating the plugin, you can make more changes in the Global setting as you can configure singular/plural texts & URLs for the Blogs & their Pages.
Blog Main Menu Redirection
You can choose welcome page visibility for logged-in and non-logged-in users. If you want to redirect users to the Blog Welcome Page, Blog Home Page, and Blog Browse Page from the Blog Menu Icon, you can select from the settings page shown.
Manage Photo Width
The height and width of “Blog Photo View Page” can be managed as per your requirement.
The setting for Content Visibility
Also, you enable content visibility for blogs, enable location, Reading button, Share blogs, claim blogs, enable Minute Read Count, etc.
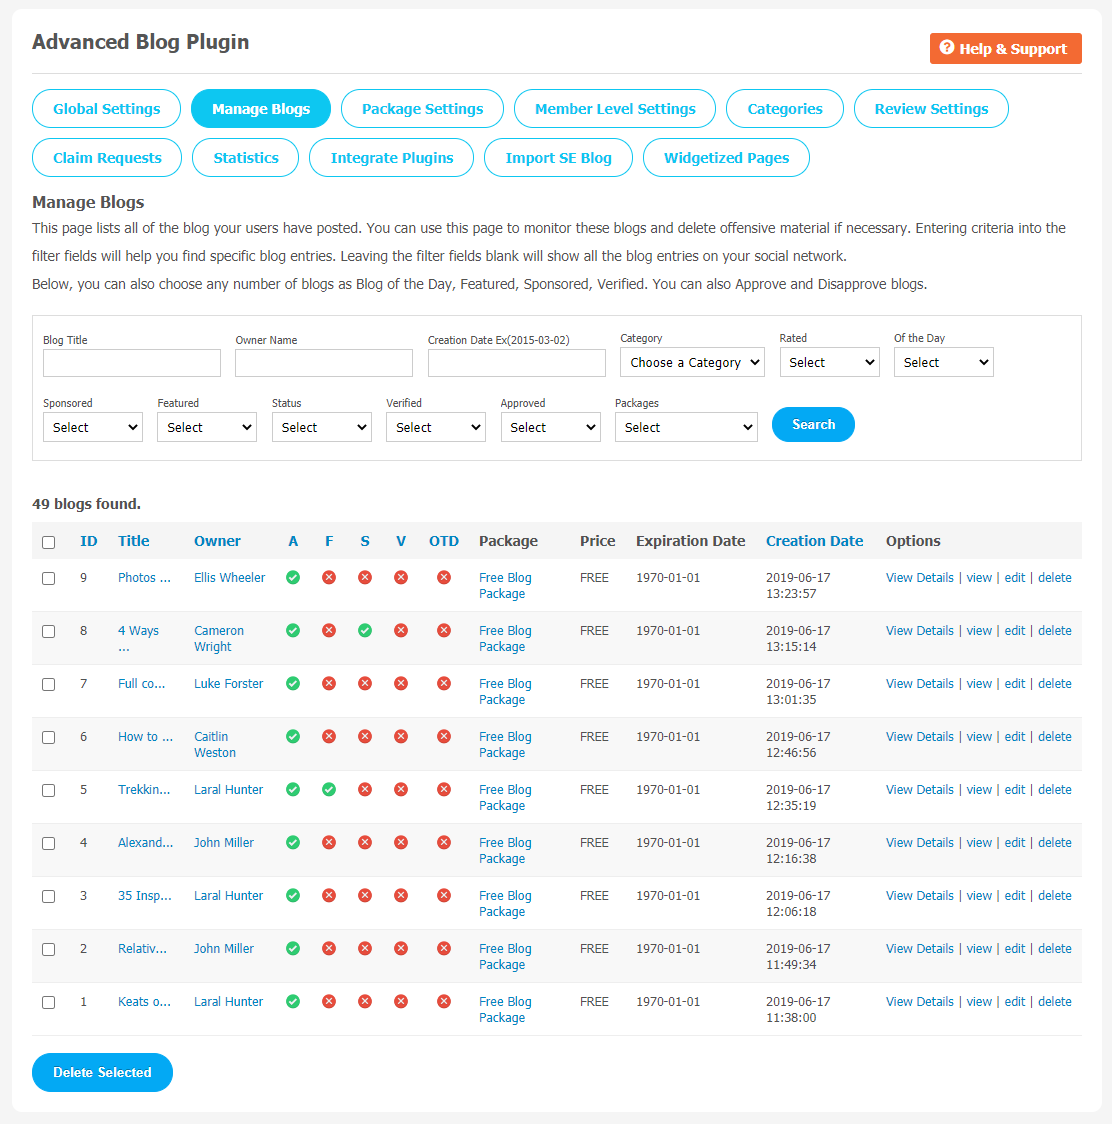
3. Manage Blogs
After posting many blogs on websites, it can be very hard to manage and monitor these blogs. So, from this panel, you can manage all the blogs created on your website by searching them with Blog Owner Name, Blog Title, Approved, Verified, and other criteria. All the Blogs are listed under this section.
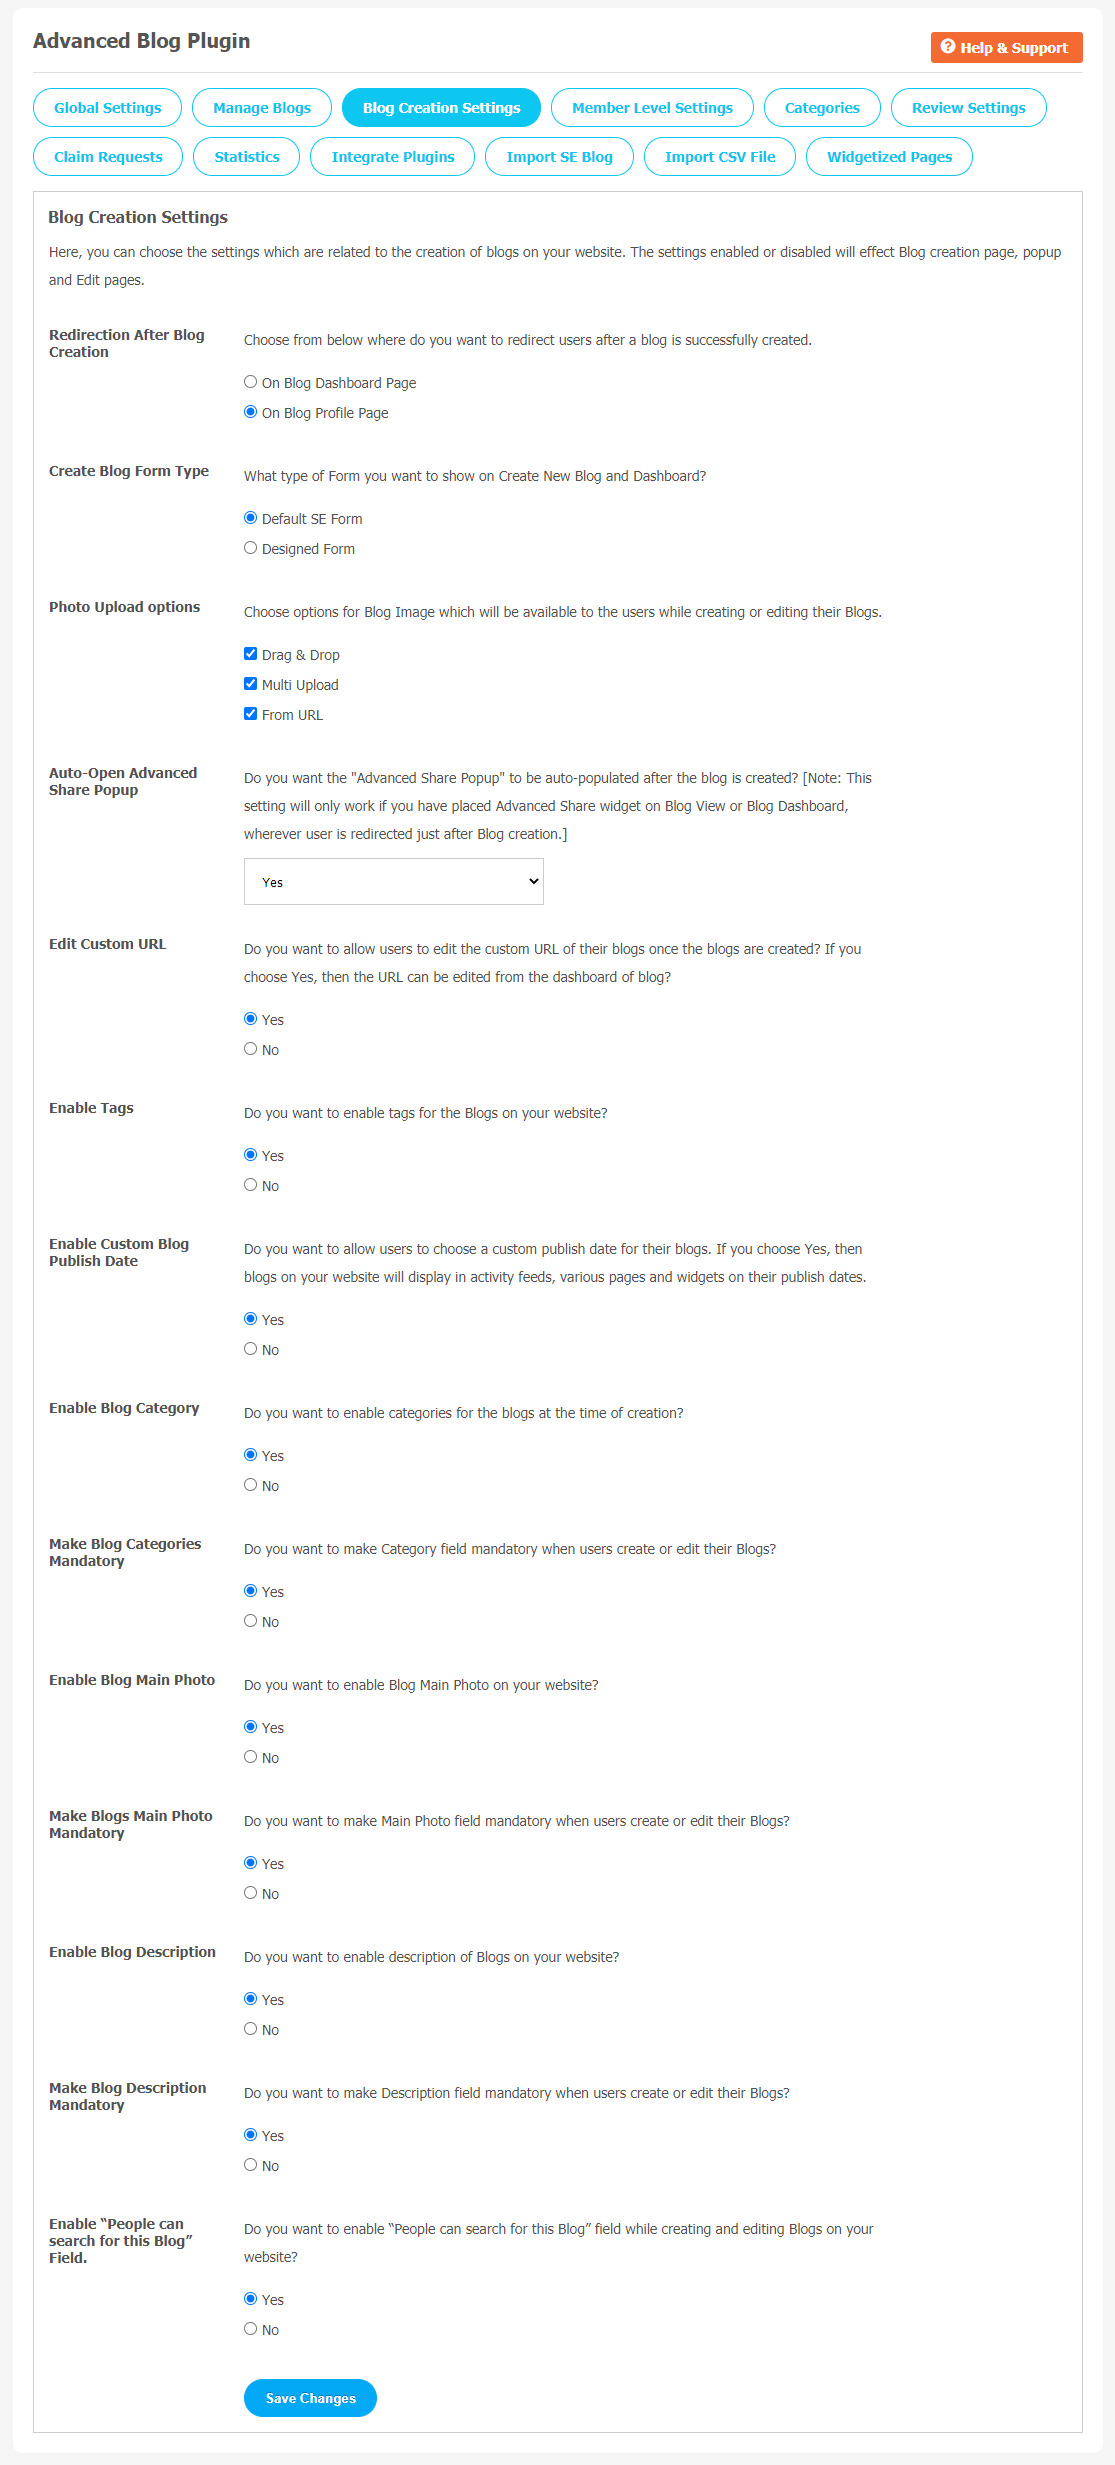
4. Blog Creation Setting
In this section, you can configure all relevant blog creation settings. Enable / disable required blog settings and it will be visible for all logged in or non-logged-in users on your website.
Popular options that can be managed from the Blog Creation Setting are:
- Redirection after Blog Creation
- Create a Blog from Type
- Photo Upload Options
- Many more…
You can make changes by simply selecting Yes/No for the settings. Don’t forget to save changes when done.
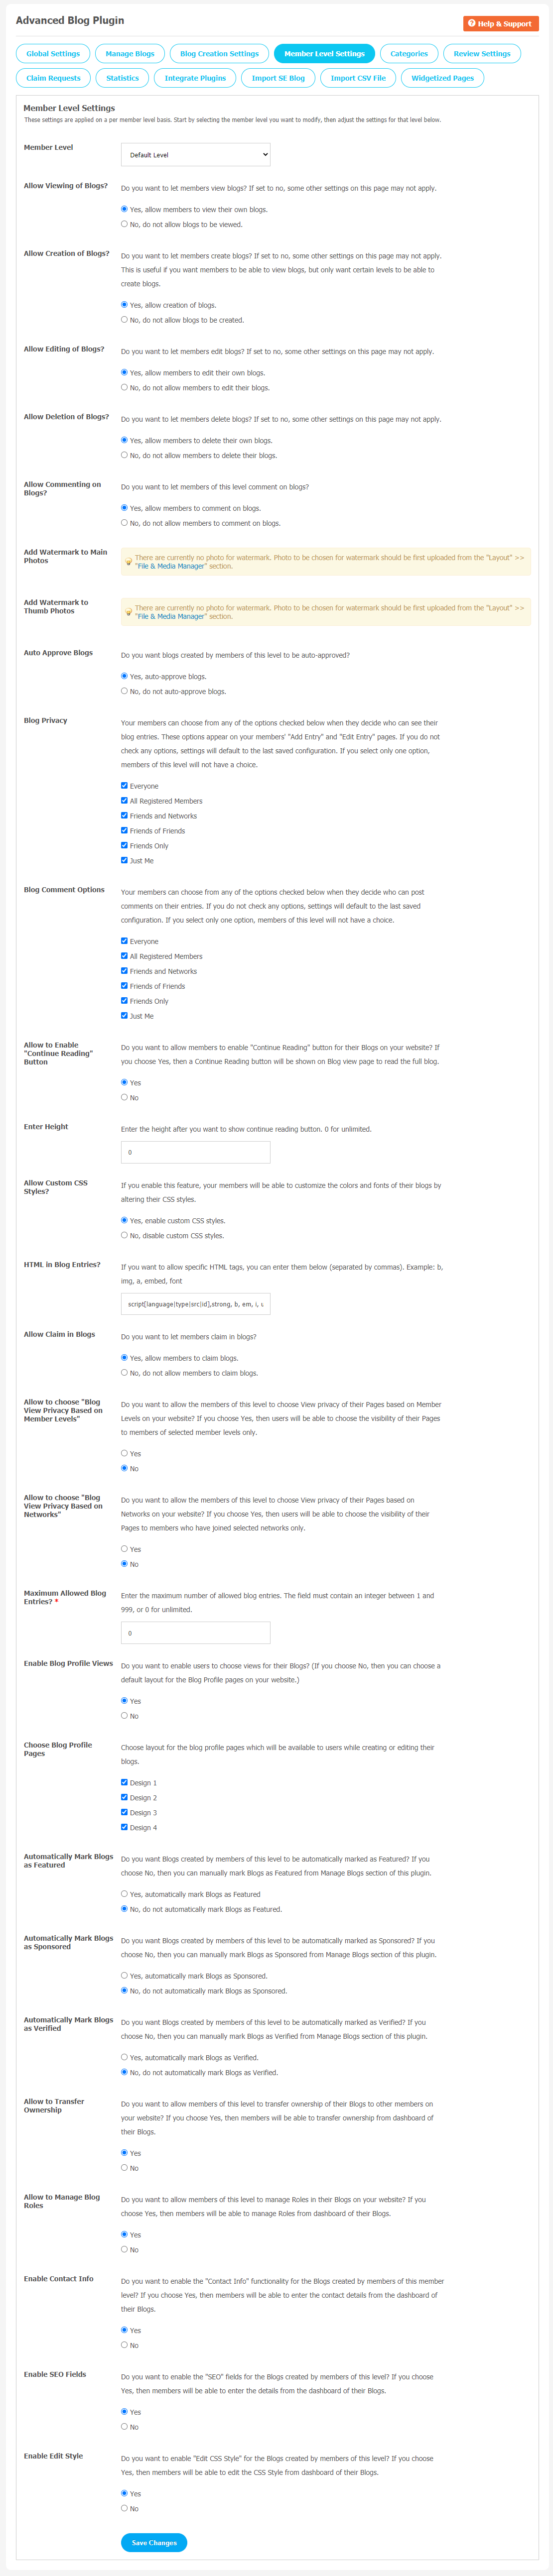
5. Member Level Setting
You can manage the visibility of your blogs for registered members on your site. You can enable or disable the viewing of blogs to specific member levels by selecting Yes/No as shown below. You can manage settings like Allow Creation of Blogs, Allow to Edit Blogs, Deletion of Blogs and Commenting on Blogs etc. from this panel.
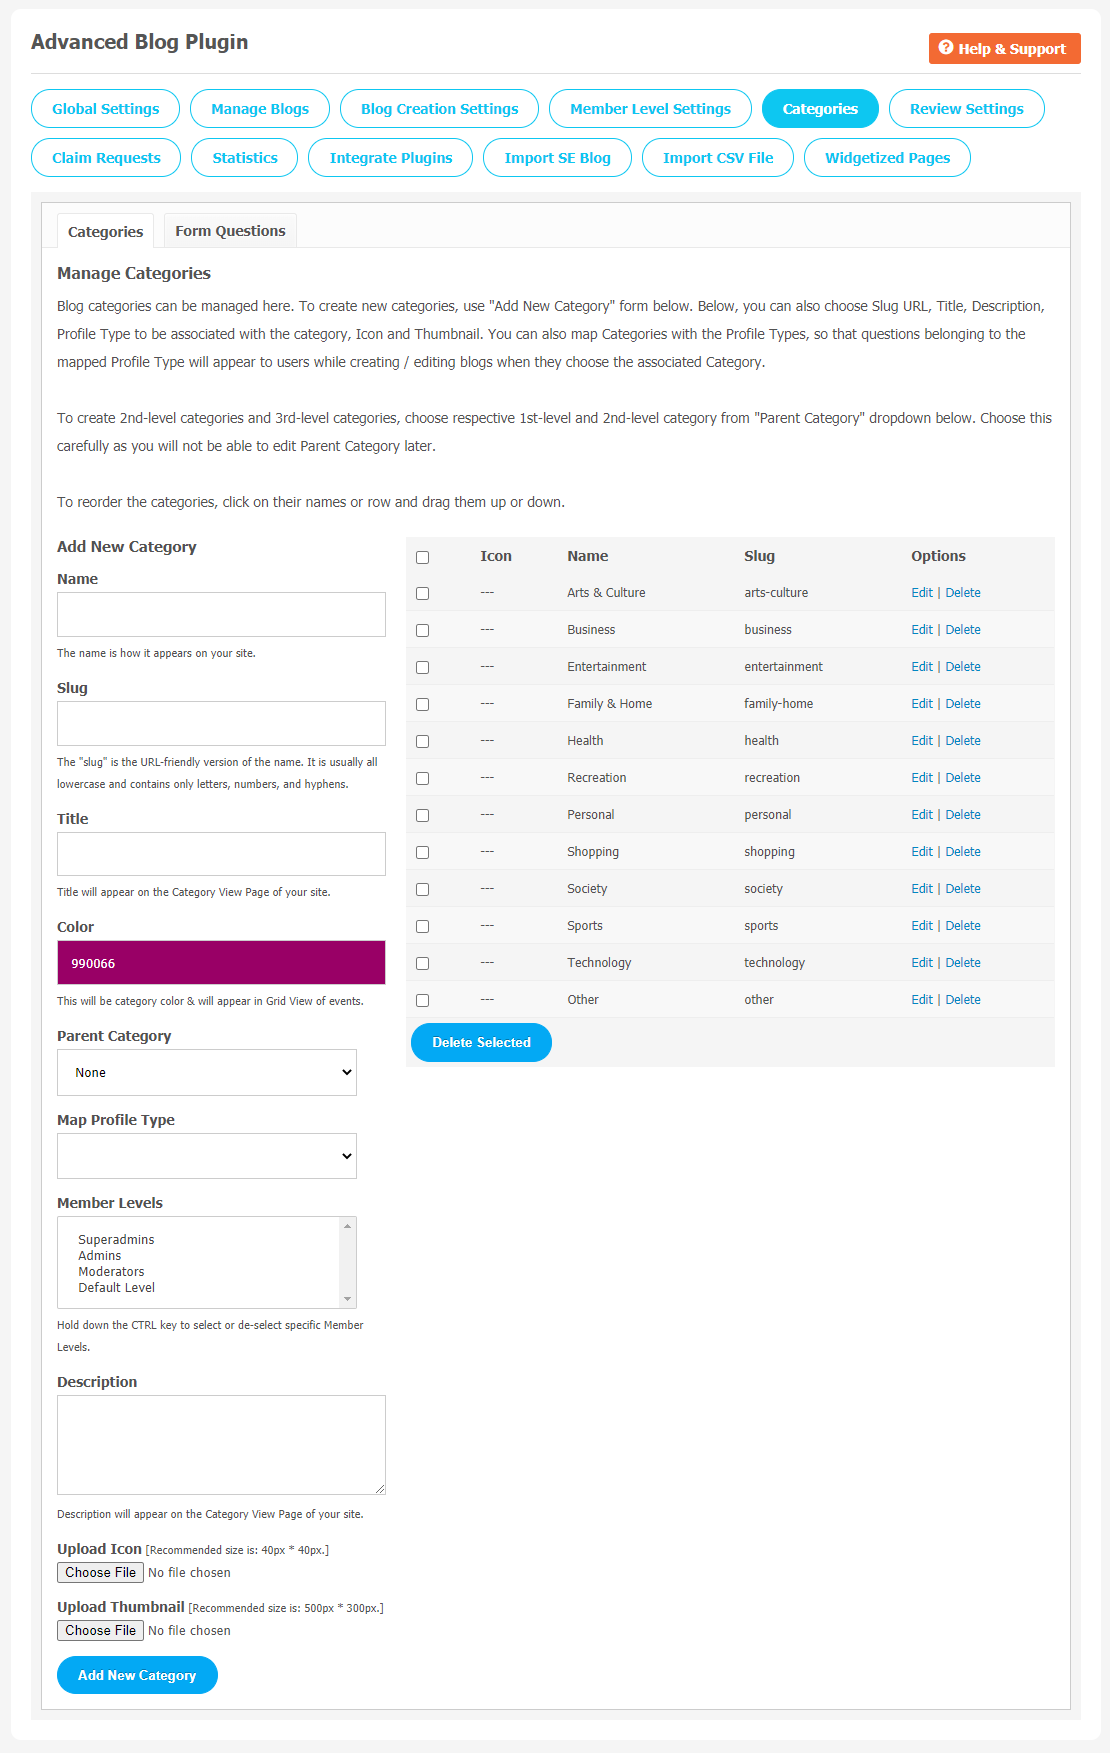
6. Categories
For a better user experience, dividing blogs into categories can be very helpful for better navigation.
To Create a New Category, Click on “Add New Category”. Now, you can choose Title, Description, Upload icon, Profile associated with the category, and make a list for all blog content.
After you create the category successfully, the profile type will appear to users while creating or editing blogs when they select the associated category.
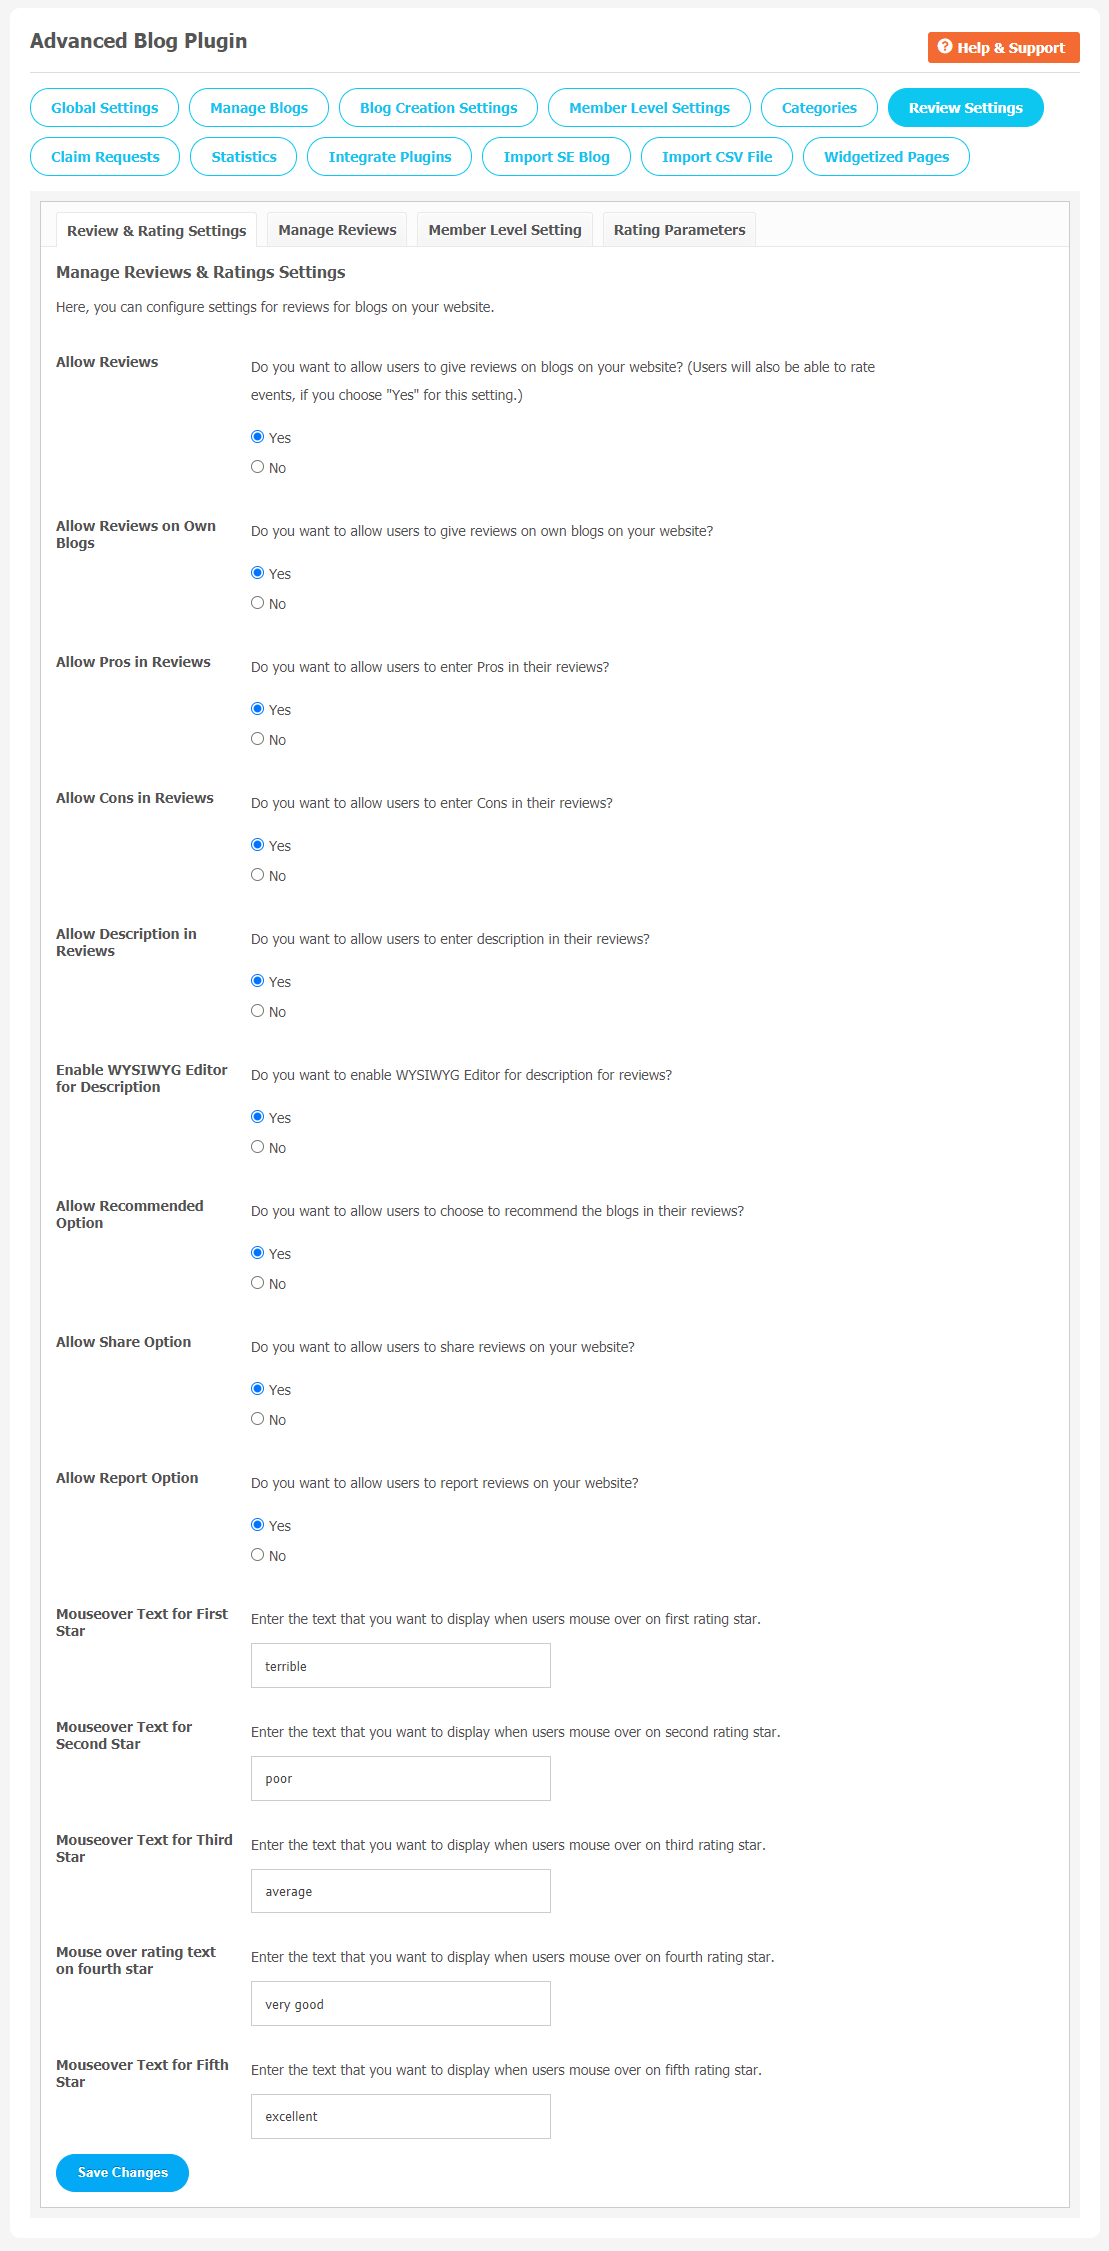
7. Review Settings
To make your website more engaging to the audience, you can allow your website members to review it. It will help you to get feedback from readers. Choose yes/no in the blog review setting and save changes when done.
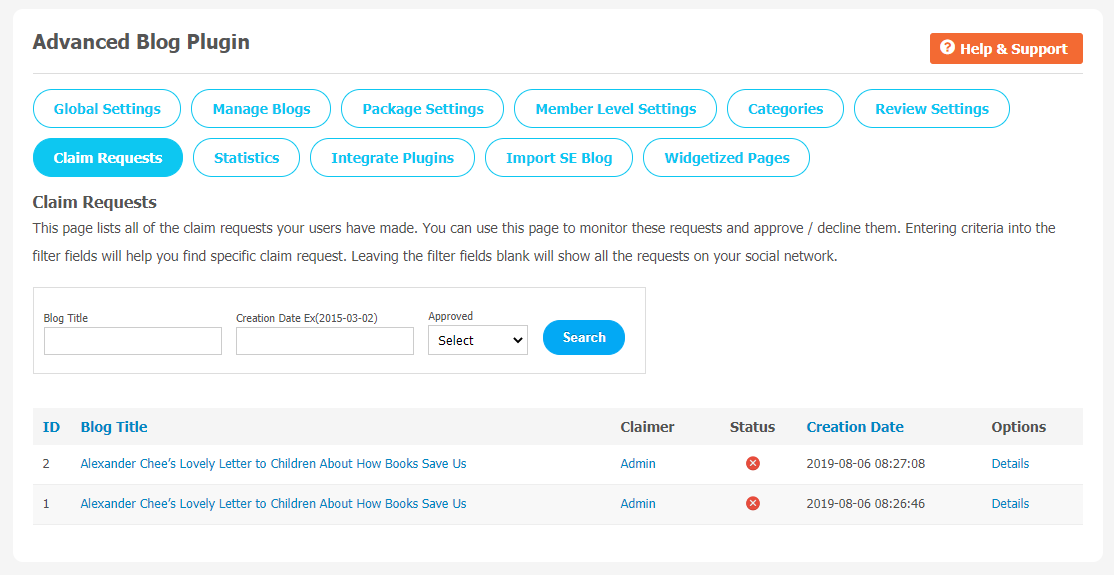
8. Claim Requests
All claim requests sent by your users can be managed here. You can approve and disapprove the claim request for better website experience.
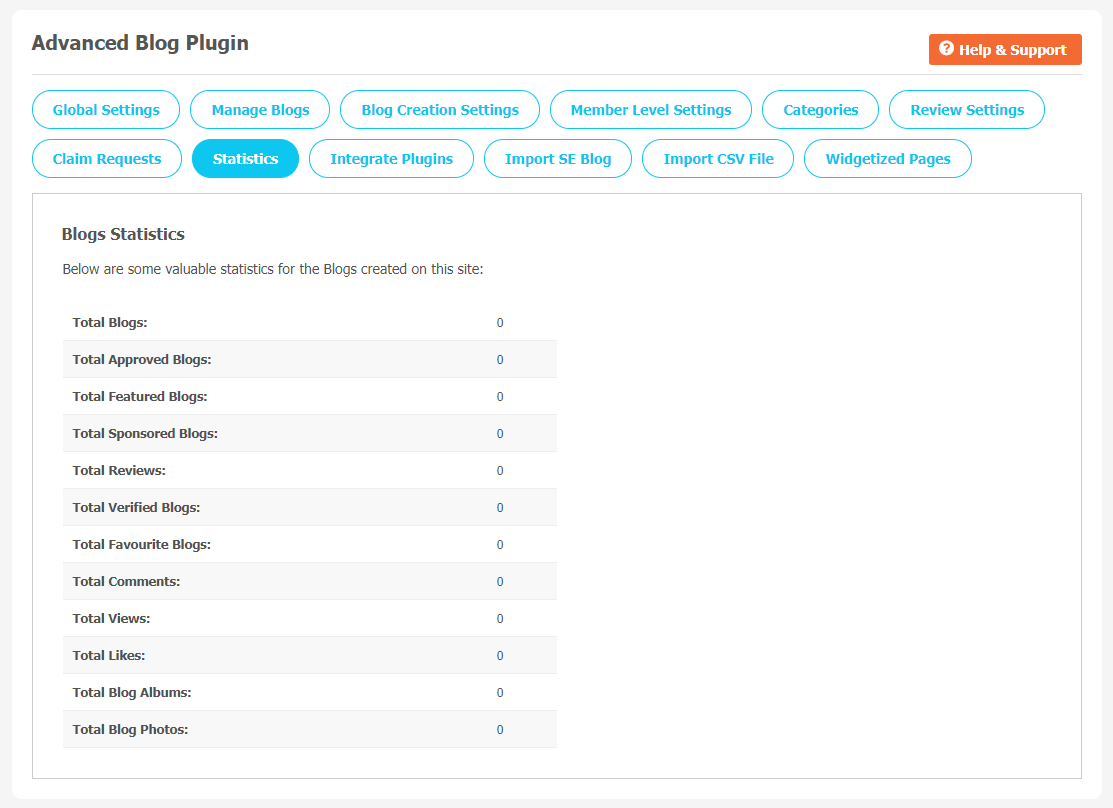
9. Statistics
This Page contains valuable statistics for the Blogs created on your website. You can check the total number of created Blogs, Approved Blogs, Featured, Sponsored Blogs, Verified Blogs etc.. from this section.
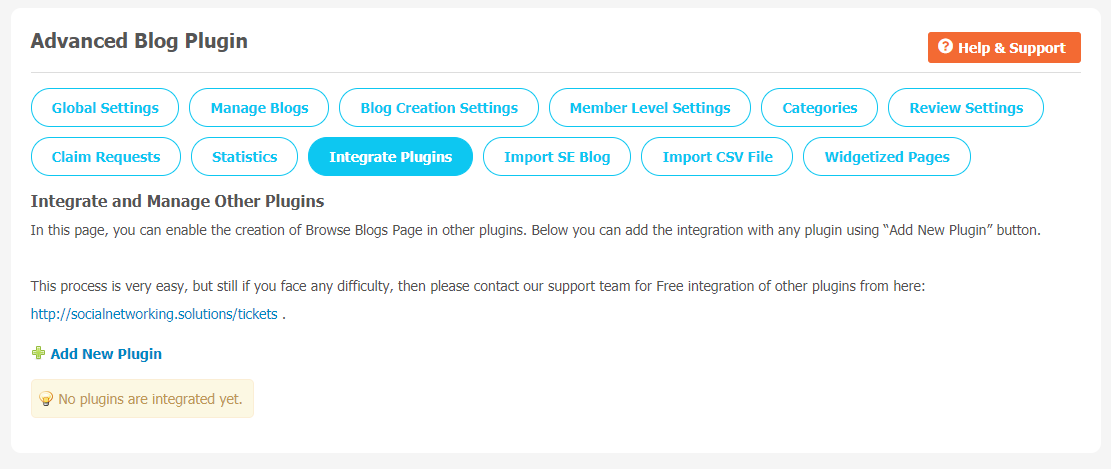
10. Integrate Plugins
You can activate the creation of Blogs in other plugins from this section by adding the modules that are installed on your website. You can add as many modules as you want from here.
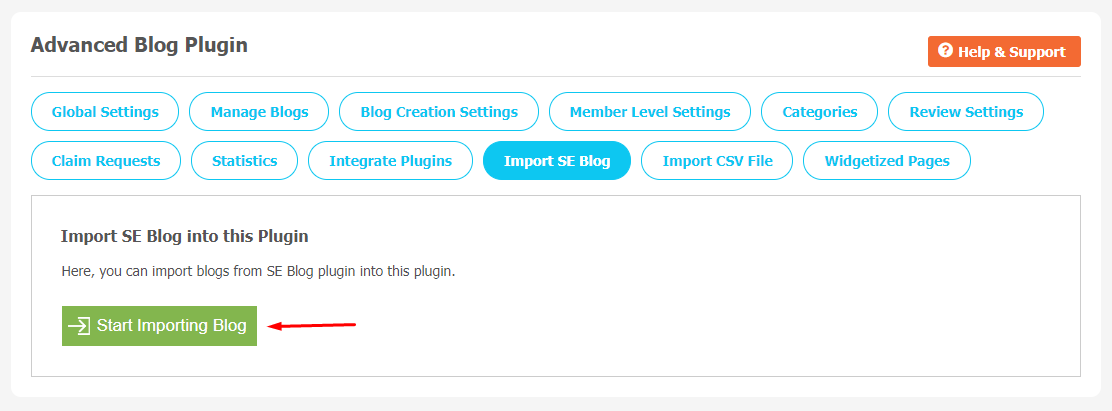
11. Import SE Blog
As it clearly shows, you can import blogs from the SE Blog plugin into this advanced plugin.
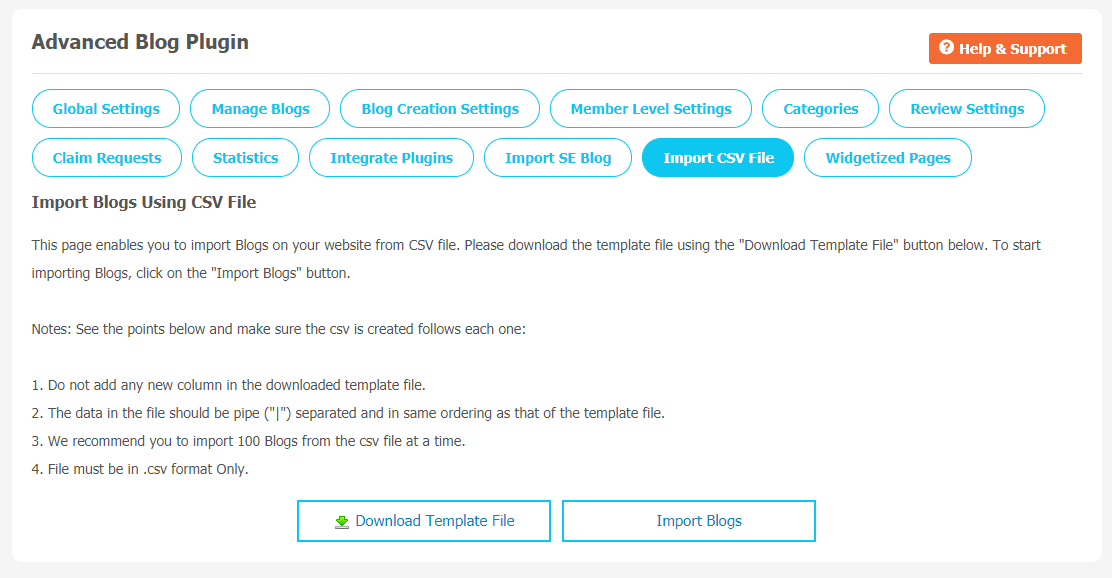
12. Import CSV File
This page enables you to import Blogs on your website from CSV files. You can download the template file or import blogs by clicking on the Import Blogs button.
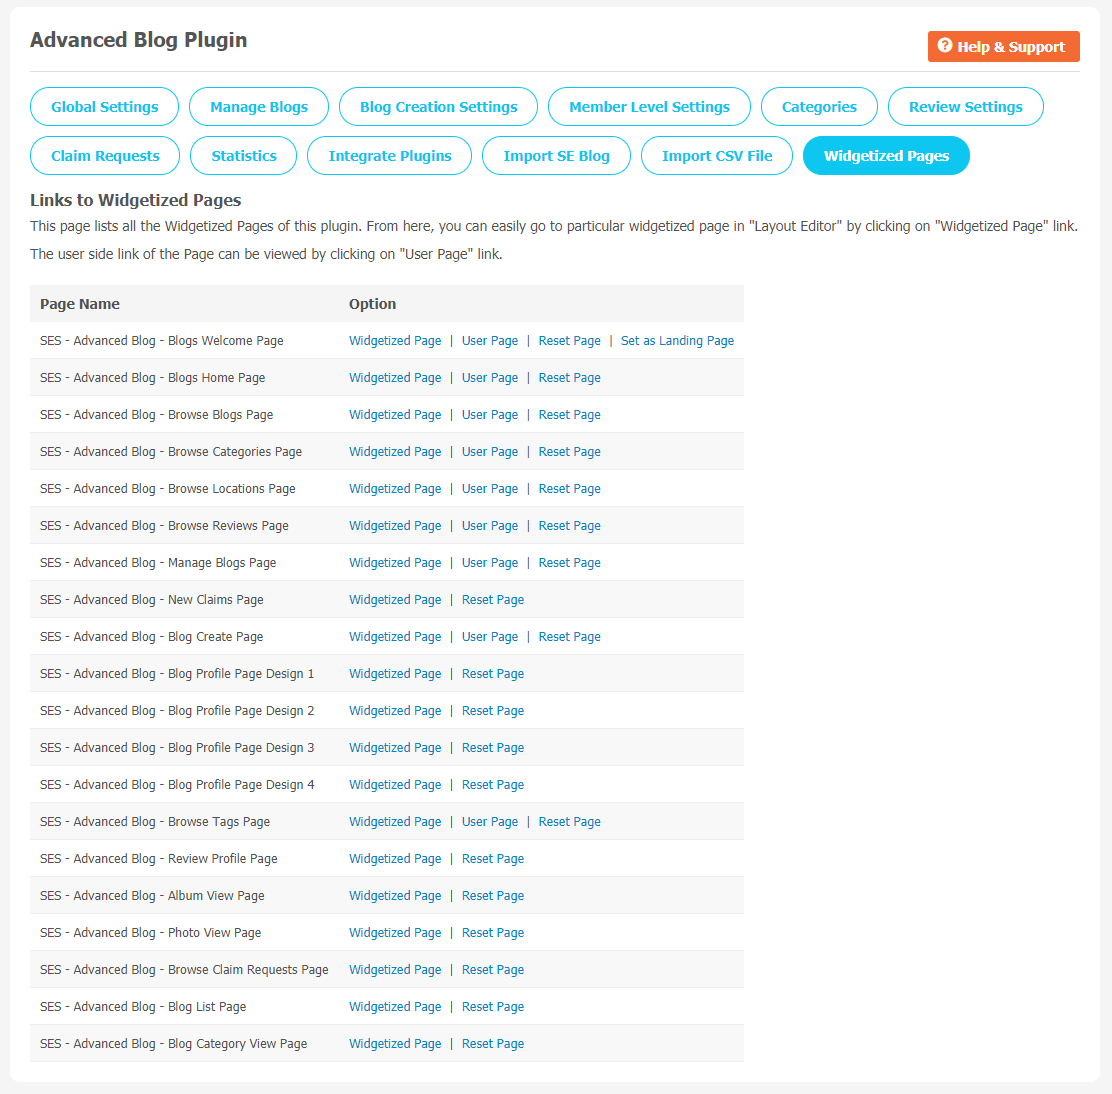
13. Widgetized Pages
You can manage widgetized pages for Advanced Blog Plugin. You can go directly to the pages in Layout Editor by clicking on the page link. Also, you can reset any of the pages to its original configuration anytime you want from this section.
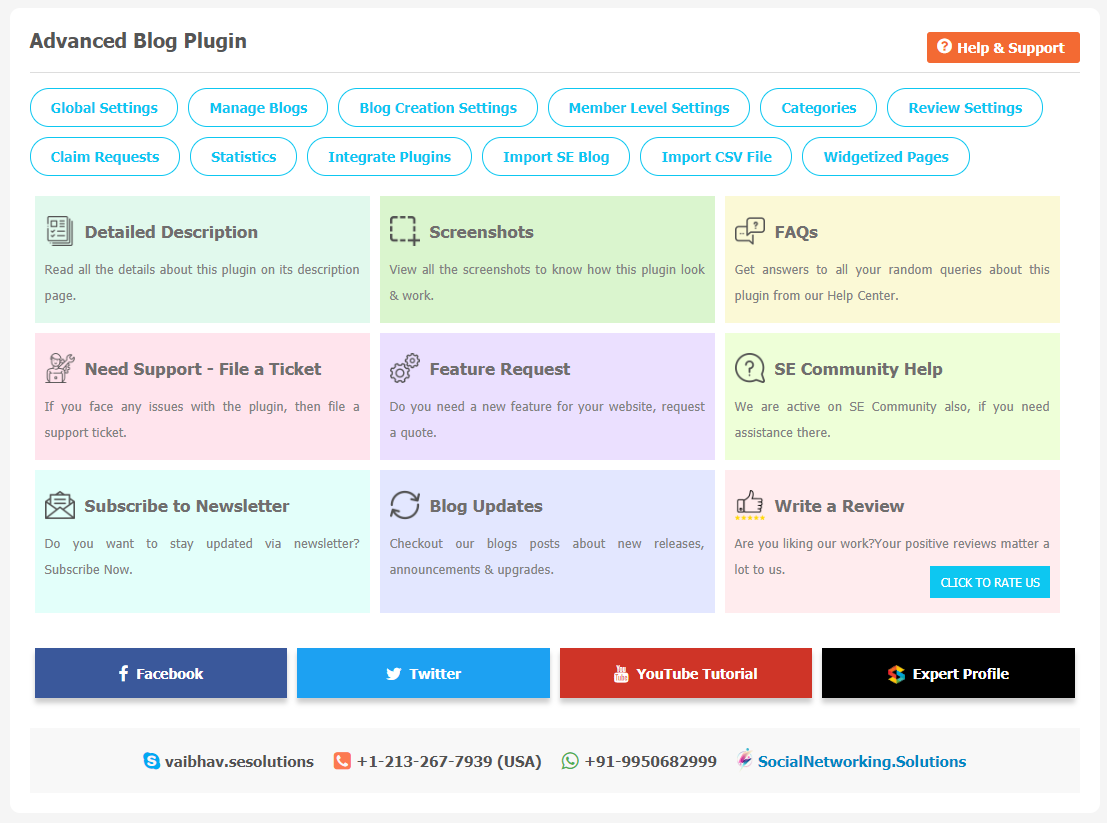
14. Help & Support
If you have found any query regarding usage of this plugin or need to ask any query regarding Installation, Setup & any kind of support for this plugin, then you can refer to the “Help & Support” section of this theme.
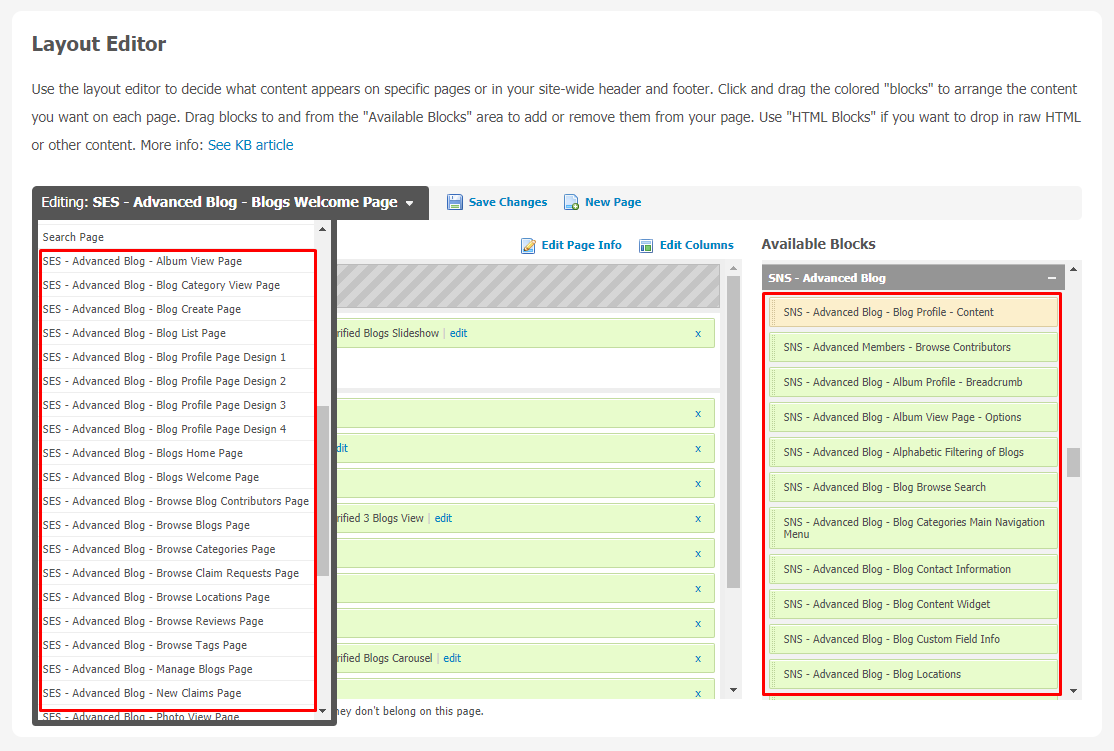
15. Configure Pages from Layout Editor
You can configure various pages of this plugin on your website from the Layout Editor with the help of the Drag & Drop of widgets. You can also configure the settings of widgets by clicking on the edit link.
Finally!! You have successfully completed the installation procedure and also explored various exciting features of Advanced Blog Plugin. Now, your visitors and website members will be able to access & use your website with some new multipurpose features.
Installation of this Plugin is straightforward, but if you still need our expert to install this Plugin for you, then you can purchase the service by Clicking Here.


