In recent times, the trend of posting stories is getting popular on every social media platform. People love to share their life activities via stories only. They upload multiple photos/videos which makes their stories more interesting for wider audiences.
So, because of the great demand from users, we have introduced our new tool, named Stories Feature in Website Plugin. There are many benefits you will get after installing this plugin, like-
- More User Engagement
- Makes your website more attractive
- Use your website as an Advertising Platform
- Grab Instant Attention of New Website Visitors
We have launched this new Stories Feature in the Website Plugin for our SocialEngine website users. Our Stories Feature in Website Plugin is compatible with SocialEngine Self-Hosted v5.0, which has new special configurations and settings that allow you to control the stories on your website. Users can post photos and videos with their family and other members as stories. Other members can like and comment on these stories with exciting & funny emojis. Interestingly, these stories automatically disappear after 24 hours. After 24 hours, these stories will automatically be collected in the Archive section, as users can see previous stories in the archived sections.
Please read more about this Plugin here.
Step-by-Step Tutorial Guide for Users
** This tutorial assumes that you are already logged in to the Admin Panel.**
If not, you have to log in first to the admin panel after filling in the admin account credentials on your website.
Admin Panel
1. Installation of Stories Feature in Website Plugin
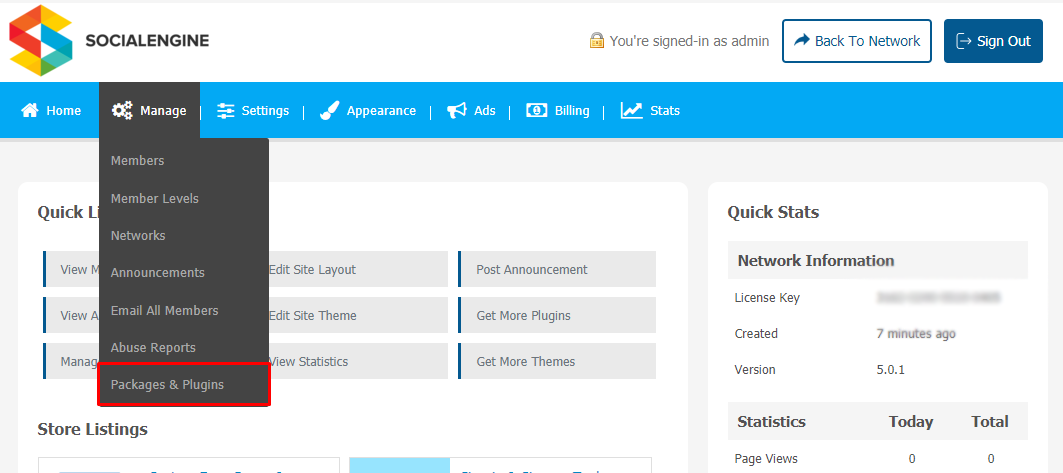
In the Main Menu section,
- Click on the tab Manage and select “Packages & Plugins” to install this plugin.
2. Activate the Stories Feature in Website Plugin
After a successful installation of the plugin, go to the “Plugins” dropdown in the Main menu and select “Stories Feature in Website”.
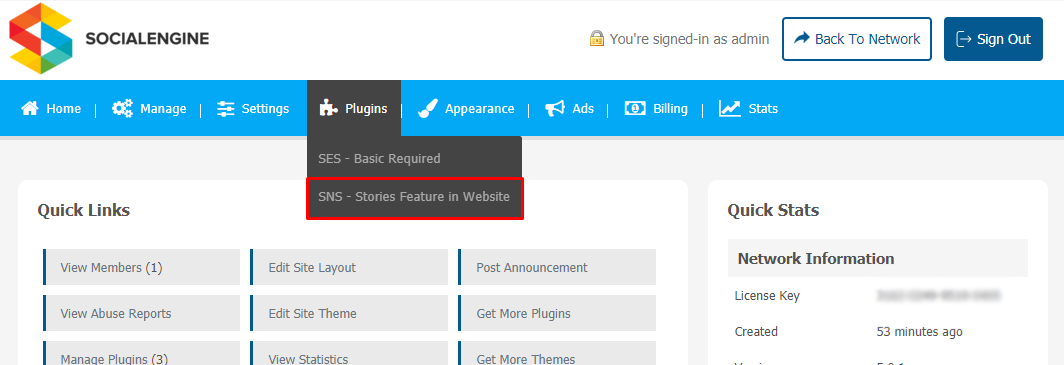
Now, click on “Stories Feature in Website”. A new window will pop up. You can see the different settings for Android, iOS, and the website. Click on Website Stories Activation.
In the next step,
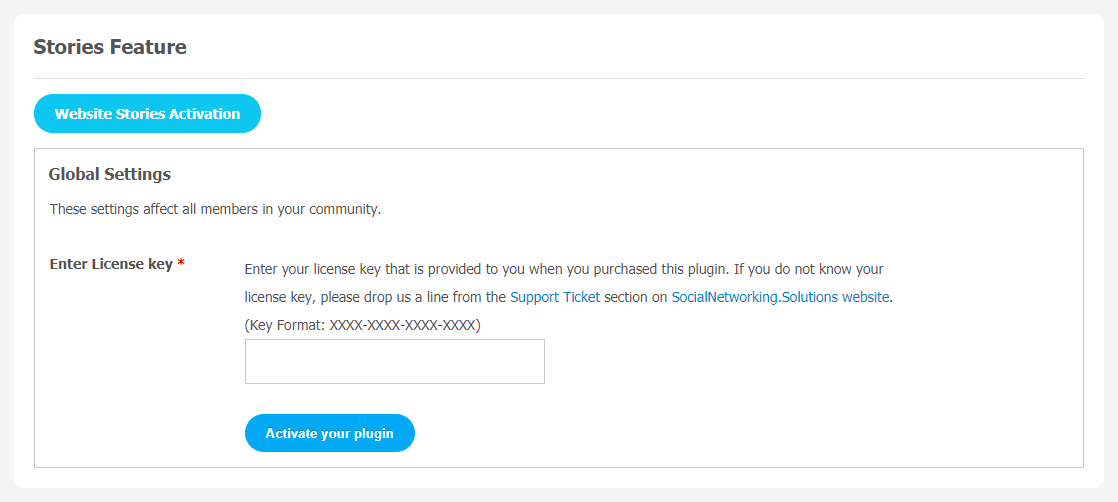
- Enter the required license key as shown above in the image and save changes.
- After entering the valid license key, your website’s stories plugin will get activated.
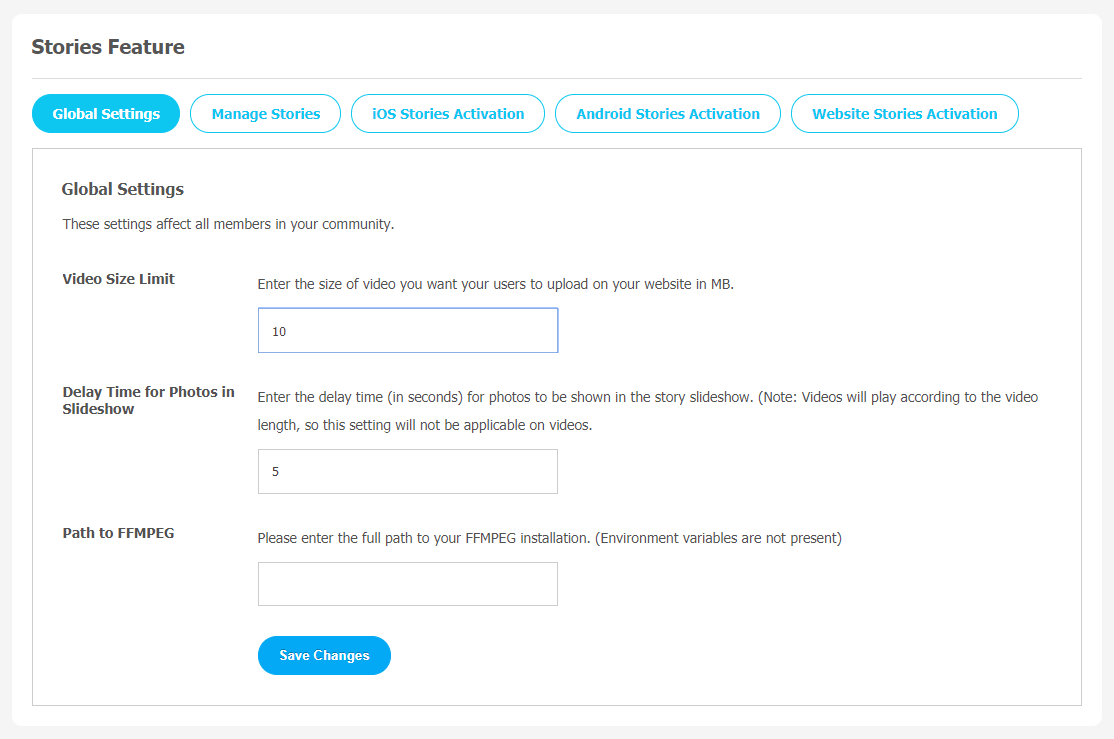
Global Settings
*Point to be noted here, the global setting is the same for stories from Android, iOS, and the website. Also, stories via Android & iOS are dependent on their respective plugins.
3. Website Stories Global Setting Configurations
In the global settings, the admin can manage the size of videos that any member can post in the stories on their website. Moreover, the delay/view time of story photos can also be managed through the global settings, and the admin can add the path of the video.
4. Managing Stories
Admin can manage all the stories by clicking on “Manage Stories ”. It can be easily tracked how many members are posting stories on their website. If an admin finds that a story is violating their website’s privacy law, the admin can remove that particular story directly from the admin panel.

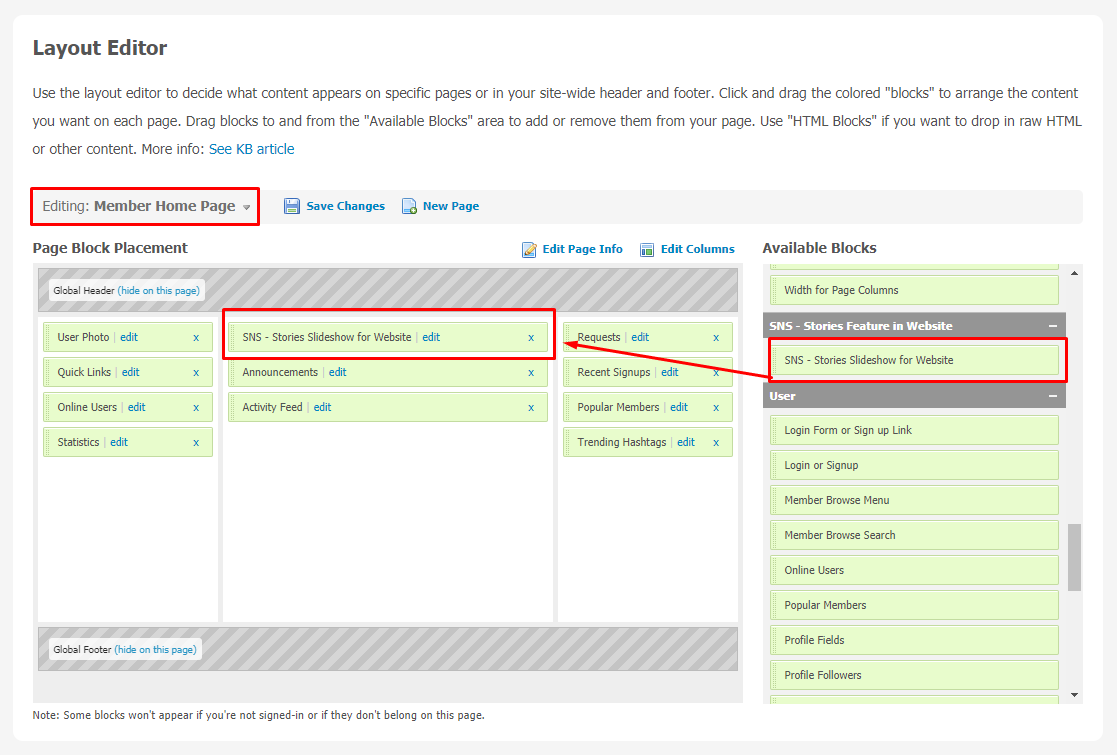
5. Layout Editor
Layout Editor is the only place for our SNS Products where you can place various widgets for your pages and configure those widgets according to your requirements as well.
There is one widget named “SNS -Stories Slideshow for Website” for displaying stories on the website, which will be placed onthe “Member Home Page”.
User Panel
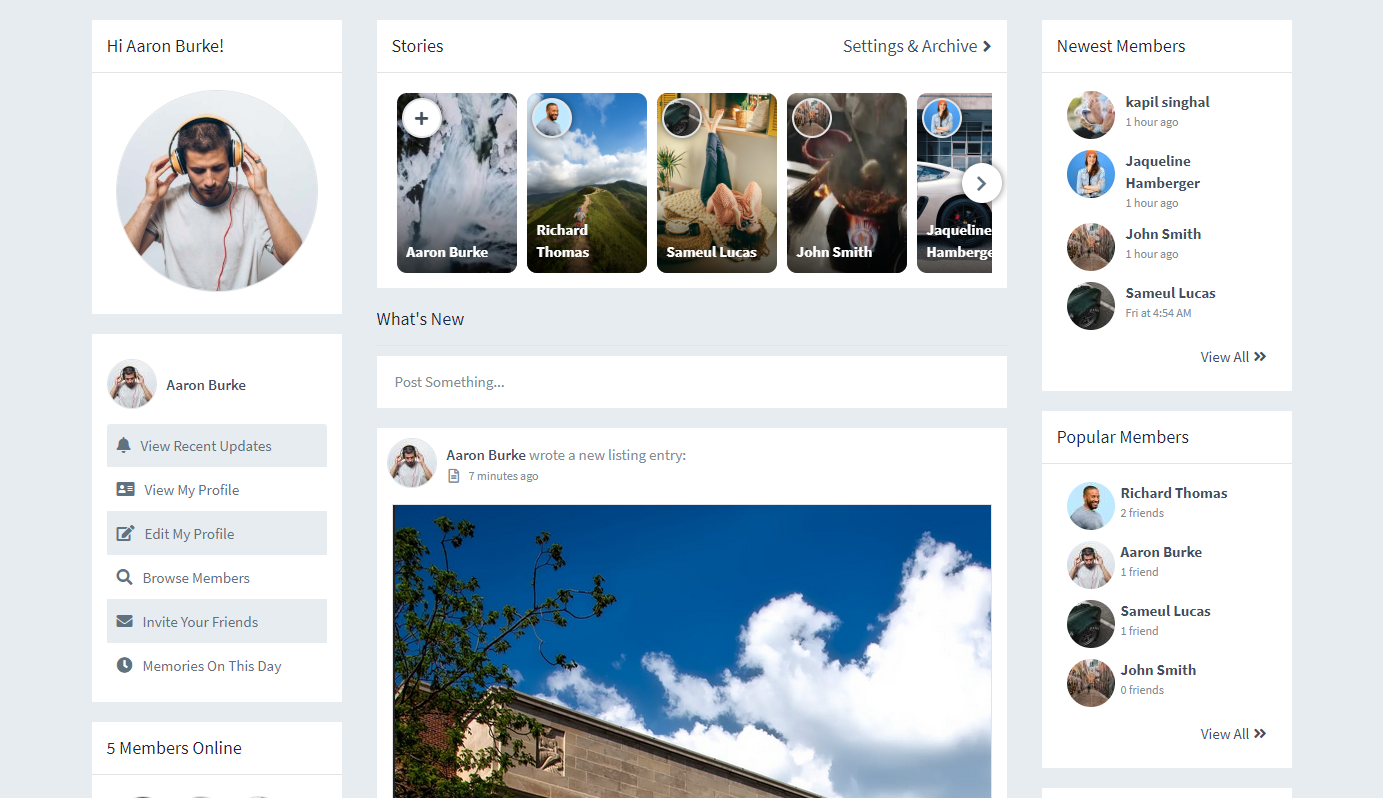
Member Home Page
On the top left corner of the screen, the Stories for the website tab will appear. Also, users can set their Stories Visibility Settings from the Settings & Archive section.
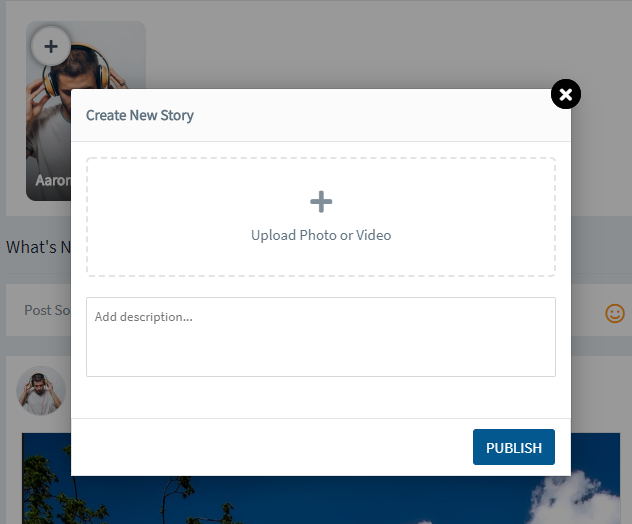
1. Create a New Story
Users can create stories from any location on their system. In the below-shown image, you can see, stories can be posted directly from your system. If you want to add a description to your photo or video, you can easily write a description through the ‘Add description‘ box.
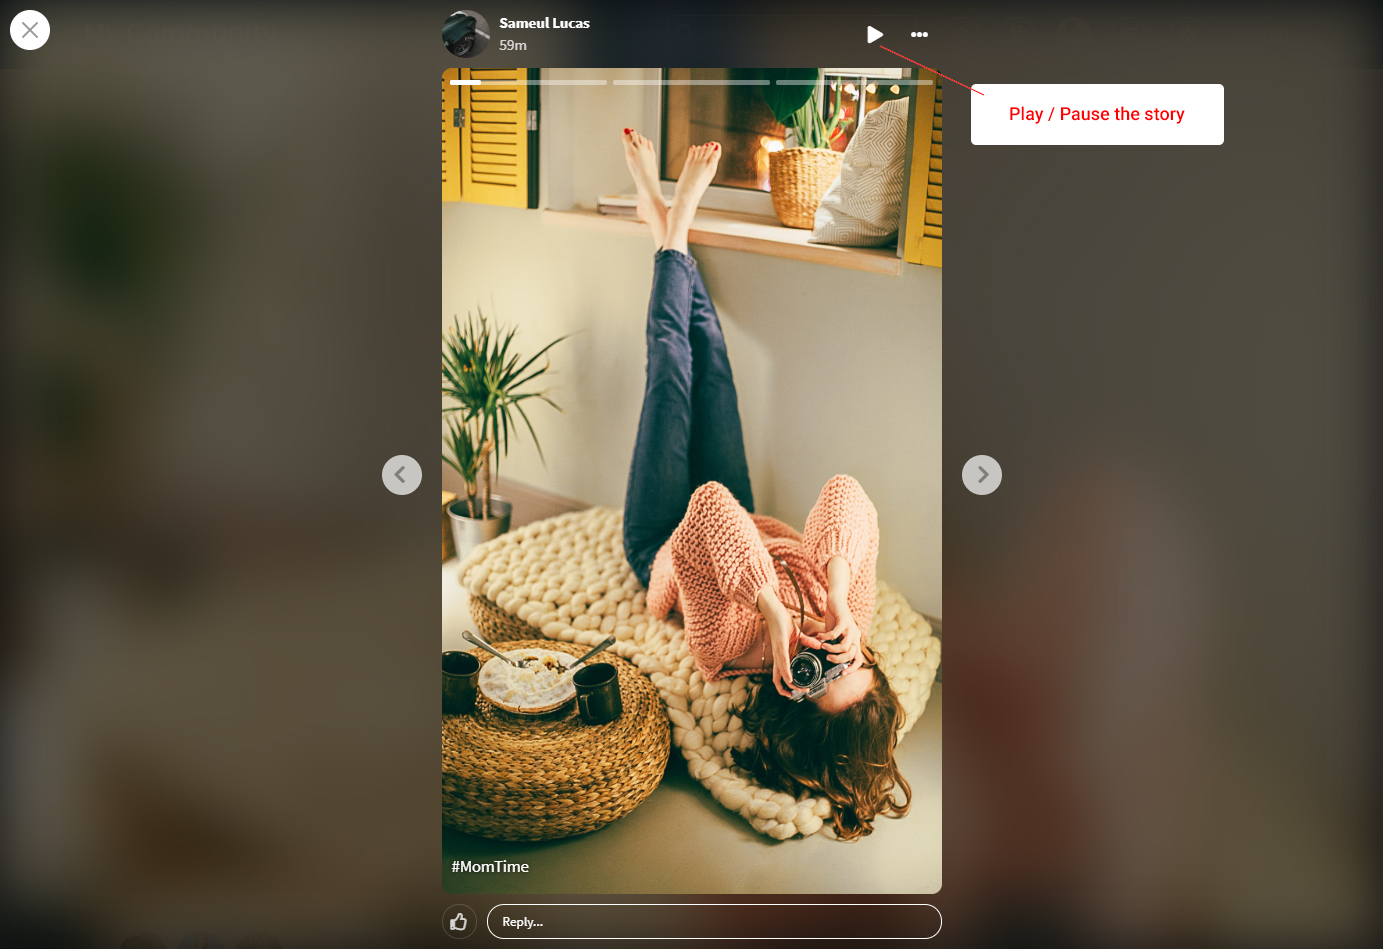
2. Story Slideshow
At the user end, the posted stories will look like this. On the right corner of the stories, you can see the pause and play button. Users can pause and play the photo slideshow to look at the photos at their convenience.
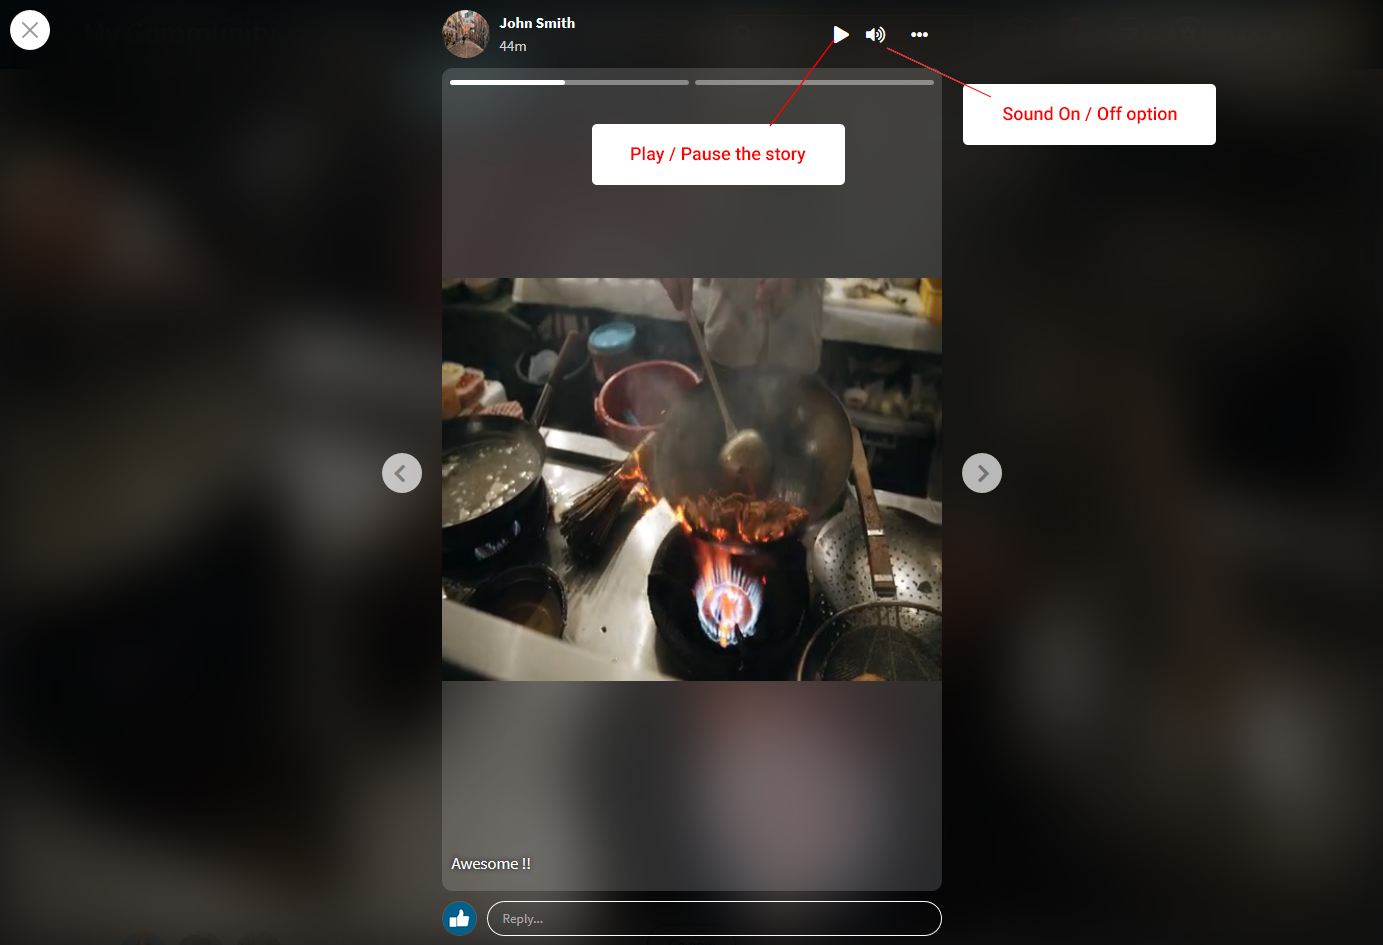
3. Video Story
Users can post videos as a story and also play or pause the story. They can mute the video sound if they don’t want to hear the audio. So, posting a video in the stories provides you with:
- Sound On / Off option
- Play/Pause the Story
4. Comment and Reaction
Users can comment and react to stories. This makes your social network platform more engaging among users. They can show their emotions through emojis and can share their thoughts through comments with each other. If a user comments on someone’s story, they are sent to the message inbox of the story owner.
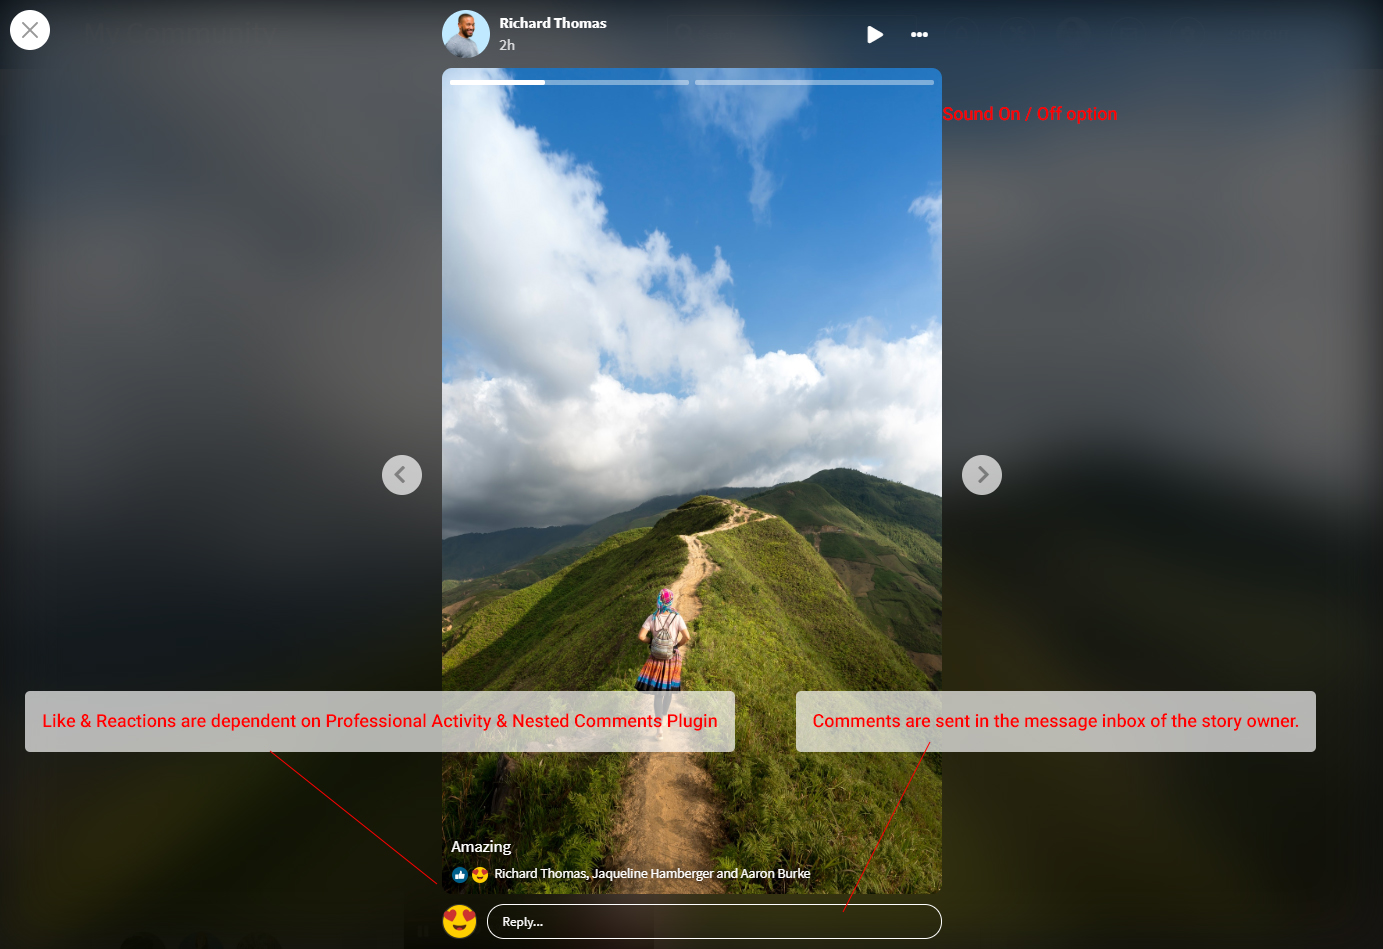
Likes and reactions are dependent on Professional Activity and the Nested Comments Plugin.
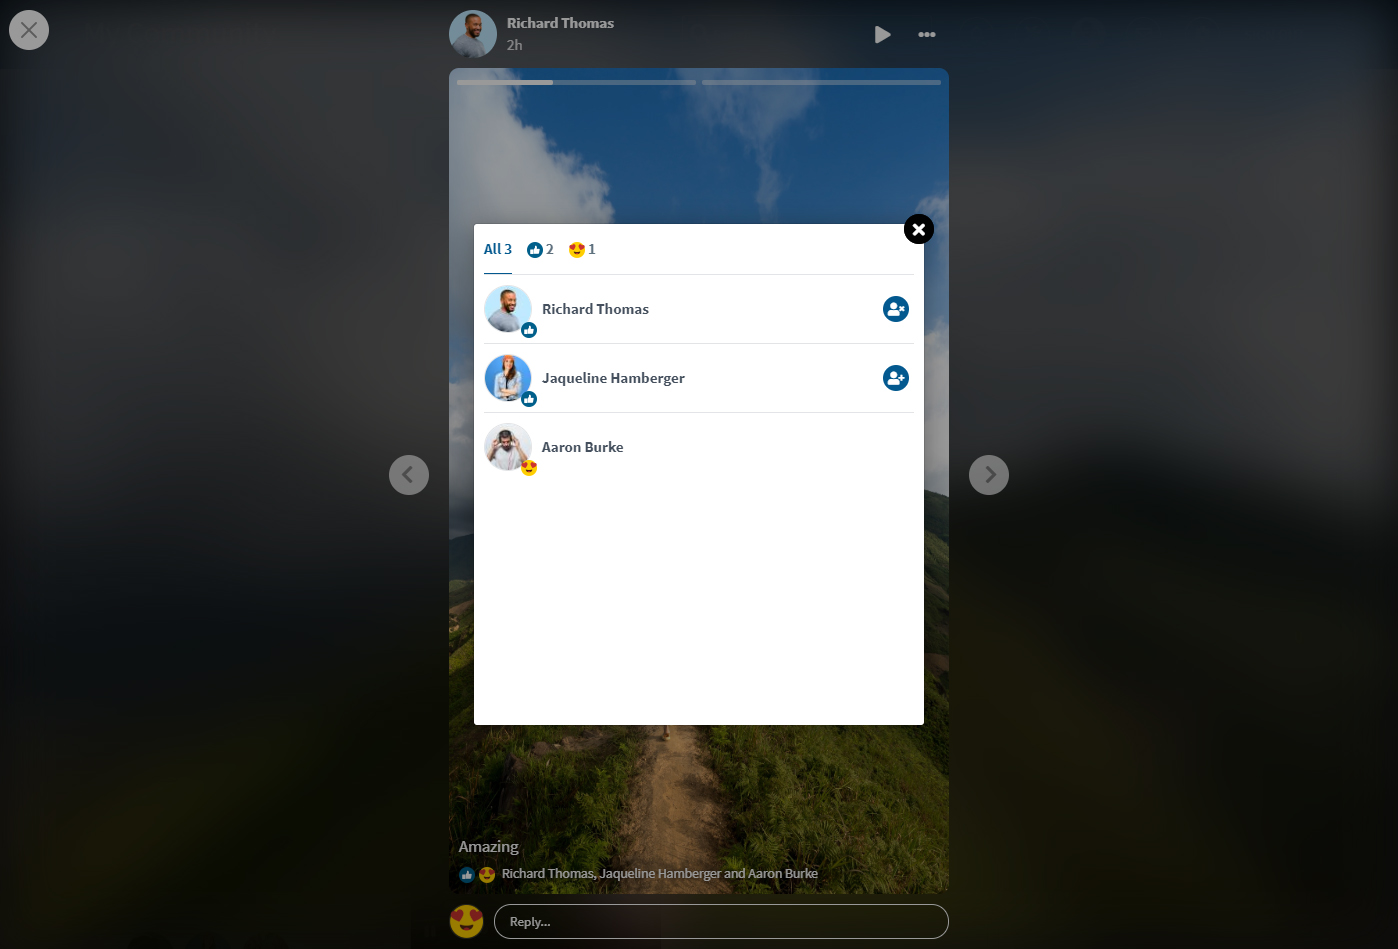
5. Member who Liked & Reacted Popup
Registered members can see who has liked the photos and videos simply by clicking on the reactions, and a pop-up will appear displaying the same.
6. Delete, Mute, and Report a Story
Users can choose to delete their stories. If a user wants to mute or report other people’s stories, they can easily mute them by simply clicking the mute button on the right corner of the story page and checking them in the Settings & Archive >> Muted Stories section. If any of the users has posted obscene photos or videos that are not suitable for your platform audience, then users can report that story.
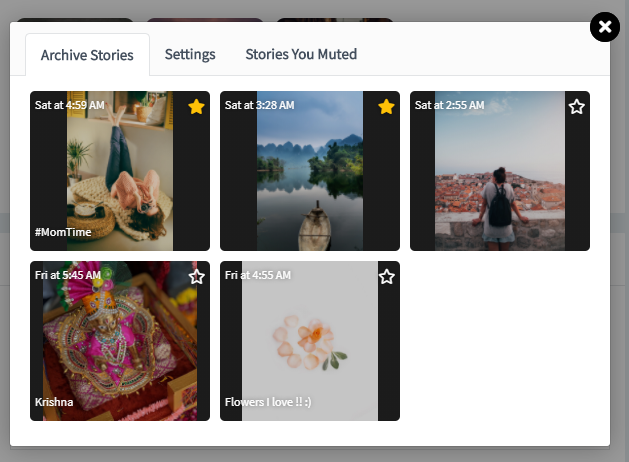
7. Archived Stories
If you want to see stories that were posted before 24 hours, you can use this amazing feature called ‘Archive Stories‘, which lies beside the status box. Click on ‘Settings & Archive’ to see the archived stories. In the shown image, you can see all the archived stories.
Finally!! You have completed the installation procedure and also explored various exciting features of this Stories Plugin. Now, your visitors and website members will be able to post photos and videos with the help of this Stories Plugin tutorial. Make your website more engaging and interactive with this amazing Stories Feature plugin.
Installation of this Stories Feature in Website Plugin is very easy, but if you still need our expert to install this Plugin for you, then you can purchase the service by clicking here.


