When it comes to managing money from your online business, going for a secure payment gateway is always a wise decision. A secure payment system builds up trust among users. You must consider a simple yet effective payment gateway system for your users so that they can complete their purchases with you on your website without extra hassle.
Stripe is one of the most effective tools to collect payments from your customers. Although there are many other popular payment gateway systems like PayPal, PayUmoney, Paytm etc. can be easily compatible with this Stripe Payment Gateway Plugin.
You can make a powerful and flexible payment gateway system and enable your users for better community. This plugin will be best suited for subscription service, on-demand marketplace, crowdfunding platform, e-commerce based websites.
Take a look at some of the most unique features of this plugin.
- Customers can save their Credit Card Details for future transactions.
- It supports all the major International Debit Cards like American Express, Visa, Diners Club, etc.
- Integrated with popular SE websites like Crowdfunding, e-commerce, and On-Demand Marketplace.
Installation of this plugin is very easy, but if you still need our expert to install this plugin for you, then you can purchase the service by clicking here.
Step-by-Step Installation & Tutorial Guide:
** This tutorial assumes that you are already logged in to the Admin Panel.**
If not, then you have to log in first to the admin panel after filling the admin account credentials on your website.
1. Installation of Stripe Payment Gateway Plugin:
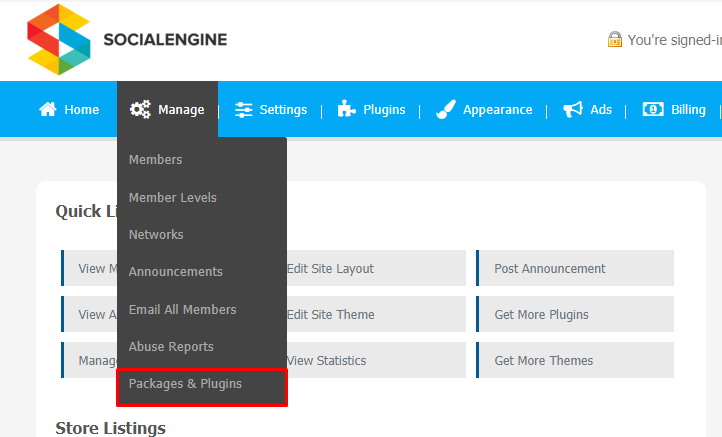
a) In the Main Menu section, click on the tab Manage and select “Packages & Plugins” to install this plugin.
b) Our Plugin is based on SE standards, so this will get installed on your website as any standard plugin can. Please read the tutorial on installing themes and plugins in SE: Click Here

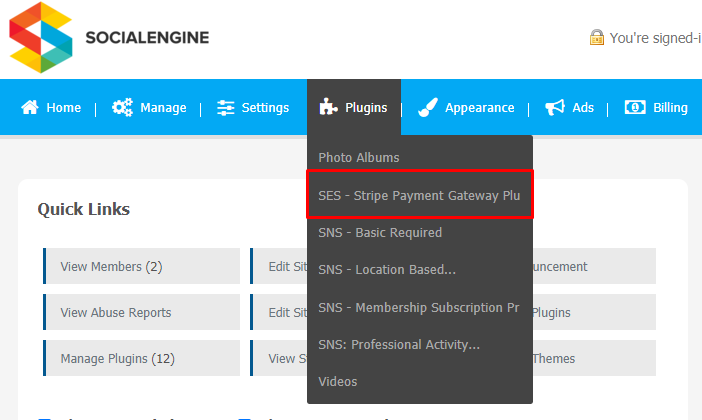
c) After the successful installation of the plugin as in Step 2 above, under the plugins section, click on “Stripe Payment Gateway Plugin“.
2. Global Settings
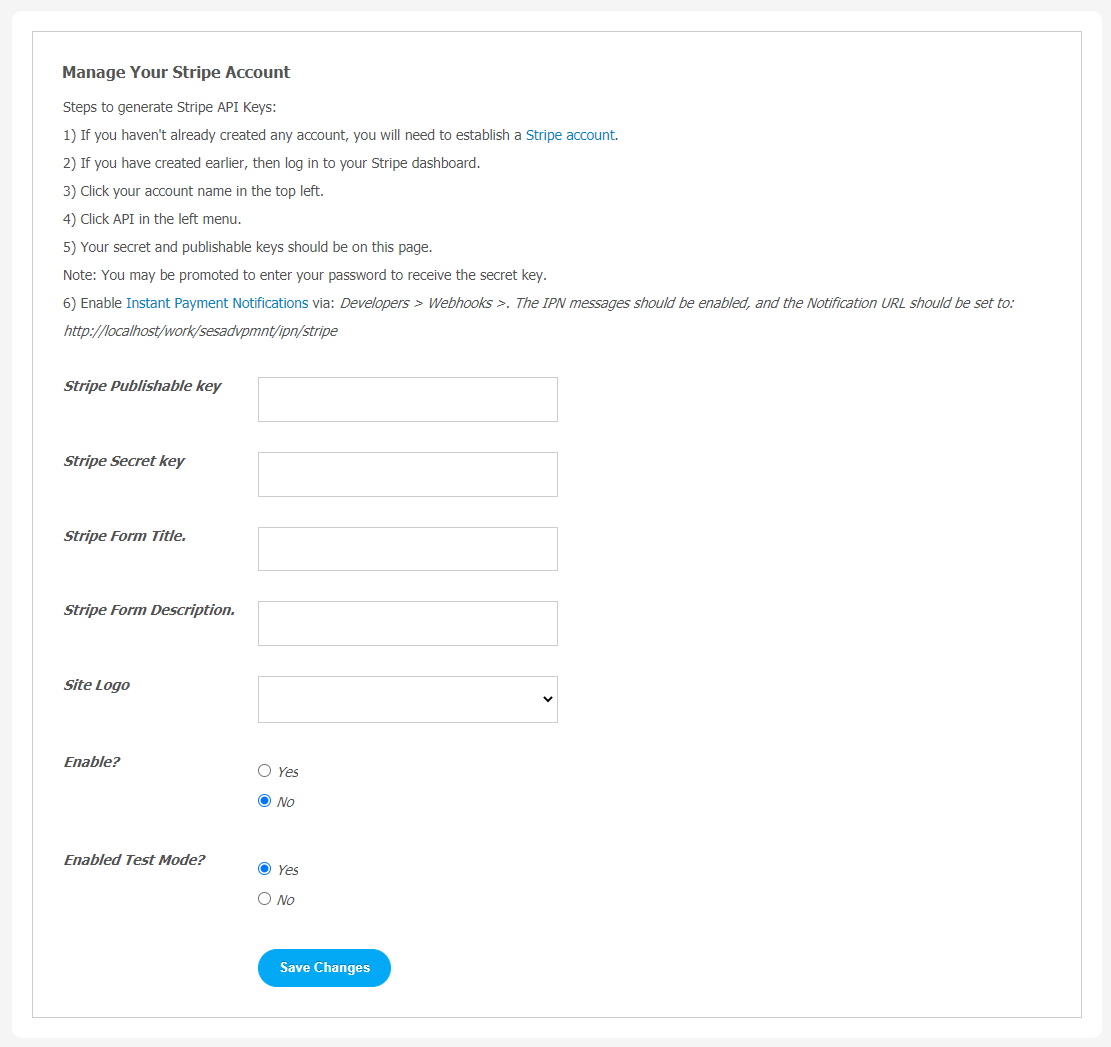
After a successful installation, a new Global Setting tab will appear where all the plugin settings can be managed easily. First, click on Global Settings. Then,
- Enter the required license key in the below-shown box below to activate the plugin.

3. Manage Gateways
When you click on this page, you will see a list of all payment gateways. You can enable the required gateways.
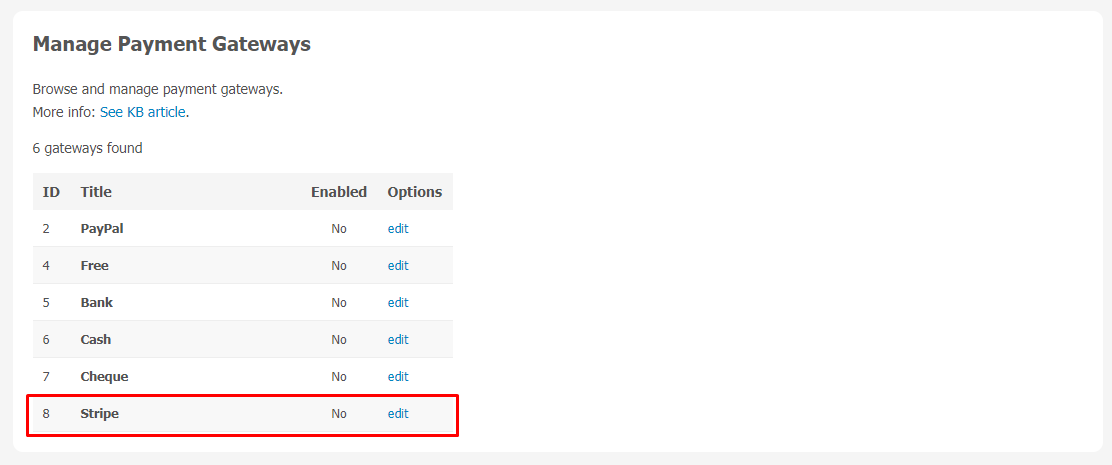
You can edit the Payment Gateways by clicking on the “Edit” link.
- Add API Username.
- Add Password and Signature.
- Enable the desired Payment Gateway System.
Finally!! You have successfully completed the installation procedure and also explored various exciting features of this Stripe Payment Gateway Plugin. Now, your visitors and website members will be able to access & use your website with new features.
Installation of this Plugin is straightforward, but if you still need our expert to install this Plugin for you, then you can purchase the service by clicking here.


