When building a community it can be very useful to utilize larger, more established social networks to help spread the word. Facebook integration gives you an opportunity to do this by allowing your users to log in to your social network and post content to their Facebook walls all from within SocialEngine! This can be set up using the Facebook Integration menu within your SocialEngine site’s admin panel.
Integrating Signup and login via Facebook into your SocialEngine Self-Hosted site is a two step process. First you must create an app, then enter the pertinent information into your SE Self-Hosted Admin panel, of the “Social Media Login – 1 Click Social Connect Plugin”. The following article will walk you through each step to help accomplish both the tasks.
Step 1: Creating Your App
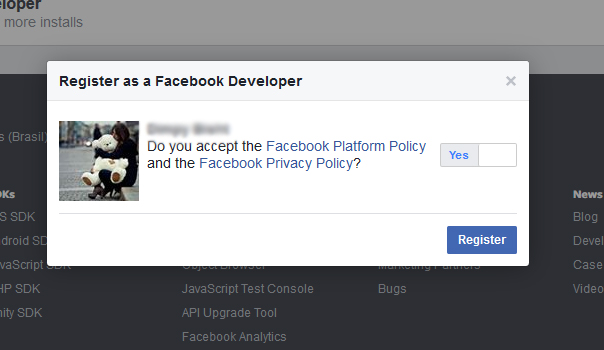
- For SocialEngine to communicate with Facebook, you will need to create a Facebook application. To set up a new Facebook application, please Click Here. Make sure that you’re registered as a “Developer” on Facebook while creating your app.
- If you are not logged in into the Facebook account, please login with your account which is registered as Developer.

- Next, you need to create a new App. You can do this by clicking the “Create App” button on the top right of the page.
- This brings a popup where you are asked to enter a display name for your app, contact email, and choose a category. Click Create App ID once you’ve filled in this info the way you want it.
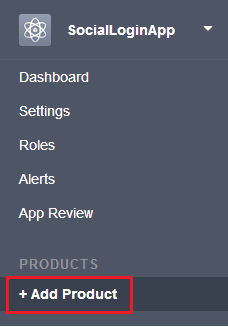
- After you’ve created the App ID above, you’ll be on the page to manage this app and everything it can do. First, you need to enter the website URL. To do that, in the left menu click “Add Product“.
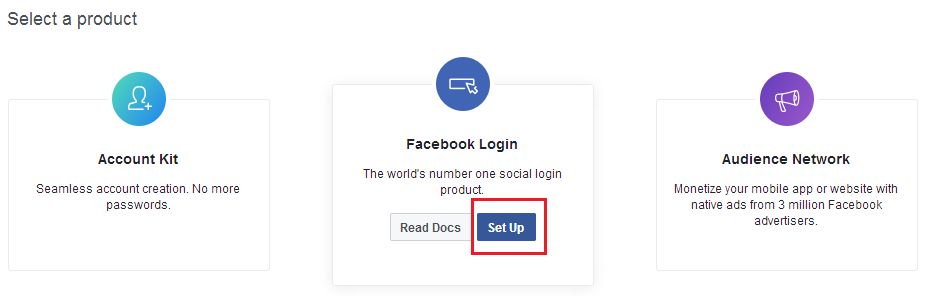
- In the Right side, on “Select a product” page, go to the Facebook Login product and click on “Set Up” button to add this product to your app.
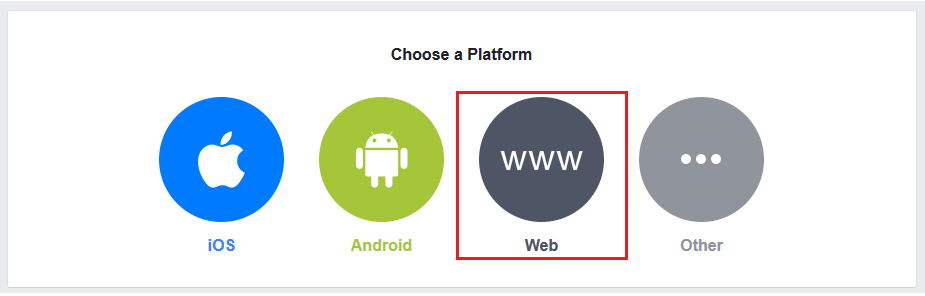
- From “Choose a Platform” page, select “Web“.
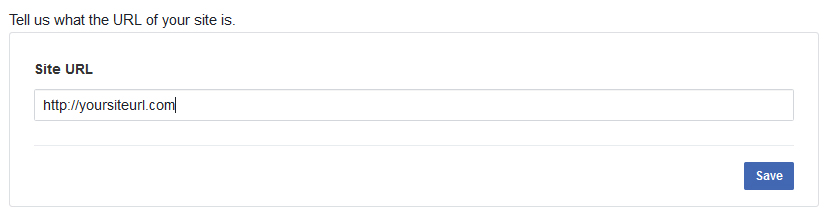
- Enter your website URL in the box. Don’t put it like you see in the screenshot, be sure to put it to your own website URL.
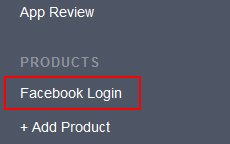
- Click on “Facebook Login” under Products section In the left menu. It will open the Client OAuth Settings Page.
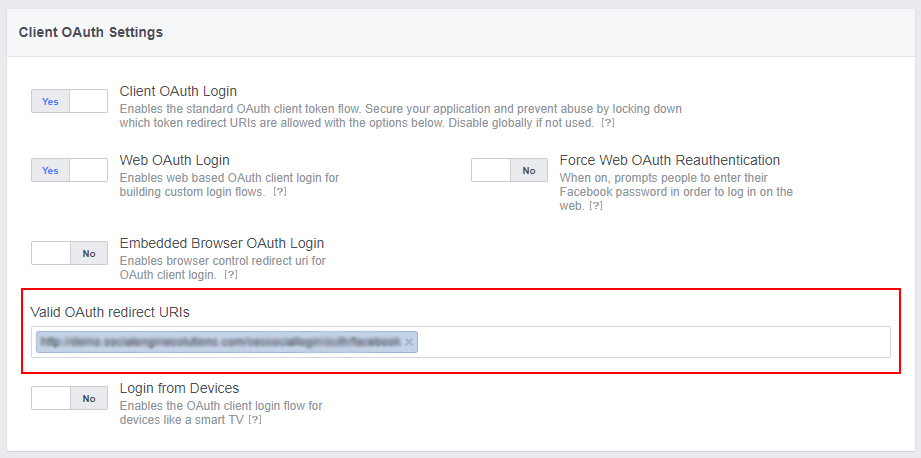
- On the “Client OAuth Settings” page enter the details for your Facebook Login Valid OAuth Redirect URL and Save Changes.
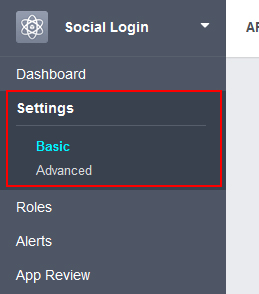
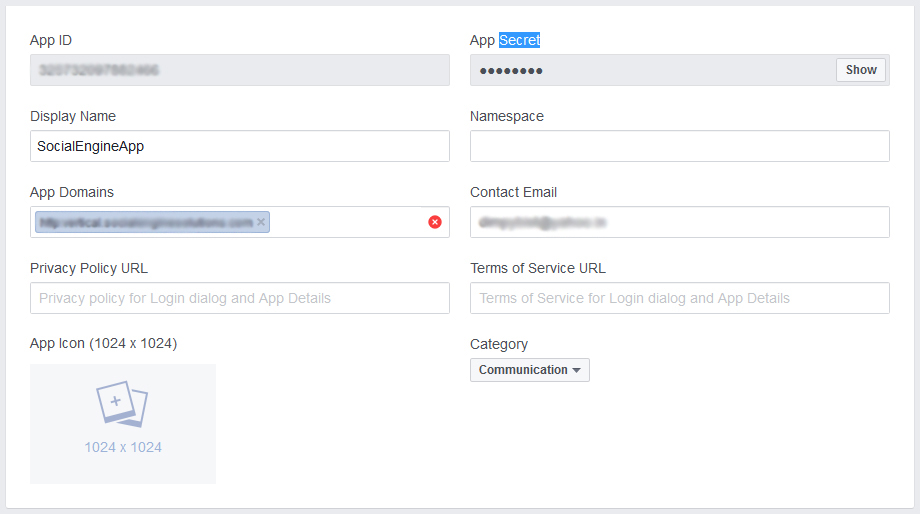
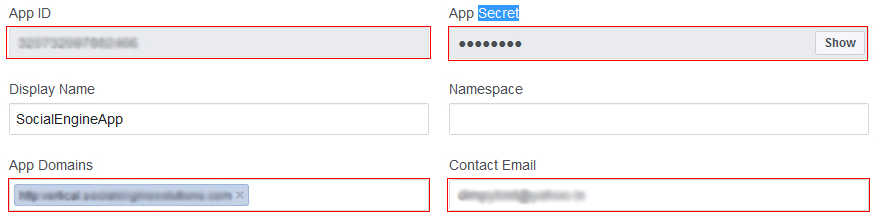
- Now, go to the Basic Settings of the Dashboard from the left menu to get your App ID and App Secret.
- Enter your domain name in the App Domains box. To make it more likely to be approved, you can also add the Terms and Privacy policy links. Save Changes when done.
- Double check that your Contact Email and App Domains have been filled in. Click Show and enter your Facebook password again, so you can see the App Secret as you need to copy the App ID and App Secret to your Admin Control Panel in the next step.


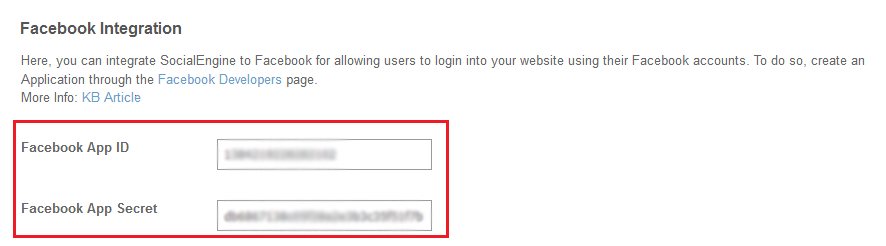
Step2: Linking to Social Media Login – 1 Click Social Connect Plugin
Once you have created your Facebook app, login to your SocialEngine admin panel and go to the Admin >> Social Media Login – 1 Click Social Connect Plugin >> Facebook settings page. Enter your App ID and App Secret numbers into the appropriate fields.
At this point, you have completed your App Configuration, and user signup and login via Facebook should work!
